headline bars
continuation tabs
notes
warnings
headline bars
continuation tabs
notes
warnings
model no. 062-3582-8 | contact us 1-800-689-9928
8
headline bars
continuation tabs
notes
warnings
headline bars
continuation tabs
notes
warnings
model no. 068-0010-6 | contact us 1-800-689-9928
Front
Front
Back
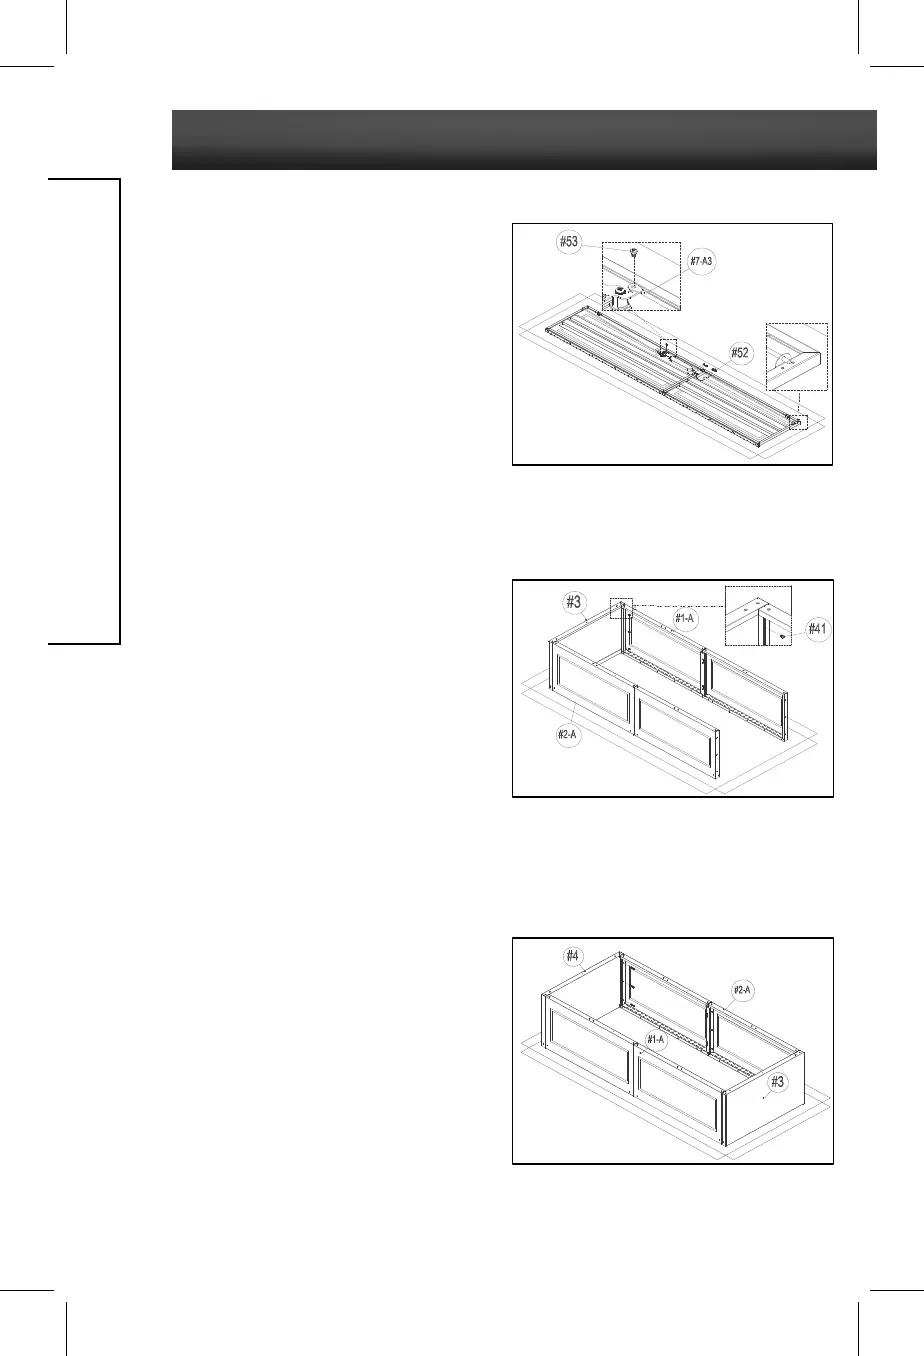
5. Install Key Rod (7-A3)
Attach and insert key rod (7-A3) into the
bottom tab hole of right door-bottom panel
(7-A2). Twist out the pre-assembled screw L
(53) on the key rod linkage plate. Attach key
rod (7-A3) by lining up the screw hole and
retightening screw L (53).
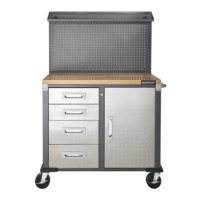
6. Install Top Panel (3) to Left Side Upper
Panel (1-A1) and Right Side Upper
Panel (2-A1)
Attach top panel (3) to left side upper panel
(1-A1) and right side upper panel (2-A1).
Make sure the front of the panel faces
downward. Line up screw holes, and use 6
pcs screw F (41) to secure.
Note: Before tightening screws, make sure the
bottom corners of left side upper panel (1-A1) and right
side upper panels (2-A1) are completely flush with the
back and front corners of top panel (3).
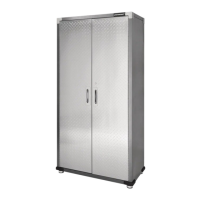
7. Install Bottom Panel (4) to Left Side
Bottom Panel (1-A2) and Right Side
Bottom Panel (2-A2)
Attach bottom panel (4) to left side-bottom
panel (1-A2) and right side-bottom panel
(2-A2). Line up screw holes and use 6 pcs
screw G (42) to secure.
Note: Before tightening screws, make sure the
bottom corners of left side-bottom panel and right
side-bottom panels (1-A2, 2-A2) are completely flush
with the back and front corners of bottom panel (4).
ASSEMBLY INSTRUCTIONS