This document describes the Mastercraft Detail Sander/Polisher, Model 54-7238-6, providing operation and safety instructions.
Function Description:
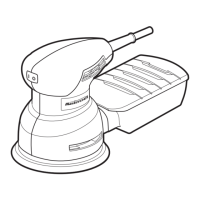
The Mastercraft Detail Sander/Polisher is a power tool designed for sanding and polishing tasks, particularly in detailed areas. It utilizes a hook and loop fastening system for sandpaper, allowing for easy attachment and removal of abrasive pads. The tool is double insulated, providing an extra layer of protection against electrical shock. It is intended for indoor use only and is not designed for wet sanding or liquid polishing. The sander/polisher is suitable for various materials, including fine woodwork, rough woodwork, manufactured wood products, solid surfacing materials, and metals, by selecting the appropriate grit sandpaper.
Important Technical Specifications:
- Model Number: 54-7238-6
- Power Source: 120V AC, 60Hz, 0.8A
- Speed: Single Speed, 12,000 OPM (Orbits Per Minute)
- Motor Construction: BALL BEARING
- Double Insulated: YES
- Backing Pad Type: HOOK AND LOOP FASTENING SYSTEM
- Cord: 6' 6" (198 cm), 2-PRONG POLARIZED
- Net Weight: 2 Lb 5 Oz (1.04 kg)
- CUL: E184584
Usage Features:
- ON/OFF Switch: The tool is equipped with a rocker ON/OFF switch located on the front of the handle area for easy operation. Pushing the top of the switch turns the tool ON, and pushing the bottom (marked 'O') turns it OFF.
- Sandpaper Installation: The sander/polisher uses sandpaper with a hook and loop fastening system and matching holes for dust extraction. To install, ensure the backing pad is clean, align the sandpaper holes with the backing pad holes, center it, and press it firmly onto the pad. To remove, simply peel the sandpaper off.
- Dust Extraction: The tool features a through-the-pad dust extraction system. For proper function, the holes in the sandpaper must align with the backing pad holes. A universal vacuum adaptor (tapered) is included, which slides onto the vacuum port at the rear of the tool. For best results, a vacuum hose should be attached to the adaptor, and the vacuum should be turned ON before starting the sander/polisher.
- Sanding Technique: The tool should be moved evenly over the entire work surface. The weight of the tool itself is sufficient for normal use; excessive pressure can alter sanding action, lead to uneven finish, and cause wear to the tool and sandpaper. Avoid leaving the sander/polisher in one place for too long to prevent excessive material removal.
- Starting and Stopping: Always start the detail sander/polisher before applying it to the workpiece and lift it from the workpiece before turning it off.
- Sandpaper Selection: Sandpaper should be chosen based on the workpiece material and desired finish.
- Grit Material:
- Fine woodwork: Garnet or aluminum oxide
- Rough woodwork: Aluminum zirconia or ceramic
- Manufactured wood products: Silicon carbide or aluminum oxide
- Solid surfacing materials: Silicon carbide or aluminum oxide
- Metals: Emery or aluminum oxide
- Coarseness:
- Coarse Grit 60 - 80: For initial sanding on rougher surfaces, fast stock removal, and rough sanding/stripping of painted and rusted surfaces.
- Medium Grit 100 - 140: For intermediate sanding and removal of minor surface imperfections.
- Fine Grit 150 - 220: For fine sanding and sanding prior to staining, priming, or sealing.
- It is recommended to start with an abrasive grit coarse enough to remove high spots and roughness, then follow with successively finer grits (one or two grades finer) to achieve the desired finish. Avoid switching directly from a coarse to a very fine grit in one step.
- Safety Precautions:
- Always read and understand the entire instruction manual before use.
- Wear a face mask or dust mask, and always wear safety goggles (not glasses).
- Keep bystanders and children away from the work area.
- Ensure the work area is clean, uncluttered, well-lit, and free of flammable liquids or gases.
- Do not force the tool.
- Dress for safety: avoid loose clothing, gloves, neckties, or jewelry; wear non-slip footwear; tie back long hair.
- Always unplug the power cord before making adjustments, changing parts, cleaning, or working on the tool.
- Ensure the power switch is in the OFF position before plugging in the power cord.
- Maintain proper footing and balance; keep the floor clear of debris.
- Inspect for and remove all nails and staples from the workpiece before sanding.
- Do not operate the tool if under the influence of drugs, alcohol, or medication.
- Operate in a well-ventilated area and provide for proper dust removal.
- Never use torn or severely worn sandpaper.
- Do not cover air vents during operation.
- Do not make adjustments while the tool is turned on.
- Use only identical replacement parts for servicing, especially for double-insulated tools.
- Ensure proper circuit protection (120V, 15A circuit with a 15A time delay fuse or circuit breaker).
- Do not modify the polarized plug.
Maintenance Features:
- General Maintenance: Keep the tool clean and in good repair. Before each use, inspect the tool, switch, and cord for damage. Check for loose screws, misalignment, jammed moving parts, or any other conditions affecting operation. If abnormal vibration or noise occurs, stop use immediately and have the problem corrected.
- Cleaning: Clean dust and debris from the vents. Frequently blow dust out of the motor area using an air compressor or dust vacuum. Keep the tool clean, dry, and free of oil and grease. Use only mild soap and a damp cloth for cleaning. Avoid using solvents such as gasoline, turpentine, lacquer thinner, paint thinner, chlorinated cleaning solvents, ammonia, or household cleaning detergents containing ammonia, as they can damage plastic parts. Never immerse the tool in liquid or allow liquid to flow inside it.
- Lubrication: The tool is factory-lubricated and typically does not require further lubrication until the motor brushes need replacing.
- Replacing Carbon Brushes: Carbon brushes should be replaced when they wear down to approximately 1/8" (3 mm) or when sparking occurs. Both brushes should be replaced at the same time.
- Extension Cords: Use a proper extension cord in good condition, heavy enough to carry the tool's current draw to prevent overheating. Refer to the provided table for minimum gauge requirements based on ampere rating and cord length. Protect cords from sharp objects, excessive heat, and damp/wet areas.
- Warranty: The power tool is guaranteed for a period of three (3) years against defects in workmanship and materials. If defective within this period, it can be returned to the store with proof of purchase for replacement or repair free of charge. This tool is not intended for commercial use.