headline bars
continuation tabs
notes
warnings
11
OPERATING INSTRUCTIONS
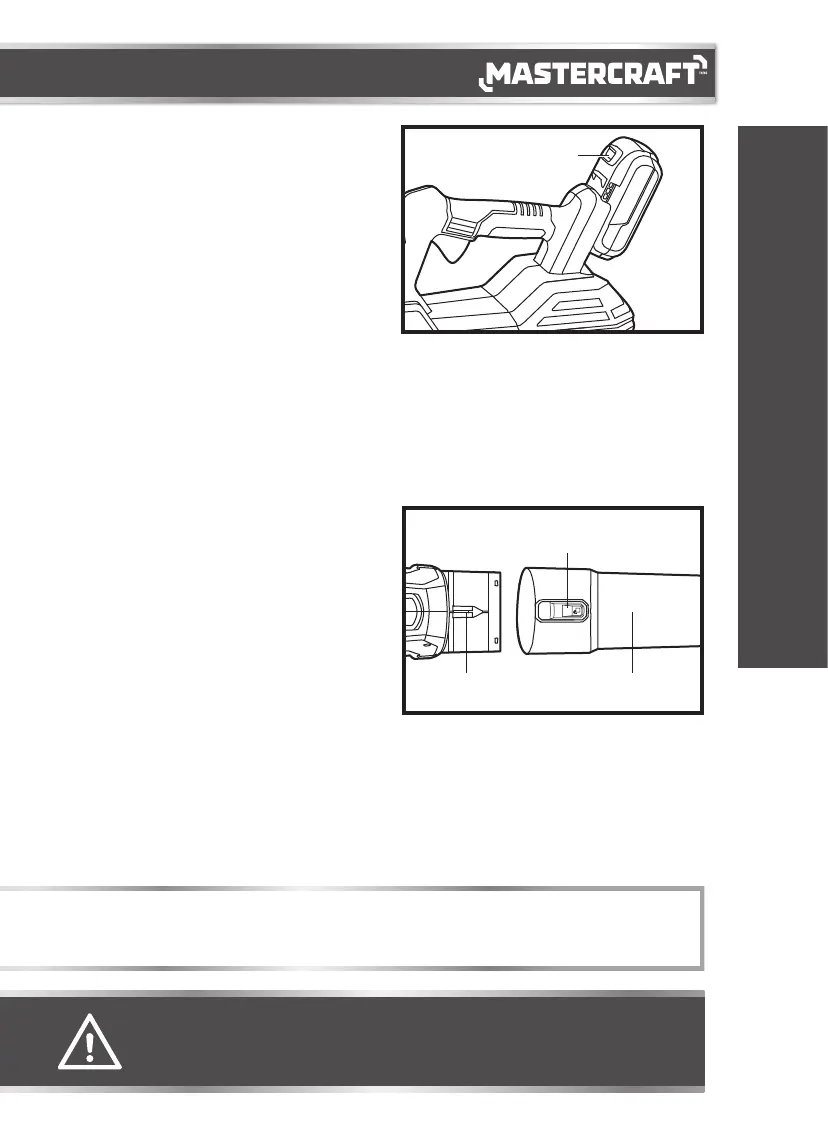
TO ATTACH BATTERY PACK
(fig 1)
1. Make sure that the switch is in the OFF position.
2. Align the raised portion on the battery pack with
the grooves on the bottom of the tool, and then
slide the battery pack onto the tool as shown.
3. Ensure that the battery-release button on the
battery pack snaps into place and the battery pack
is secured to the tool before beginning operation.
TO DETACH THE BATTERY PACK
(fig 1)
1. Ensure that the switch is in the OFF position.
2. Depress the battery-release button located on the front of the battery pack to release the battery pack.
3. Pull rearward on the battery pack to remove it from the tool.
ASSEMBLING THE BLOWER TUBE
(fig 2)
This product requires assembly before using. To
prevent accidental starting that could cause serious
personal injury, always remove the battery pack from
the tool when assembling parts.
1. Align the tube-release button on the blower tube
with the arrow on the top of blower housing, and
then insert the tube into the blower housing.
2. To remove the blower tube, press the tube-release
button and then pull the tube straight out from the
blower.
OPERATING INSTRUCTIONS
NOTICE: When placing a battery pack on the tool, be sure that the raised rib on the battery pack aligns with the groove
on the cordless blower and the latches snap into place properly. Improper assembly of the battery pack can cause damage to
internal components.
WARNING!
• To avoid the possibility of accidental starting, always take care not to activate the variable-speed trigger
switch when you are attaching the battery pack or performing other adjustments to the tool.
fig 1
Battery-release
button
fig 2
Tube-release
button
Blower tube
Arrow