8
CAUTION:
CAUTION:
CAUTION:
CAUTION:
Adjusting
Adjusting
Adjusting
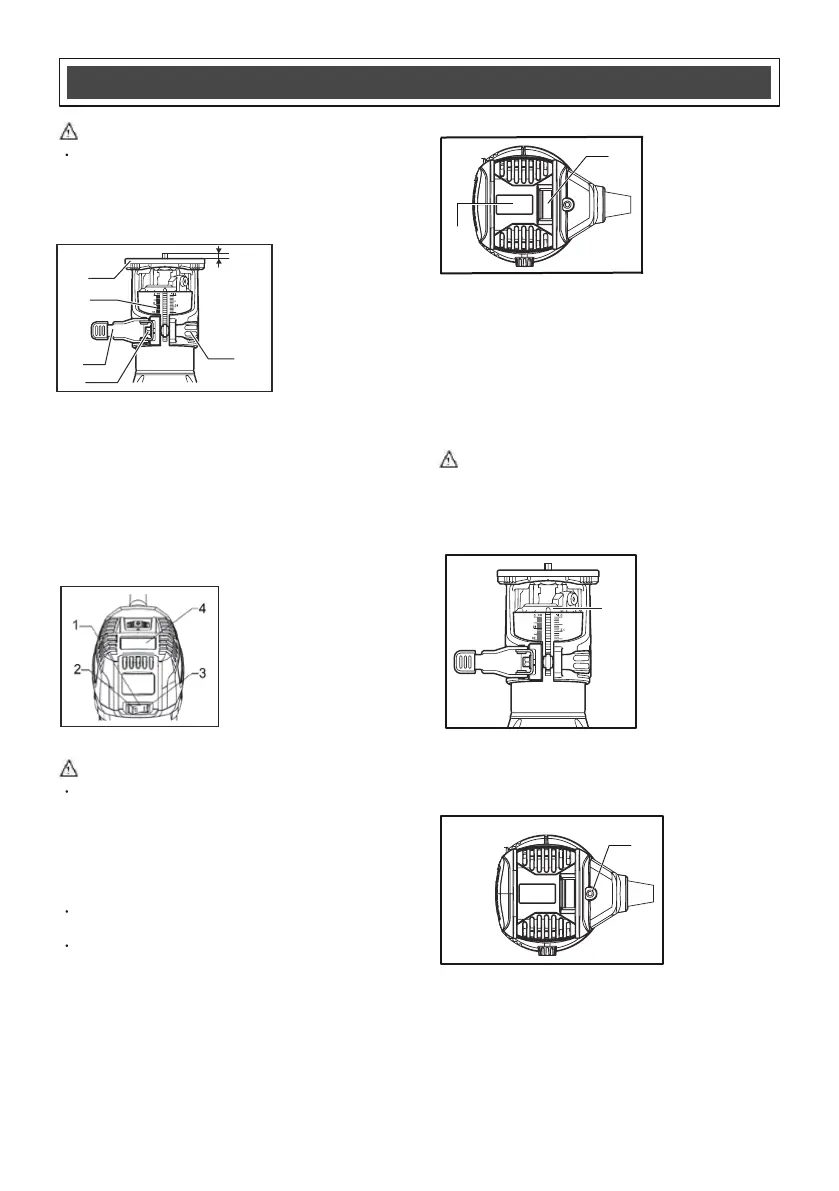
Adjusting cutting depthcutting depth
cutting depthcutting depth
1. Cutting depth
2. Tool base
3. Scale
4. Locking lever
5. Adjusting screw
6. Hex nut
You can set the depth of cut using the scale marked
on the side of the router.
To adjust the cutting depth, loosen the locking lever
and move the tool base up or down as desired by
turning the adjusting screw. After adjusting, tighten the
locking
lever firmly to secure the tool base.
Switch
Switch
Switch
2.
OFF (O) side
3.
4.
O
Speed display
N ( I ) side
1. Switch
CAUTION:
CAUTION:
CAUTION:
CAUTION:
This is a rocker ON/OFF switch.
To start the tool, press the "ON ( I )" side.
To stop the tool, press the "OFF (O)" side.
Electronic control function
Electronic control function
Electronic control function
Electronic Speed Control maintains constant
speed under heavy load.
Soft Start feature gradually increases speed
for a smoother start up process.
Variable speed & LED display
1
2. LED display
. Variable speed
dial
CAUTION:
CAUTION:
CAUTION:
CAUTION:
LED
LED
LED
LED work
work
work
work light
light
light
lightsts
ts
ts
ts
1. LED work lights
The LED work light illuminates the work area and alerts
user of power to the tool.
Power
Power
Power
Power indicator
indicator
indicator
indicator
1.Power indicator
T
When light is on (1), there is power to the router.
When the light is off, there is no power to the router.
he power indicator helps to easily identify live tools.
FUNCTIONAL
FUNCTIONAL
FUNCTIONAL
FUNCTIONAL DESCRIPTION
DESCRIPTION
DESCRIPTION
DESCRIPTION
1
2
Always be sure that the tool is switched off and
unplugged before adjusting or checking the tool.
The tool speed can be changed by turning the
speed adjusting dial to any one of six speeds.
Speed at 1:10,000/min
Speed at 2:15,000/min
Speed at 3:20,000/min
Speed at 4:25,000/min
Speed at 5:30,000/min
Speed at 6:32,000/min
Please avoid prolonged low speed operation which
can cause over heating and possible motor damage.
1
2
3
4
5
6
1
1
 Loading...