Page 8
ASSEMBLY INSTRUCTIONS
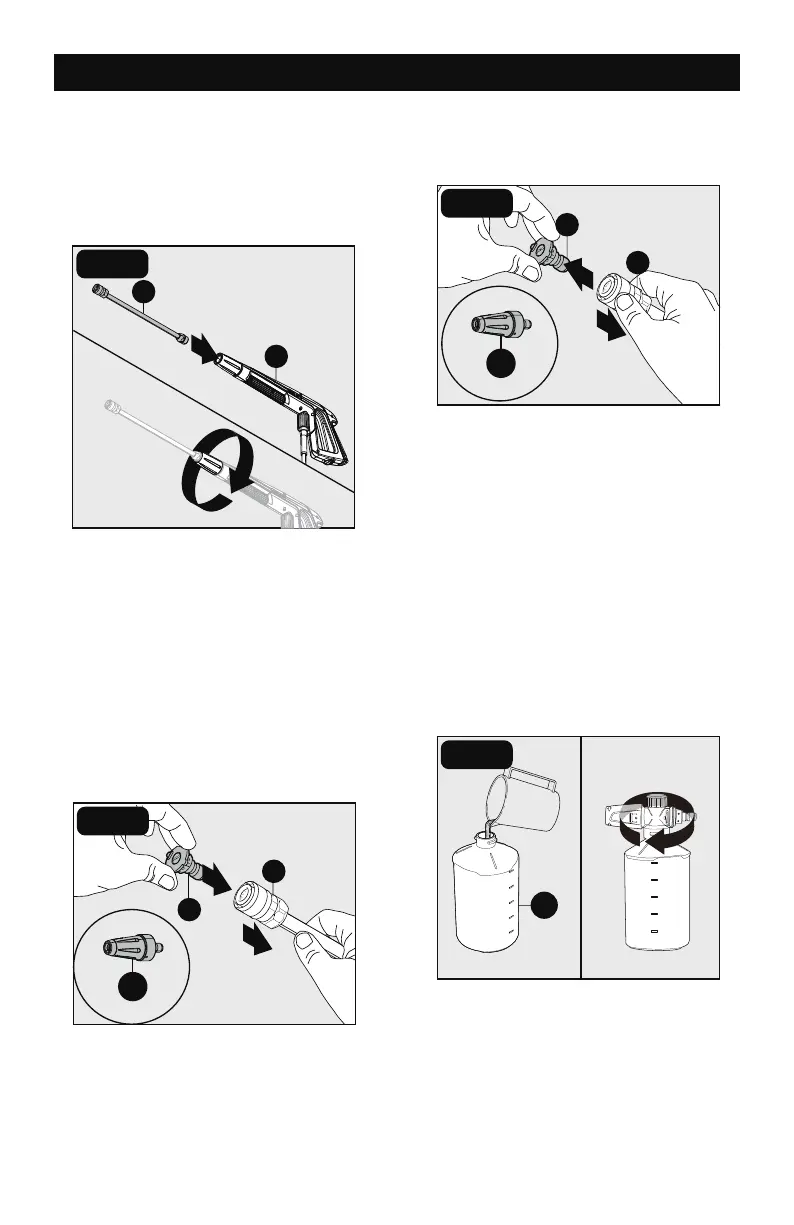
Extension Lance Installation
While spray gun (K) is in the locked position,
insert lance (I) into the end of spray gun by
inserting and turning clockwise until fully in
place. To remove, turn counterclockwise.
Pull back on collar of lance (I) and attach
nozzle (E) or rotary nozzle (C) into end of
lance (I) by pressing selected nozzle into
place. It will make a “click” sound when rmly
in place.
Note:
Always push safety lock button to lock
trigger when changing lances and nozzles to
ensure that they do not accidentally eject with
force during removal.
To remove nozzle (E) or rotary nozzle (C),
pull back on collar of lance (I) and pull out
nozzle.
I
K
1
2
FIG .9
I
E
C
1
2
FIG .10
1
2
I
E
C
FIG .11
Foam Cannon Installation
The foam cannon comes with a straw which is
tted into high pressure top. If you do not see
the straw, look inside the foam cannon and
attach it to the high pressure top. When using
foam cannon, ll it with a properly formulated
detergent or cleaner with a water ratio
according to instructions on the container.
• DO NOT
use thick or gel-like detergents
as they will clog the foam cannon and can
cause damage.
1
750ml
600ml
450ml
300ml
150ml
2
O
FIG .12