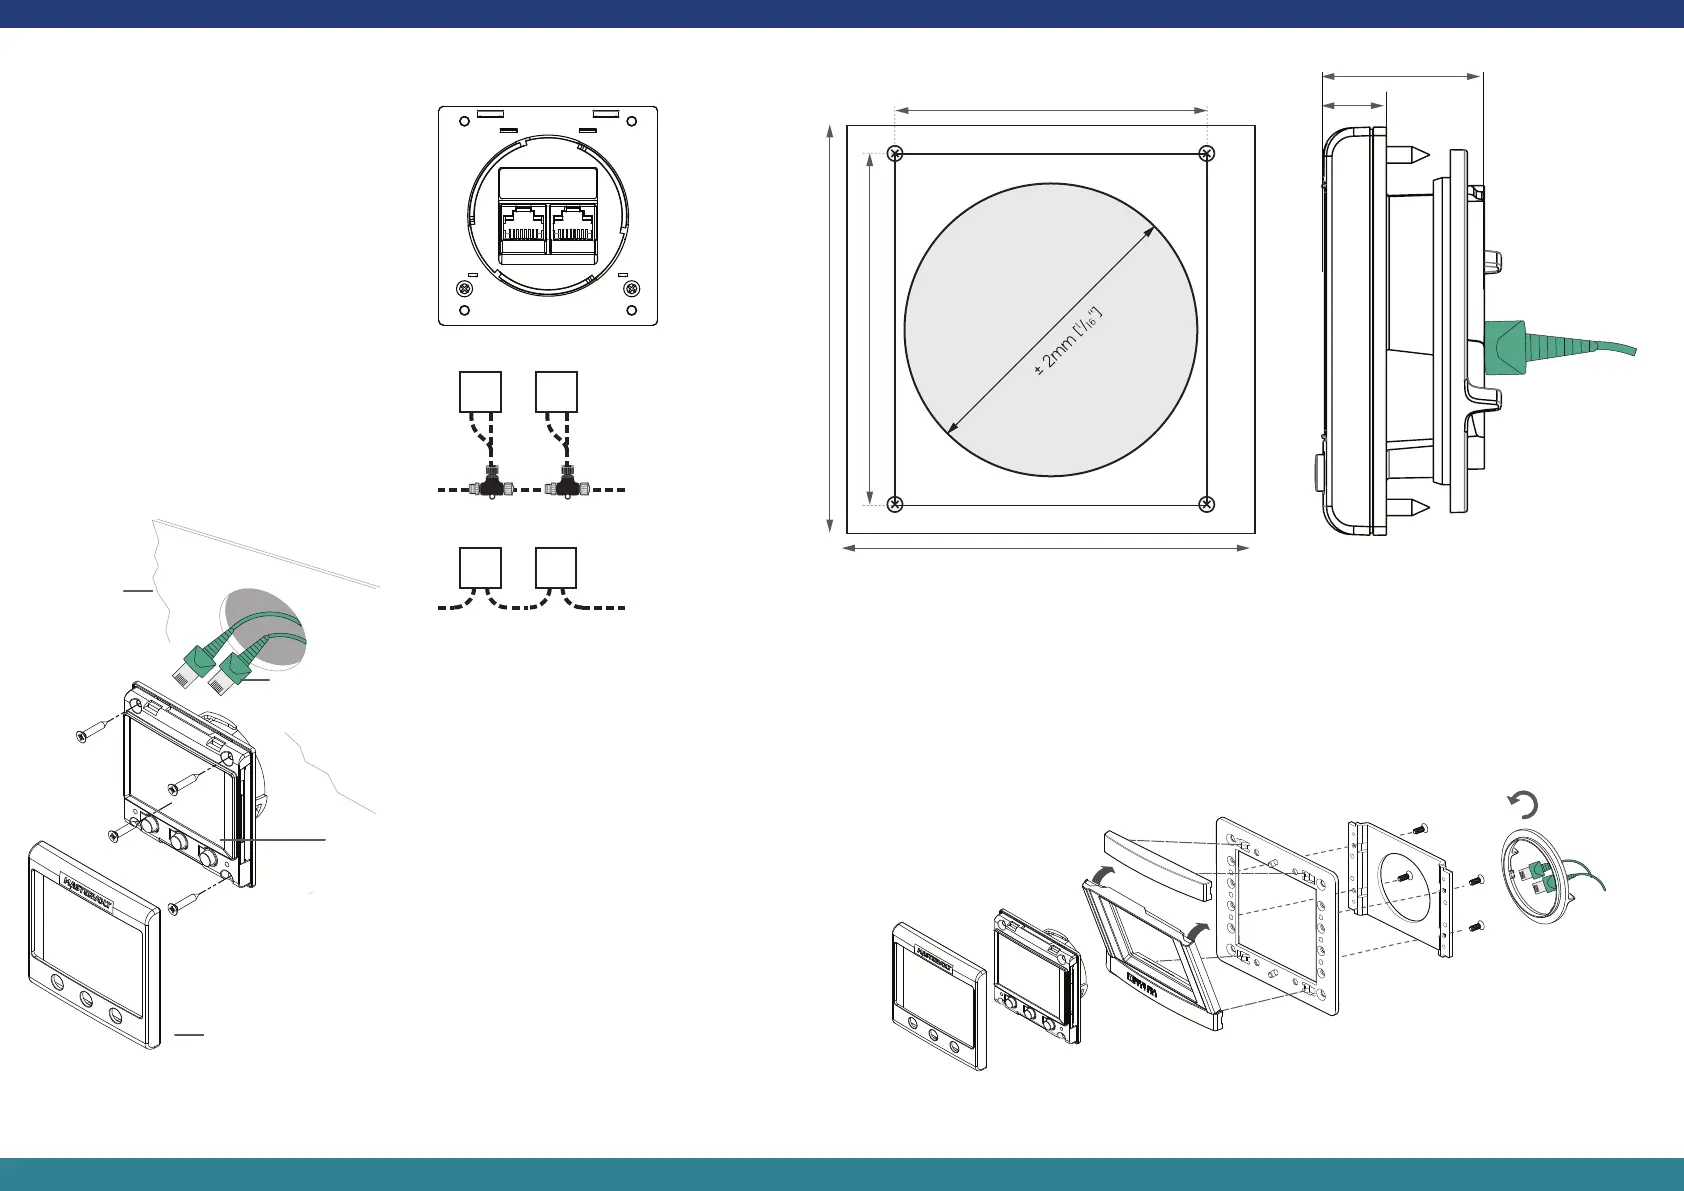
72mm [2.8"]
Mounting Template
72mm [2.8"]
55mm [2.3"]
Ø 52mm [2"]
62mm [2.4"]
Surface Mount
Mounting
Substrate
Head
Unit
Front Panel
Network
Cables
• Before installing, be sure to turn electrical
power off.
• The SmartRemote is designed for indoor
use only.
• Make sure the front panel is easy
accessible and readable.
• Always check for existing wiring, pipes, etc.
before drilling or cutting into walls.
• Make sure there is adequate space behind
the mounting surface to fit the
SmartRemote, including its cables.
• The SmartRemote is powered by the
MasterBus network.
Installation Notes
360 Panel Mount
Note that this requires the 360 Panel Mounting Kit
PN 1525 (sold separately).
STEP 1
Snap header and footer into the mounting clips
on the panel frame. Snap the bezel mount into
place with the flat edge up.
Ensure that the network is properly terminated.
CZone network wiring
MasterBus network wiring
SmartRemote
Back Side
Connect the required RJ45 cable at the back of
the SmartRemote.
STEP 3
Place the SmartRemote and fasten with the
bayonet collar. Turn collar until is snaps.
28mm [1.1"]
11mm [0.4"]
STEP 2
Place the carrier mount behind the panel, aligning
mounting holes, and attach with 4 screws.
Head
Unit
Bayonet
Collar
Front
Panel
Network
Cables
Carrier MountPanel Frame
Bezel
Mount
Footer
Header