5
.
Press BATTERY TYPE button and hold for 3 seconds to go into your battery ty pe
selection mode, the battery type you select will be shown on the LCD meter, the
default setting is AGM Battery; the controller will automatically memorize your battery
type setting.
Caution: Incorrect battery type setting may damage your battery.
When the controller powers on, the unit will run self-qualify mode and automatically
show below items on LCD before going into charging process
Self-test starts, digital meter segments test
Software version test
V
A
Rated voltage and current test
ºC
External battery temperature sensor test (if connected)
Indicates the solar panel connected.
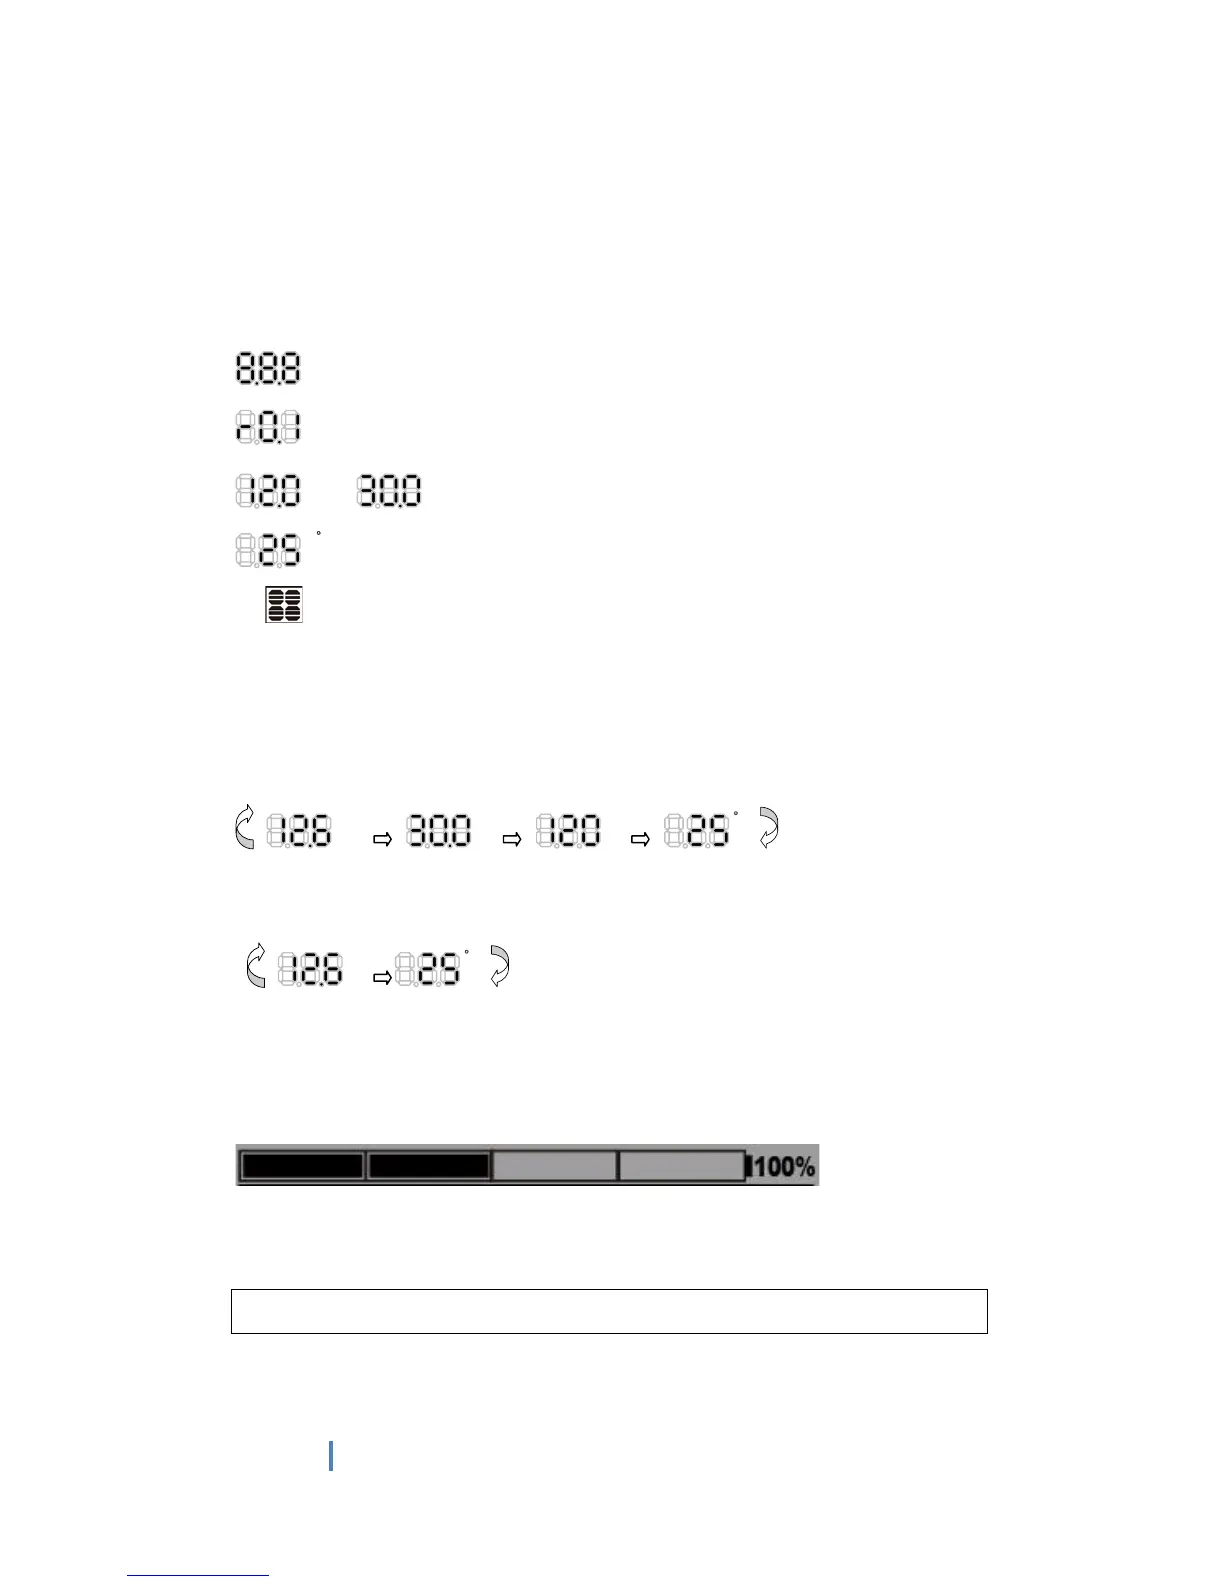
After going into charging process, the LCD displays the charging statues as below:
Press VOLT / AMP button in sequence, the LCD will display in turn with
Battery Voltage, Charging Current, Charged capacity (Amp-hour) and Battery
Temperature (if external temperature sensor connected) -
in the time
Display day
V
A
V
ºC
Display during the night- -
V
ºC
The VOLT / AMP button can be changed at any time during charging process.
You also can visually monitor your battery charging condition for each battery; there is
a LCD bar to show how many percentage capacities are charged, you can easily see
the battery is charged around 25%, 50%, 75% or 100%.
The LCD also can be treated as an independent voltage meter or thermometer.
A voltage less than 11.5V Volts (for 12V battery) indicates that the battery is
discharged and needs re-charging.
The unit has a 5 stage charging algorithm.
Soft Charge (Level 1) –Bulk Charge (Level 2)-Absorption charge (Level 3) –
E
qualizing Charge* (Level 4) - Float Mode (Level 5)
CHARGING STAGES
 Loading...