Revision Date: April 2020
10
Find the logo on the belt. Are there tension markers? If NO, follow the steps below to tension.
The two 8mm hex bolts in the end caps adjust the rear roller position. To move the roller out (closer to you), turn
both clockwise. This will add tension to the running belt. In turn, adjusting the two bolts counterclockwise will
move the roller in, removing tension from the running belt. Adjust each bolt the same amount of turns to keep
the belt centered on the running deck. Make ¼ to ½ turns at a time when adjusting.
This belt should stretch over its lifetime. Check tension after the first week of use, then monthly during
preventive maintenance tasks.
TENSIONING BELT
1. Press Go on the treadmill and adjust speed to 3mph / 4.8kph.
2. Walk on the treadmill belt. Once you are balanced, stomp your foot on the belt to emulate a runner with a
heavy foot. Does the belt stop?
a. If yes, tension needs to be added. Do this by turning both roller bolts clockwise as described above,
then repeat step 2. The belt can be adjusted while it is moving if you are careful.
b. If no, the belt is properly tensioned.
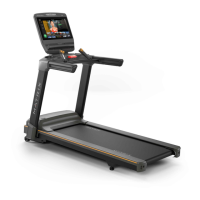
TREADMILL BELT ADJUSTMENTS
FIG. 1
FIG. 2
FIG. 3
TIGHTENS RIGHT SIDE OF ROLLER TIGHTENS LEFT SIDE OF ROLLER
CARDIO EQUIPMENT