This document outlines a comprehensive preventive maintenance and cleaning checklist for Matrix strength equipment, including single stations (Aura, Ultra, Versa, Versa Duals), multi-stations, benches, racks, and platforms. The primary function of this guide is to ensure the longevity of the equipment and enhance member loyalty by providing clear instructions for regular upkeep.
Function Description:
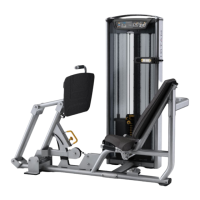
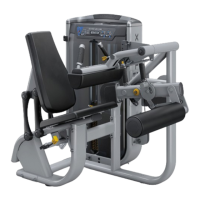
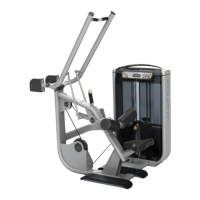
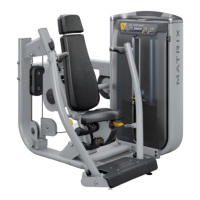
The Matrix strength equipment, encompassing various types of machines, is designed for robust and effective strength training. These machines are built to withstand rigorous use in commercial fitness environments. The document serves as a guide for maintaining the operational integrity and aesthetic appeal of these devices. It categorizes maintenance tasks into those for facility staff and those requiring Matrix-certified technicians, ensuring that all aspects of equipment care are covered by appropriate personnel. The checklists are structured to facilitate both monthly and quarterly/bi-annual maintenance routines, addressing different levels of inspection and intervention required for optimal performance.
Usage Features:
The equipment is designed for user-friendliness and durability, providing a safe and effective workout experience. While the document focuses on maintenance, the underlying design of Matrix strength equipment emphasizes smooth operation, adjustable settings for various users, and robust construction to handle heavy loads. Features like rep counters/consoles (on Ultra and Versa models) provide immediate feedback to users, enhancing their workout experience. The push/pull pins for weight selection are designed for secure and easy adjustment, contributing to a seamless workout flow. The various types of equipment, from single stations targeting specific muscle groups to multi-stations offering diverse exercises, benches for free weight training, and racks/platforms for compound movements, cater to a wide range of strength training needs. The design also considers the need for easy cleaning and lubrication, with accessible guide rods and frames.
Maintenance Features:
The document provides detailed maintenance features to ensure the equipment remains in top condition.
Regular Cleaning:
- Facility Staff Tasks (Monthly):
- Wipe entire frame and pads with an approved cleaner. This is a fundamental daily task to maintain hygiene and appearance.
- Clean and lubricate guide rods with an approved lubricant. This ensures smooth movement of weight stacks and prevents wear.
- Facility Staff Tasks (Quarterly/Bi-Annually):
- Thoroughly clean the platform with an approved cleaner (for racks and platforms).
- Wipe entire frame and pads with an approved cleaner (for single stations, multi-stations, and benches).
- Clean and lubricate guide rods with an approved lubricant (for single stations, multi-stations, and benches).
Preventive Maintenance (Matrix-Certified Technician Tasks):
- Monthly Inspections:
- Visually inspect hardware for tightness: This is crucial for safety and structural integrity.
- Inspect belts/cables for damage: Early detection of wear prevents unexpected failures.
- Check belts/cables for proper tension: Ensures smooth operation and correct resistance.
- Inspect pulleys for damage: Damaged pulleys can lead to cable/belt wear and unsafe operation.
- Perform a few reps with weight: This allows the technician to listen for unusual noise and check for smoothness of movement, indicating potential issues.
- Check rep counter/console for proper operation: Ensures electronic components are functioning correctly.
- Test push/pull pins for proper operation: Confirms secure engagement with the frame and proper cleaning/greasing.
- Inspect all accessories for defect (for racks and platforms): Ensures all attachments are safe and functional.
- Quarterly/Bi-Annual Inspections:
- All monthly inspection tasks are repeated with a more thorough approach.
- Clean and grease all tie rod ends: This specific task, illustrated with a picture, is vital for the smooth operation of certain components.
- Clean and lubricate adjustable pulley chrome bars (for multi-stations): Ensures smooth adjustment of pulley positions.
- Clean and lubricate adjustable seat chrome bars (for benches): Facilitates easy and smooth seat adjustments.
- Visually inspect welds and accessories for defect (for racks and platforms): A deeper inspection for structural integrity.
General Torque Specifications:
The document provides specific torque values for various bolts and axles, emphasizing the importance of applying red Vibra-Tite® Threadlocker to all frame bolts and axles. This ensures that fasteners remain secure under repeated stress and vibration, preventing loosening and potential safety hazards. Key torque specifications include:
- Axle Arm: 180 N-m / 133 ft. lb.
- M10 Bolt & Nut: 77 N-m / 57 ft. lb.
- M10 Bolt & Frame Rivnuts: 40 N-m / 30 ft. lb.
- M8 Bolts: 25 N-m / 18 ft. lb.
- M8 Plastic and M6 Bolts: 15 N-m / 11 ft. lb.
- Pad Bolts: 10 N-m / 7 ft. lb.
Belt Tensioning Procedure (Aura):
This section provides a step-by-step guide for tensioning belts, crucial for the proper functioning of belt-driven machines. It includes:
- Loosening bolts on clamps.
- Removing slack from the belt using hands and pliers.
- Tightening bolts with a torque wrench to 5 N-m (for "fold over" clamp) or 30 N-m (for "barrel" clamp), ensuring three squares of extra belt show on the opposite side of the clamp.
- Applying Red Vibra-Tite® Threadlocker to the bolts.
Cable Tensioning Procedure (Aura, Ultra, Versa, Functional Trainers, Multi-Stations):
Detailed instructions are provided for adjusting cable tension across different machine types, which is critical for safety and effective resistance.
- Aura: Involves loosening a jam nut, pulling slack from the cable, turning the cable bolt down, and then tightening the jam nut. It also notes additional adjustment points for machines like the cable Leg Press.
- Ultra: Requires loosening the jam nut, removing the weight stack pin, tightening the cable bolt until the head plate moves, and then tightening the jam nut. It includes a visual check for proper tension (cable movement no more than 1 inch from the center) and ensures the weight stack pin moves smoothly. A critical note highlights the need for seven threads of the cable bolt in the head plate adapter.
- Versa: Involves adjusting the cables at the bottom of the weight stack by loosening two M10 bolts, using a 6mm hex wrench to turn an adjuster bolt, and then torquing the M10 bolts to 77 N-m once proper tension (10-12 mm deflection of the cable) is achieved.
- Functional Trainers and Multi-Stations:
- Checking for Proper Tension: Attaching the bolt to the correct location and ensuring 10mm of clearance between the stopper and carriage/pulleys. It also provides guidance on adjusting the jam nut and pulley housing if clearance requirements are not met.
- Pre-Stretch or "Set" the Cable: Involves attaching a short handle, pinning 50-70 lbs. on the weight stack, performing 5-10 rapid reps without crashing the weight stack, and then re-checking the cable end measurement to ensure 10mm clearance.
Identifying Damaged Cables:
This section is a crucial maintenance feature, providing visual indicators for various types of cable damage that necessitate replacement. This proactive identification prevents accidents and ensures equipment reliability.
- Fractures: Cracks in the casing, especially near components like Nylon Ball, Nico loop, or Threaded Plug.
- Twisting/Binding: Wire rope twisting within its casing.
- Bulging: Internal wire rope strands breaking and coiling, causing a bulge.
- Frayed / Exposed Wire Rope: Any wire rope protruding through the casing or at the ends.
- Flattened: A section of the cable compressed and not retaining its original shape.
- Permanently Bent: Cable having a 'kink' that prevents it from laying straight, potentially indicating unraveling wire rope.
- Ends Separating: Component end of the cable pulling away from the cable assembly, exposing wire rope.
Overall, the document serves as an indispensable resource for maintaining Matrix strength equipment, ensuring its safety, functionality, and extended lifespan through systematic cleaning, inspection, and adjustment procedures.