10
STRENGTH: PREVENTIVE MAINTENANCE AND CLEANING CHECKLIST
Revision Date: December 2022
ULTRA: CABLE TENSIONING PROCEDURE
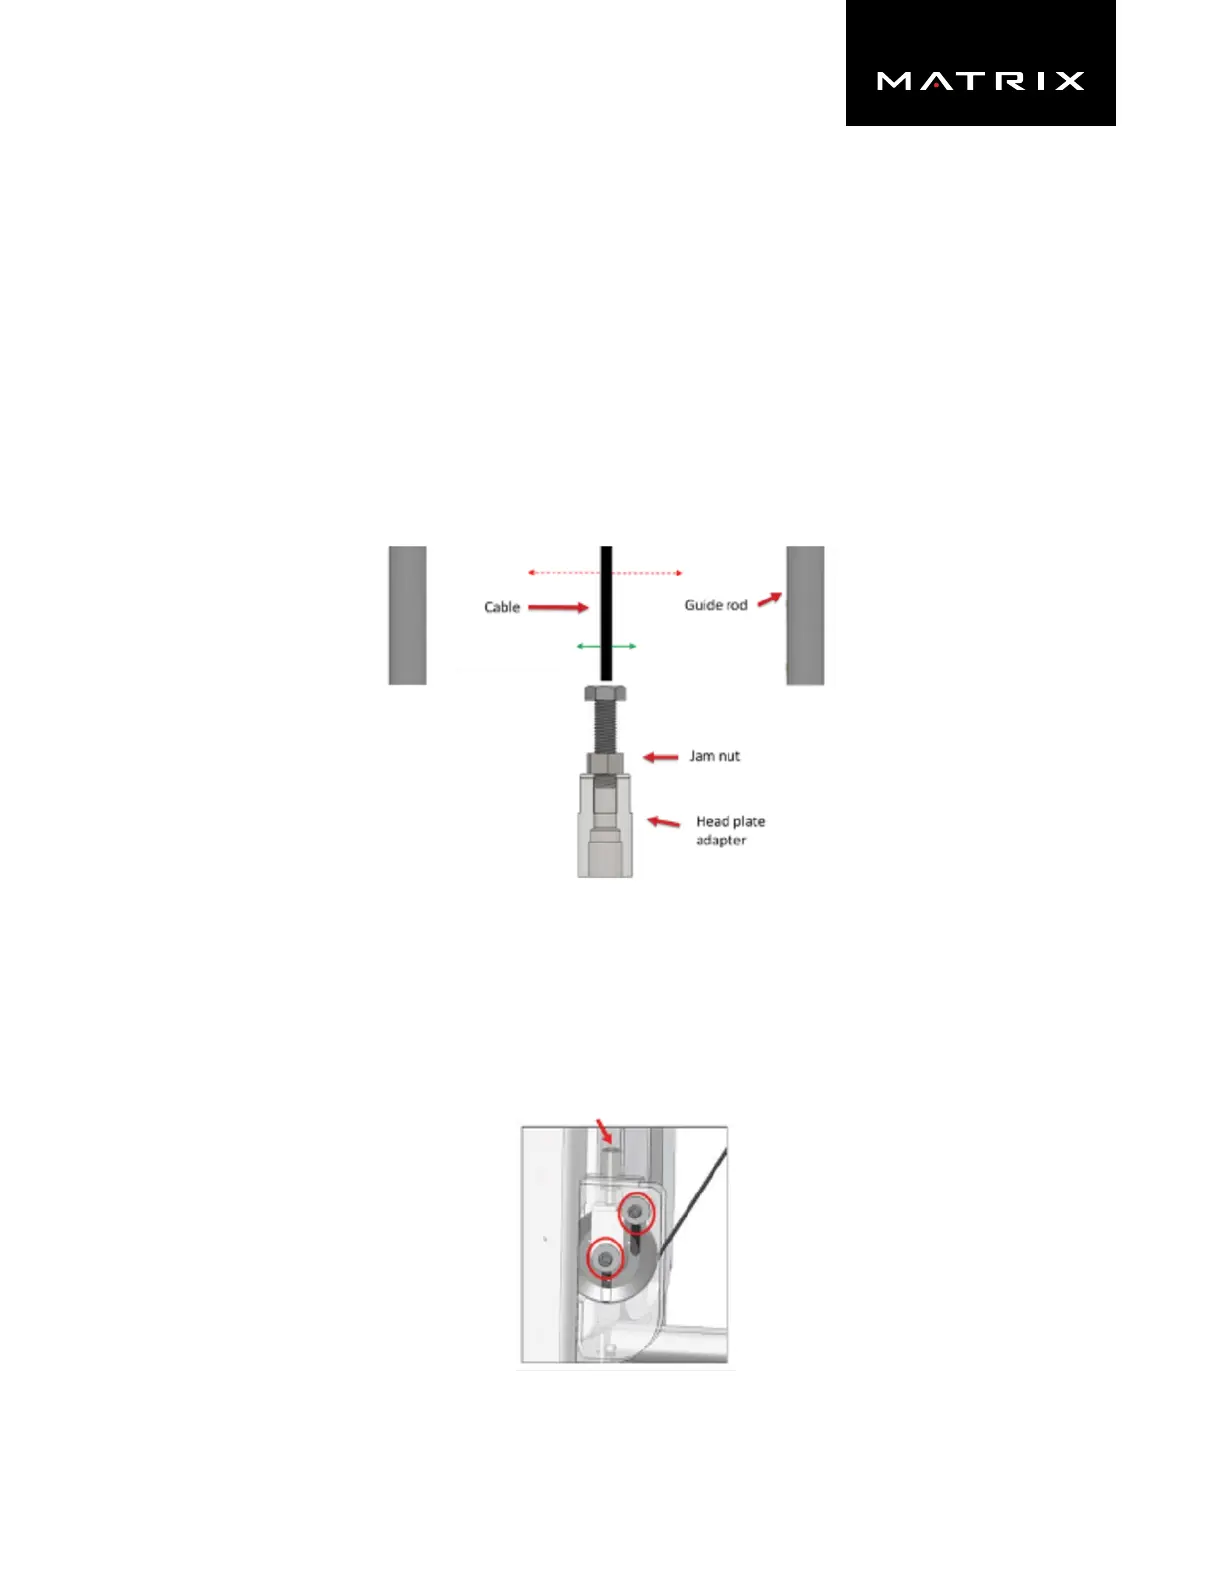
▶ Loosen the jam nut and remove the weight stack pin
▶ Tighten cable bolt until head plate begins to move
▶ Tightening jam nut using a wrench
▶ Put as much weight on as possible, perform exercise to set cable
▶ Check cable tension with your finger pushing the cable from side to side
▷ If the weight stack lifts (moves) when pushing the cable no more than 1 inch from the center, the cable is tensioned properly.
▷ If the weight stack head plate does NOT move, repeat steps 1-4
▶ Check cable tension with your finger pushing the cable from side to side. If the weight stack head plate lifts (moves)when pushing the cable no more than
1 inch from the center, the cable is tensioned properly
▶ Check to make sure weight stack pin goes into every hole without hitting the bayonet
Red dashed arrow is showing the cable too loose
Green arrow is showing the cable tensioned properly
IMPORTANT:
There must be seven
threads of cable
bolt in the head
plate adapter.
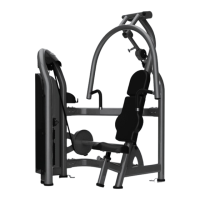
VERSA: CABLE TENSIONING PROCEDURE
▶ The cables on all Versa can be adjusted at the bottom portion of the weight stack.
▶ Loosen the two M10 bolts seen in the picture
▶ Use a 6mm hex wrench, turn the adjuster bolt up or down to tighten the cable
▷ A properly tensioned cable will lift the head plate with 10–12 mm of deflection of the cable
▶ Torque the two M10 bolts to 77 N-m once the proper cable tension has been achieved