EasyManuals Logo

Matrix FRAME User Manual

Matrix FRAME
14 pages
To Next Page IconTo Next Page
To Previous Page IconTo Previous Page
Page #9 background imageLoading...
Page #9 background image
MATRIX FRAME - Installation Manual Page 9
Step 2 - Camera installation
1) Connect the camera power cable at the back side and plug it into the power outlet
2) Mount the camera to the wall or ceiling and point it to the unit direction
WiFi connection (optional item)
Machine will connect automatically to the camera
Wait until the light around the camera lens is green (it may take several minutes)
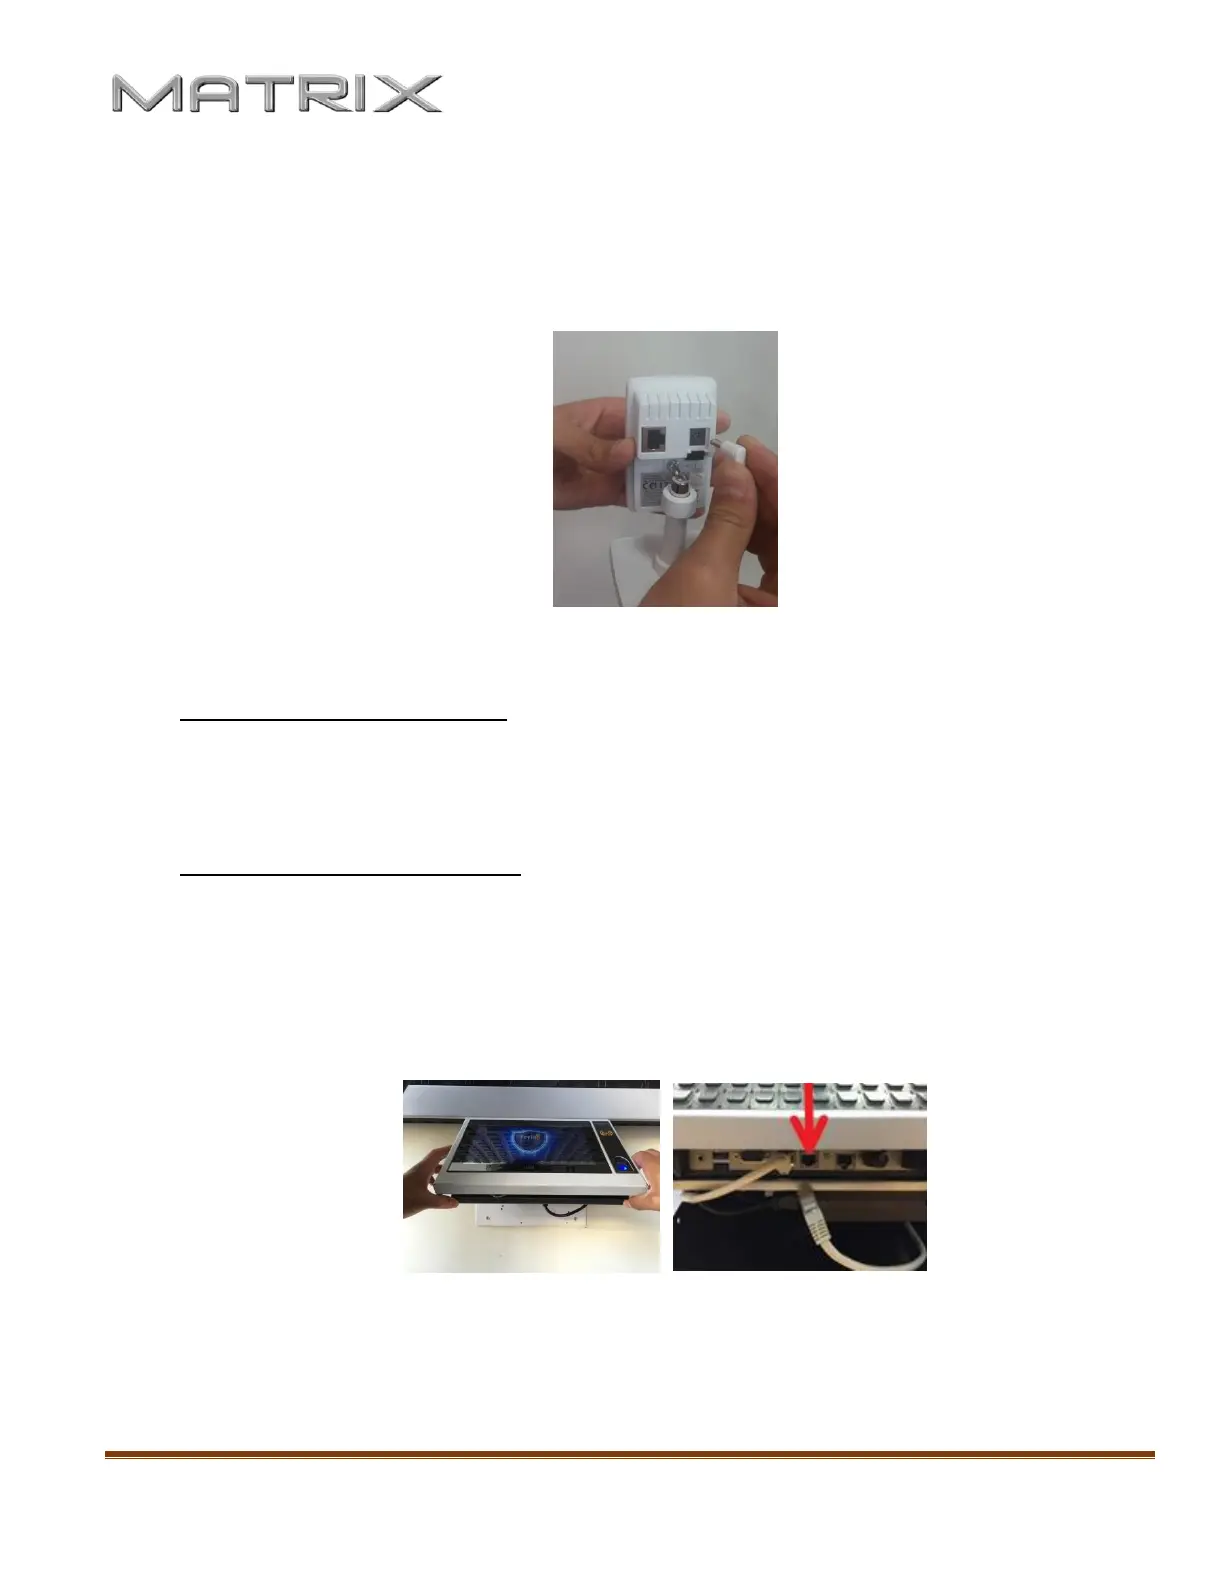
Cable connection (optional item)
Connect the free Lan socket to the camera with TCPIP cable:
Open the computer rear cover by pressing the two metal tabs away from the metal casing.
Insert TCPIP cable and drive it across the back opening, then close the lid back. Connect the other
end to the camera.

Questions and Answers:

Question and Answer IconNeed help?

Do you have a question about the Matrix FRAME and is the answer not in the manual?

Matrix FRAME Specifications

General IconGeneral
TypeNetwork Video Recorder (NVR)
Operating SystemEmbedded Linux
Operating Temperature-10°C to +55°C (14°F to 131°F)
Video InputsIP cameras
Network Interface10/100/1000 Mbps Ethernet
Video Input Channels32
Video Output Channels1 (HDMI), 1 (VGA)
Recording ResolutionUp to 8MP
CompressionH.265, H.264

Related product manuals