12 Matrox C-Series – User Guide
Step-by-step connection setup
This section guides you through the step-by-step connection setup of your graphics hardware.
Matrox C680 or Matrox C420
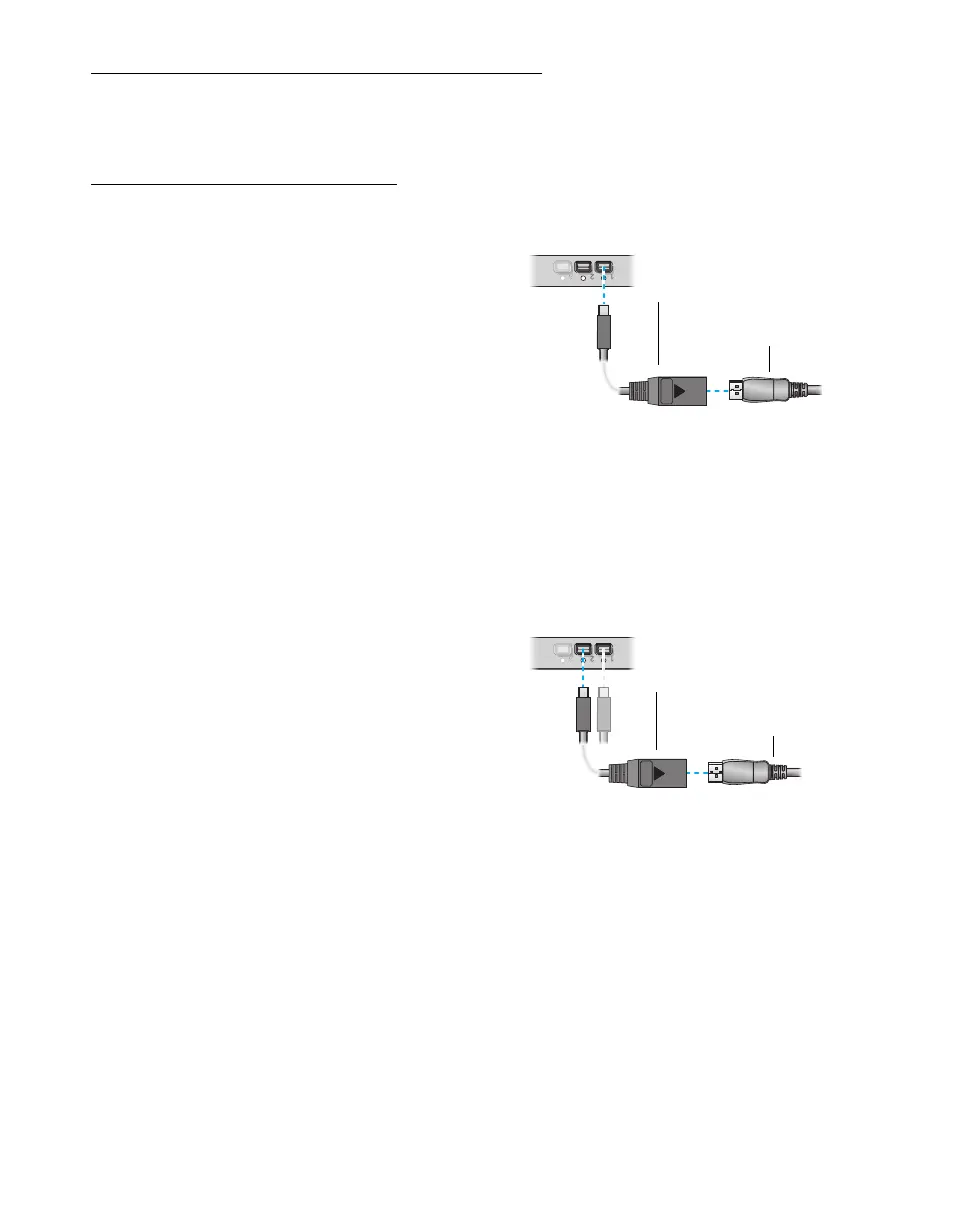
1 Connect the first monitor
If your monitor has a DisplayPort
connector, use a mini DisplayPort to
DisplayPort adapter to connect your
monitor cable to the mini DisplayPort
connector labeled
1
on the bracket of your
Matrox card.
If your monitor has an HDMI connector,
use a mini DisplayPort to HDMI adapter (active) to connect your monitor cable to the mini
DisplayPort connector labeled
1
on the bracket of your Matrox card.
If your monitor has a DVI connector, use a mini DisplayPort to DVI adapter (active) to
connect your monitor cable to the mini DisplayPort connector labeled
1
on the bracket of
your Matrox card.
2 Connect the other monitors
Repeat step 1 for each monitor you want to
connect.
Your Matrox card is now installed. Restart your computer and install your Matrox software (see
“Installing your Matrox software”, page 13).
Mini DisplayPort to
DisplayPort adapter
Monitor connector
(DisplayPort)
Mini DisplayPort to
DisplayPort adapter
Monitor connector
(DisplayPort)