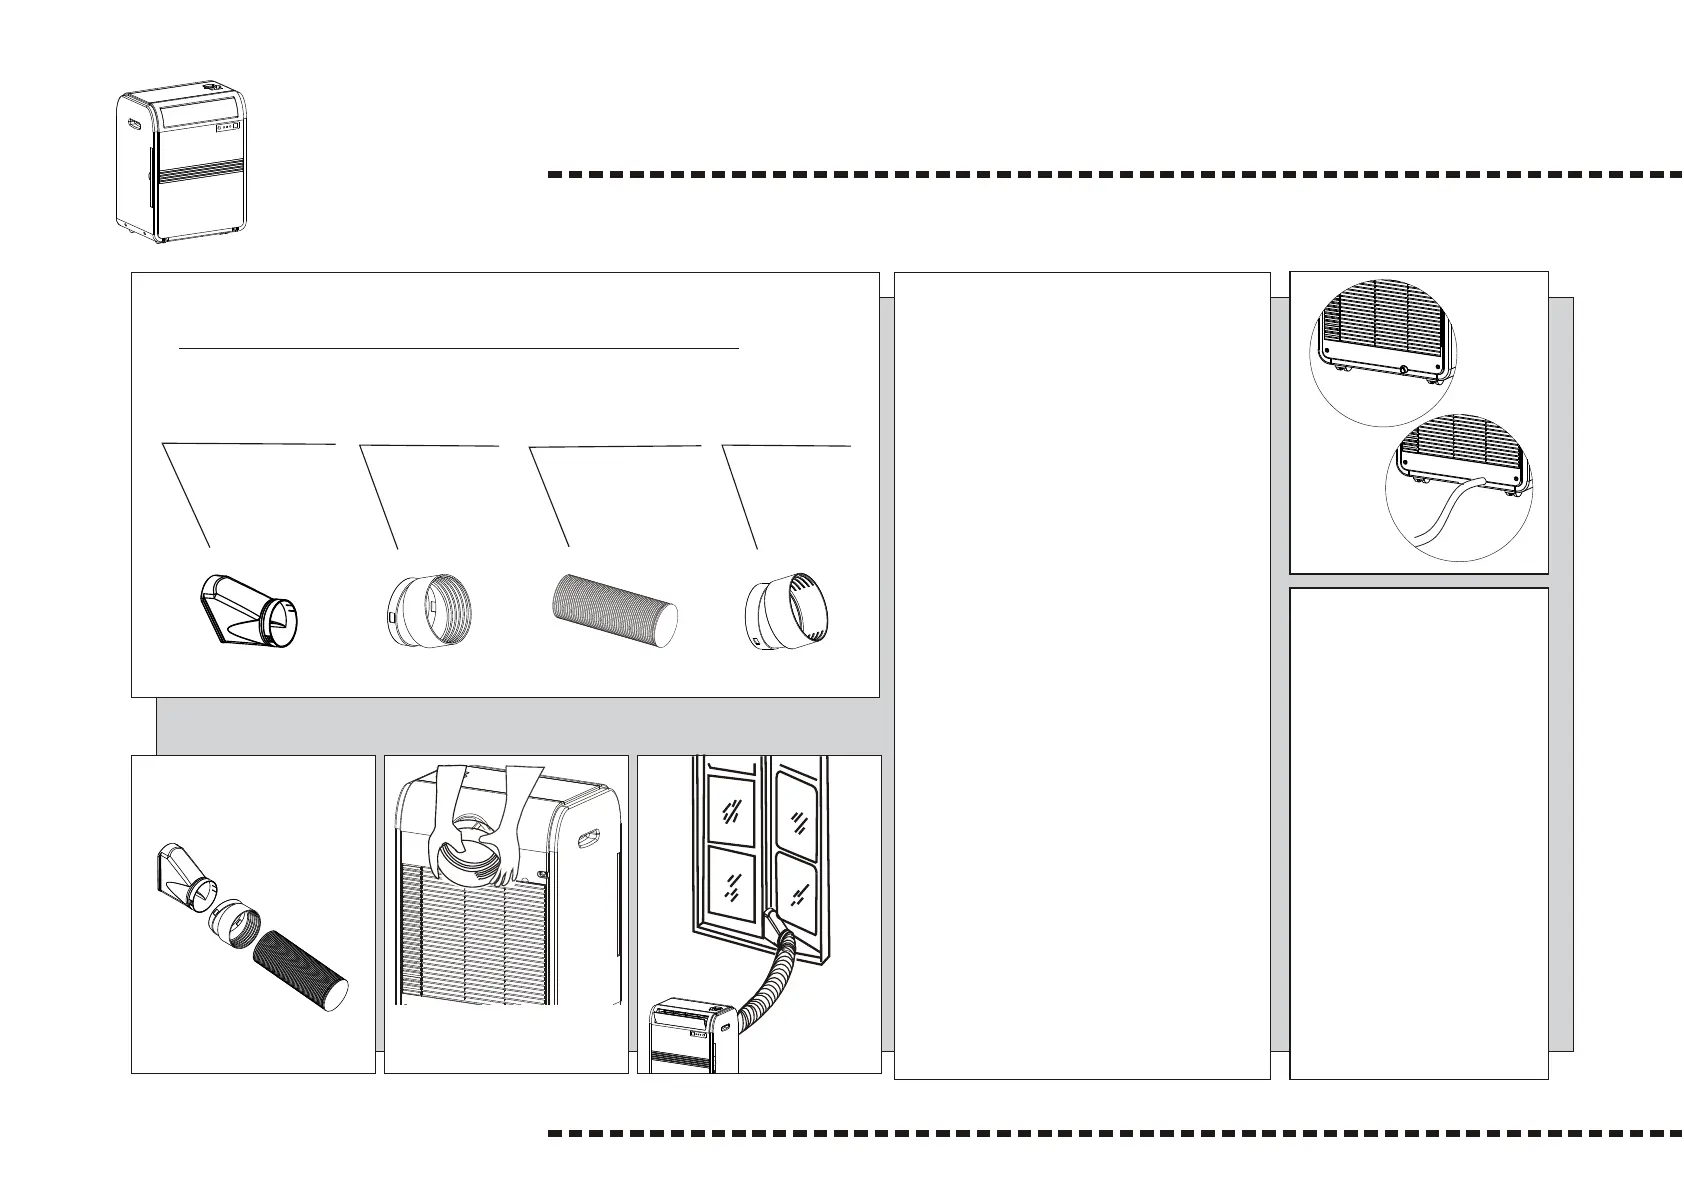
Installation instructions
Connect exhaust hose assembly to the back of the unit. Extend hose to desired
length and locate the exhaust nozzle through the window for ventilation.
EXHAUST DUCT SET ASSEMBLY AND INSTALLATION
Exhaust nozzle
connector
Exhaust nozzle
Exhaust hose
Exhaust duct
connector
1. Insert ends of Exhaust hose
into Exhaust nozzle connector
and Exhaust duct connector
by twisting anti-clockwise
until it stops.
2. Fix the exhaust duct connector
onto the rear outlet of the unit.
This is achieved by sliding the
exhaust duct connector of hose
downwards over. The exhaust
outlet of unit ensuring that the
lugs on the exhaust duct
connector are engaged with
the grooves on the connector
of unit.
3. Fix the exhaust nozzle to the
exhaust nozzle connector.
4. Extend the exhaust hose and
close the window as far as
possible trapping the exhaust
nozzle as below shown.
Note: Before moving the product,
please ensure all water is removed
from the product. (See Maintenance
after use on page 9.)
Hose outlet
INDOOR
Fig.1
Fig.2
Continuous Drainage
(OPTION)
If the unit is placed in a
location allowing
continuous drainage,
connect the drainage
pipe to the drainage
hole (Fig 1/2), and put
the other end in a
suitable drainage
location ie. outside.
6