4
5
START HERE. . .
Verify contents; inspect for damage.
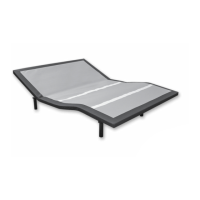
A - (4) Wood Legs
B - (4) Plastic Washers (for leg installation)
C - (1) Remote Control w/ (3) AAA Batteries
D - (1) Power Supply (includes power brick, electrical
feed cord, and electrical power cord)
E - (1) Dual Sync Cable (split sizes only)
F - (1) Warranty Activation Card
G - (1) Mattress Retainer
2
3
99301626-f EDR14992 11/18
© 2018 Mattress Firm, Inc.
1
REMOVE HARDWARE BOX.
PLACE PLASTIC WASHERS OVER THREADED INSERTS IN
CORNERS OF BASE FRAME.
SCREW LEGS INTO THREADED INSERTS, KEEPING PLASTIC
WASHER BETWEEN LEG AND THREADED INSERT.
DUE TO RISK OF INJURY, TWO PEOPLE
ARE REQUIRED TO HANDLE AND MOVE
ADJUSTABLE BASE.
ROTATE BASE OVER SO IT IS RESTING ON ITS LEGS. REMOVE PLASTIC
PACKAGING.
INSTALL (3) AAA BATTERIES IN REMOTE CONTROL. OPERATE REMOTE
CONTROL TO VERIFY BASE FUNCTIONS PROPERLY.
BATTERY
COMPARTMENT
DOOR
TABS
POSITIVE (+) END
NEGATIVE (-) END
PRESS IN ON TAB AND LIFT OUT TO
REMOVE BATTERY COMPARTMENT
DOOR. INSERT TABS IN TAB SLOTS
AND SNAP IN TO REPLACE.
QUICK SETUP GUIDE
n500
F
E
D
A
B
PLUG POWER CORD INTO A WORKING, GROUNDED ELECTRICAL OUTLET.
Note: An electrical surge protection device is recommended (not included).
ELECTRICAL
POWER CORD
pre-attached to base
LEG
WASHER
C
INSTALL MATTRESS TO COMPLETE SETUP.
If adjustable base will not operate, refer to the Troubleshooting Guide or detailed
instructions in the owners manual. To download a copy of the owners manual, visit
www.lpadjustablebeds.com/om/mattressfirm or call toll free: 844-MATT-FRM.
READ ALL INSTRUCTIONS BEFORE USING
INSTALL MATTRESS RETAINER.
Place the retainer ends into the bushing inserts at the foot end of the base.
Press down until the horizontal retainer section is flush against the base.
MATTRESS
RETAINER
G*
*zip-tied to frame (not shown)
