Do you have a question about the Max-Thrust RIOT and is the answer not in the manual?
Essential safety guidelines for operating the radio-controlled aircraft, emphasizing safe handling and flying practices.
Manufacturer and distributor disclaim all responsibility for injuries or damages resulting from product use.
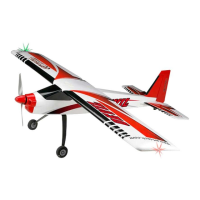
Introduction to the MAX-THRUST RIOT aircraft, highlighting its features, construction, and intended use.
Lists the main components and attributes of the aircraft, such as brushless motor, durable construction, and lighting system.
Detailed specifications including wingspan, length, weight, motor, ESC, servos, and battery requirements.
Attaching the landing gear to the fuselage using self-tapping screws, noting the angled orientation.
Securing the horizontal tail-plane to the fuselage, ensuring alignment of mounting holes.
Installing the vertical fin and rudder, ensuring correct routing of the tail-wheel control wire.
Fixing the horizontal tail-plane and vertical fin securely using screws, cautioning against over-tightening.
Connecting rudder and elevator snap-links to control horns, adjusting for neutral positions.
Joining wing halves with the aluminium spar and locking plate, ensuring proper wire routing.
Attaching the wing to the fuselage using plastic connectors and screws, ensuring correct alignment.
Fitting the propeller and spinner to the motor, emphasizing secure fixing for safety.
Connecting the speed controller, servos, and circuit board for aileron and LED lighting systems.
Installing the flight battery into the compartment and securing the cover before flight.
Checking and adjusting control surfaces for correct centering and response to transmitter inputs.
Verifying that the propeller is securely fixed and rotates in the correct direction.
Crucial step to balance the model correctly for stable flight, specifying CG range from wing leading edge.
Recommended control surface movements for ailerons, elevator, and rudder for optimal flight performance.
| Power Source | Electric |
|---|---|
| Control | Radio Control |
| Motor Type | Brushed |
| Terrain | Off-Road |
| Battery | 7.2V NiMH |
| Features | 4 Wheel Drive |
| Scale | 1:10 |
| Charger | Included |
| Run Time | 15 minutes |
| Charge Time | 4 hours |