A3. 4x
A10. 4x
9.0
10.1
9.2
9.1
11.0
10.0
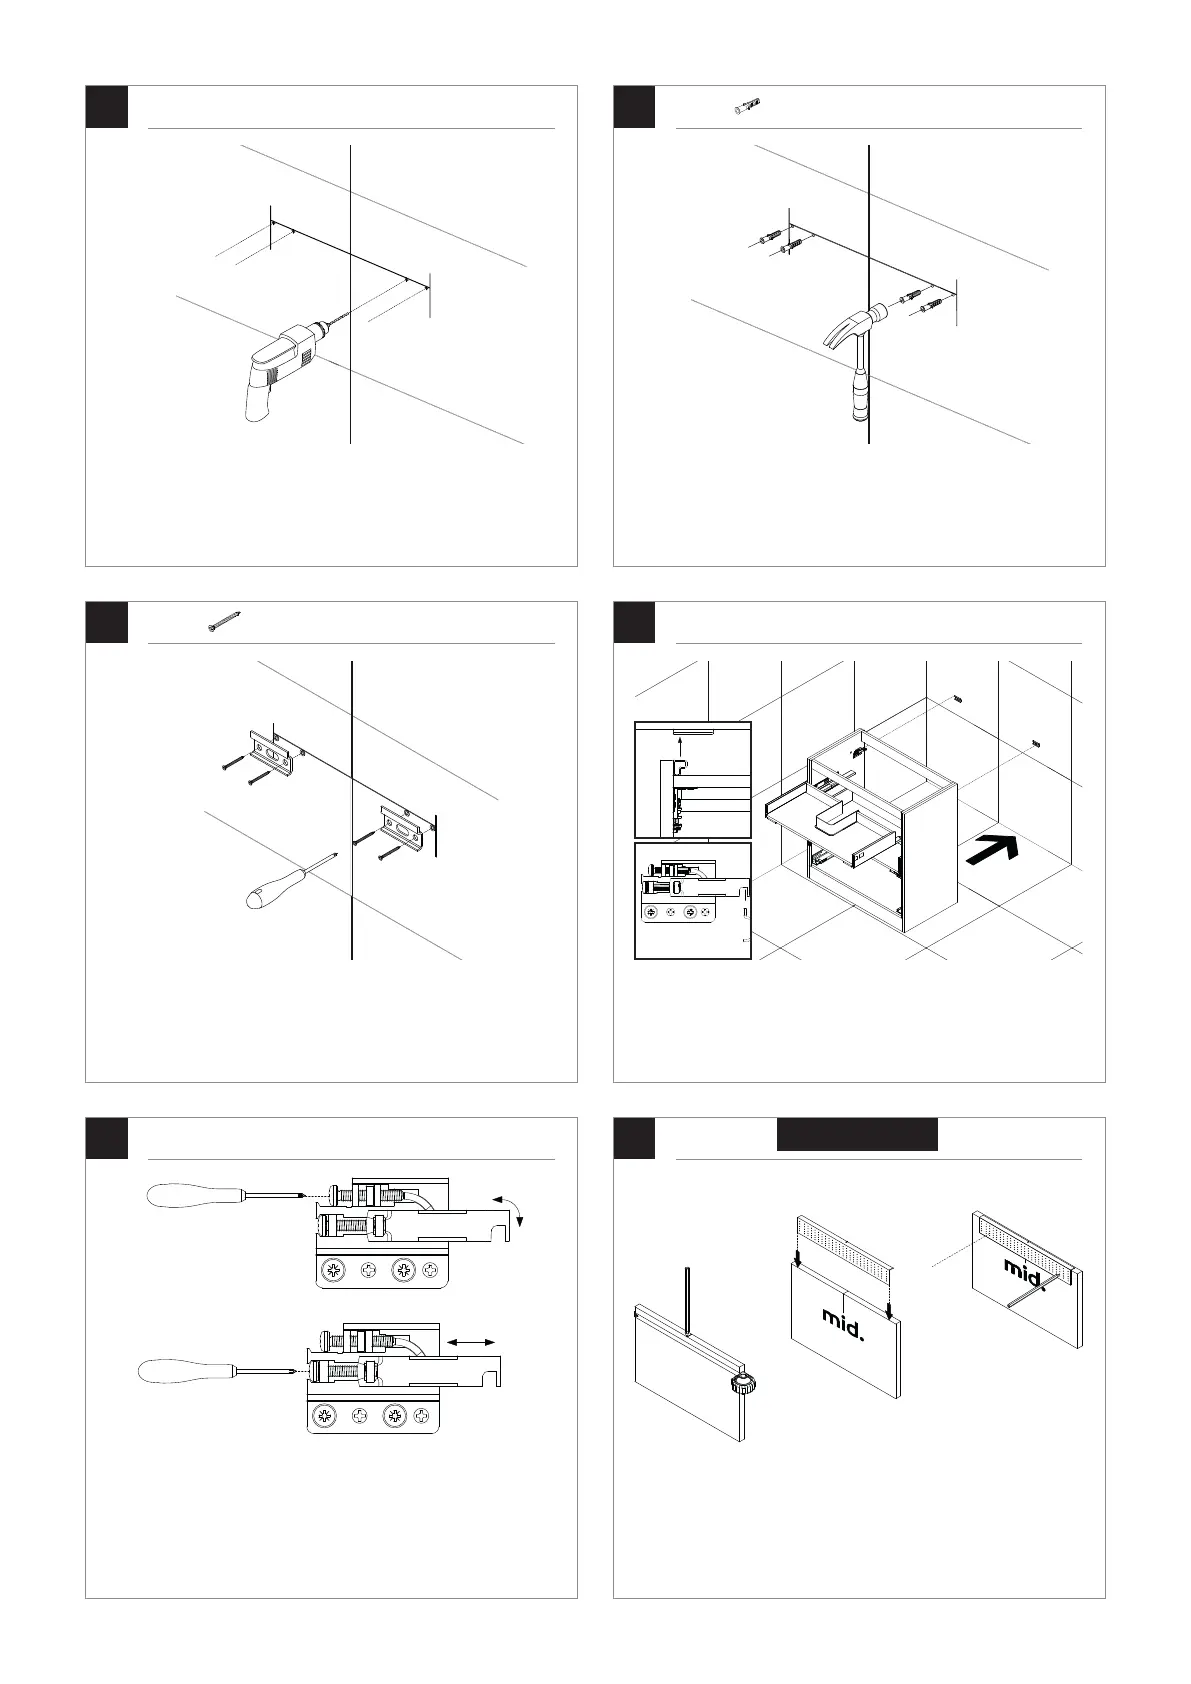
Boor de gaten met een boormachine. Gebruik hiervoor een boor van Ø6 mm.
Attach the wall brackets by screwing the screws with a hand screwdriver into the
plugs.
Gebruik de bovenste schroef om het meubel in hoogte te verstellen en de
onderste schroef om de afstand tussen het meubel en de muur te bepalen. Hierbij
dient u een handschroevendraaier te gebruiken in plaats van een elektrische
schroefmachine.
Use the upper screw to adjust the cabinet in height and use the lower screw to
adjust the distance between the cabinet and the wall. Use a hand screwdriver
instead of an electric screwdriver.
Bevestig de muurbeugels door de schroeven met een handschroevendraaier in de
pluggen te draaien.
Install the wall brackets.
Plaats de pluggen in de geboorde gaten. Gebruik hierbij een hamer indien nodig.
Place the plugs into the drilled holes. If necessary, you can use a hammer.
Markeer het midden van het front. Plaats de bijgeleverde boormal op de
gemarkeerde positie. Teken de juiste hart-op-hart maat af.
Mark the centre of the front panel. Place the supplied drilling template on the
marked position and mark the centre-to-centre distance.
Zorg ervoor dat de ophangbeugels over de muurbeugels vallen, zie afbeelding.
Attention: Make sure that the hanging brackets are placed on the wall brackets.
See picture.
6
256 mm / 352 mm
 Loading...