3 4
model nos.
058-0322-8 | 058-0323-6 | 058-0324-4 | contact us 1-888-670-6682
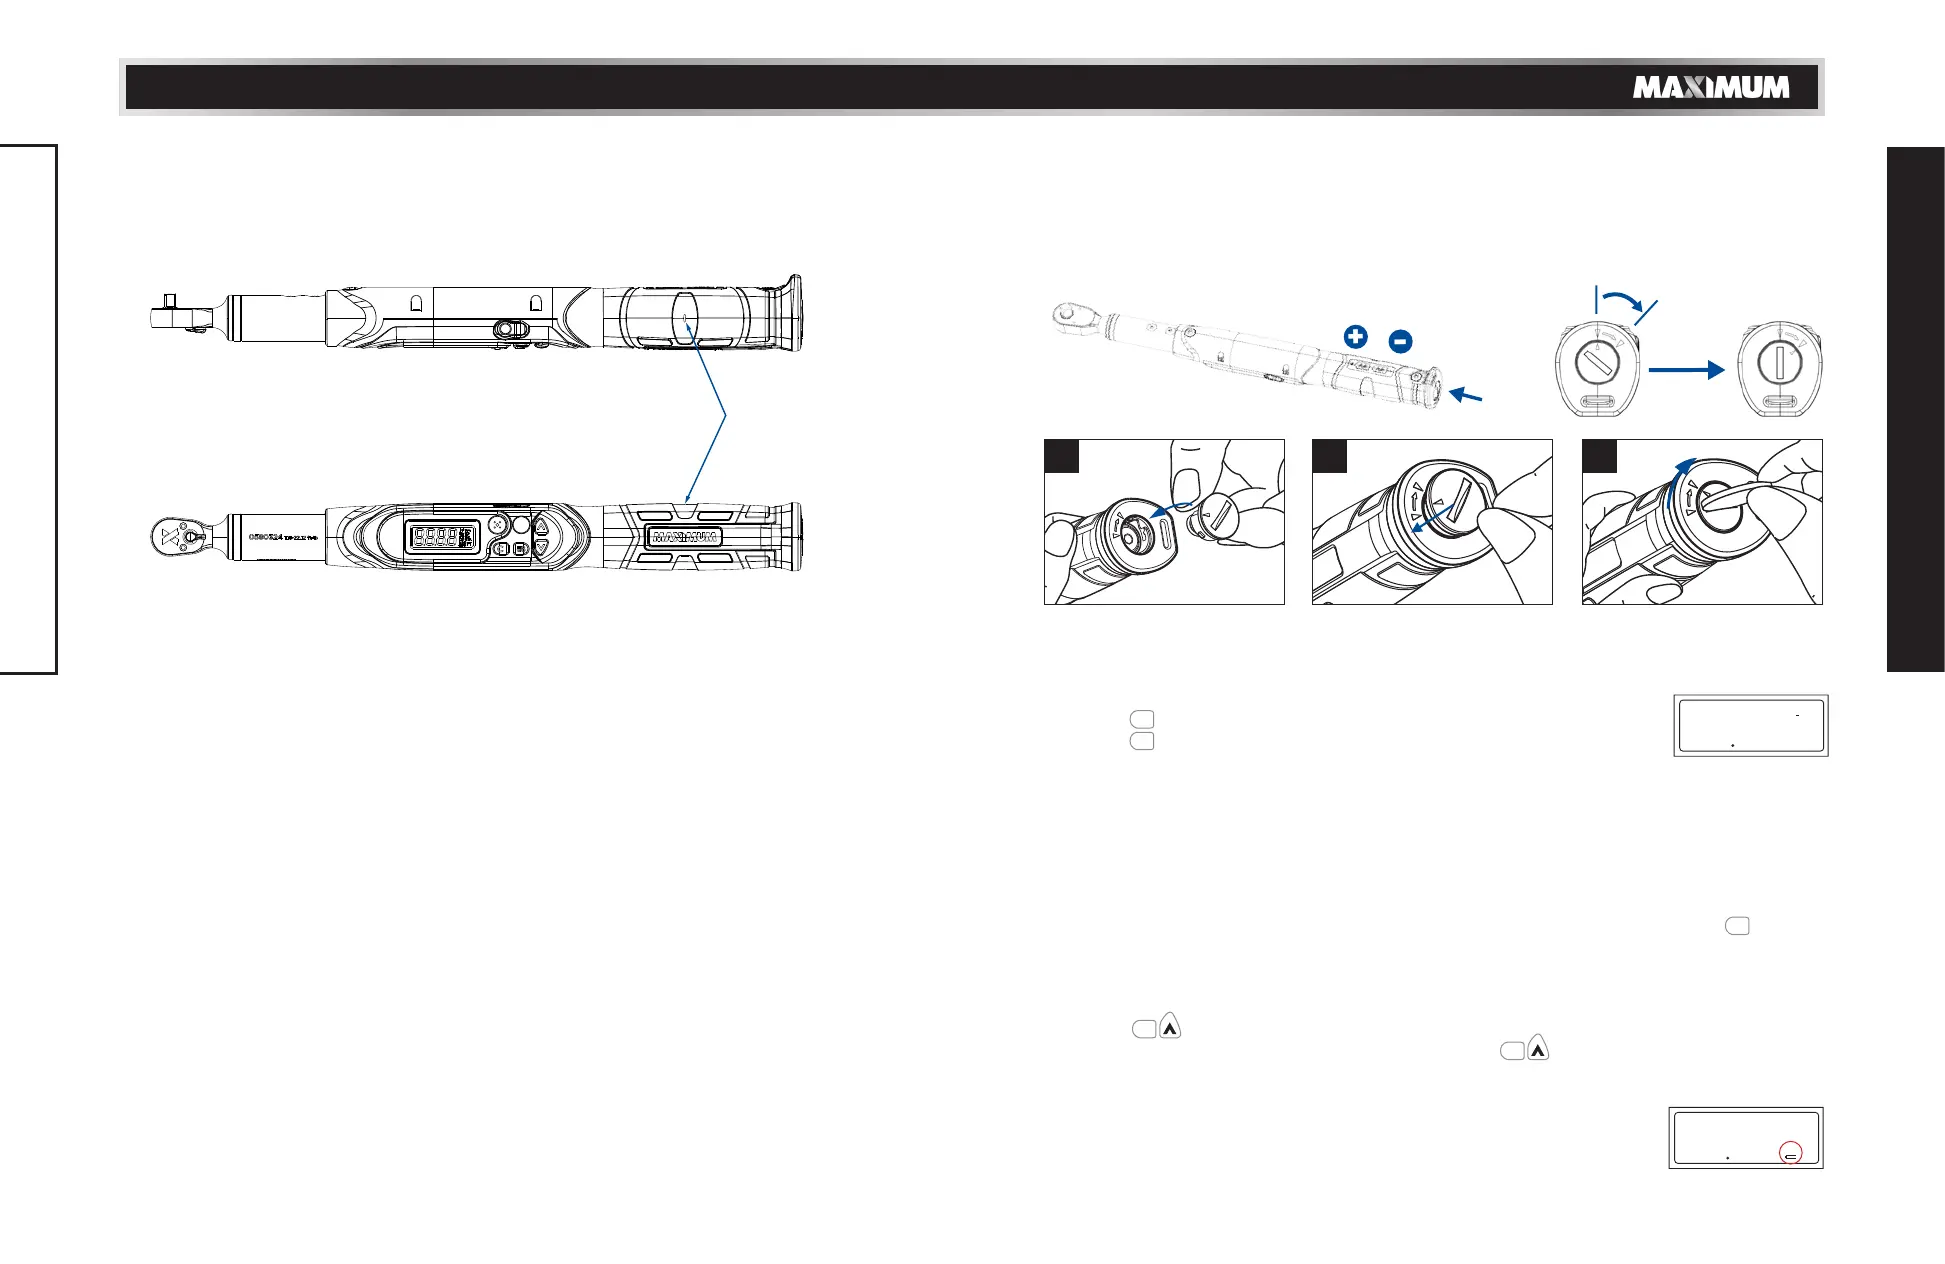
BEFORE USING THE WRENCH
SPECIFICATIONS
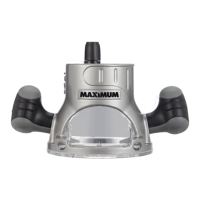
BATTERY INSTALLATION
• Remove the battery cap.
• Insert two AA batteries matching the -/+ polarities of the battery to the
battery compartment.
• Put on the battery cap and rotate it tightly, as illustrated in the following figures.
NOTE:
*1: The accuracy of the readout is guaranteed from 20% to 100% of maximum range
+/- 1 increment. The torque accuracy is a typical value. Calibration point is at the
middle line of black circle area on the rubber grip.
To ensure accuracy, calibrate the wrench for a constant period time (1 year). The
accuracy is based on the zero degree of offset from perpendicular drive.
*2: Two AA batteries (carbon-zinc battery).
*3: Horizontal and vertical test.
*4: Environmental test:
a. Dry heat
b. Cold
c. Damp heat
d. Change of temperature
e. Impact (shock)
f. Vibration
g. Drop
*5: Electromagnetic compatibility test:
a. Electrostatic discharge immunity (ESD)
b. Radiation susceptibility
c. Radiation emission
Calibration Point
POWER ON
• Press to power on the electronic torque wrench.
• Press to zero-reset the electronic torque wrench before using it.
ATTENTION:
If an external force is applied to the torque wrench during power-on/reset or wake up
period, an initial torque offset will exist in the memory.
ACTIVATION DURING SLEEP MODE
The wrench will auto sleep after about 5 minutes idle to save power. Press to wake
up the wrench during the sleep mode.
RESET
• Press to reset the wrench.
• If the wrench does not function normally, press together to reset the wrench.
LOW BATTERY VOLTAGE PROTECTION
• If the battery serial voltage is low, the wrench will display a
battery symbol and then turn off. Replace batteries.
1 2 3
STEP 1:
Put the cap on the
battery compartment.
STEP 2:
Make both triangle
marks on the end of handle and
battery cap aligned.
STEP 3:
Always use a coin to
close or open.
®
C
C
C
C
C
2500
N-m
M
T
2500
N m
M
T