20
STEP 14
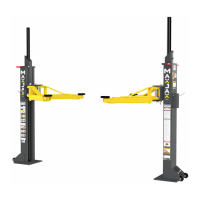
LIFT REMOVAL
STEP 15
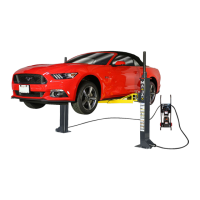
RE-INSTALLATION
1. Press and hold the Lowering Handle on the Power Unit.
2. Ensure that the Lift is lowered all the way to the ground and hydraulic pressure is relieved.
3. Disconnect the Power Unit from the power source and / or ensure that the power to the circuit is shut o to prevent
accidental powering on of the Lift while disassembling.
4. With a cloth in hand to collect weaping uid, disconnect the Cylinder Hoses from the Cylinder. Hoses can be coiled
and stored on the Power Unit Cart.
Before removing cylinder hoses, always ensure that the hydraulic pressure has been relieved from
the system by depressing the lowering valve until the Lift is fully lowered or the raised load is fully
settled onto the safety lock blocks. Never connect or disconnect hoses with the lift in an elevated
position.
Do not perform any maintenance or installation of any components without rst ensuring that
electrical power has been disconnected at the source or panel and cannot be re-energized until all
maintenance and/or installation procedures are completed.
5. Be careful to clean up any spilled hydraulic uid that may drip from the Hose assemblies.
6. Remove the Lift Arm Assemblies.
7. Loosen the Anchor Bolts. Be careful not to disturb the Post until ready to move the Post.
8. Move the Post to your storage area. Secure with straps or other device to prevent any accidental tipping or
movement of the Posts during storage.
9. Insert an Anchor Plug (P/N 5530412) in each Anchor Sleeve in the ground, to prevent the Anchor
Sleeves from lling with debris while the Posts are in storage.
1. Clear installation area of debris, tools and equipment.
2. Remove the Anchor Plugs and blow out the mounting holes with compressed air or clean with a nylon
brush.
3. Inspect the drop in anchors for proper setting and the concrete for defects and / or damage.
4. Line up the holes of the Base Plates with the Anchors. Re-shim the lift as required to ensure the Lift is installed
level.
5. With the Shims and Anchor Bolts in place, tighten all Anchor Bolts tight to the base plate. DO NOT USE AN
IMPACT WRENCH FOR THIS PROCEDURE.
6. Follow all procedures as outlined in STEPS 8 - 12 (Hydraulic Power Unit Set Up - Lift Start Up/Final Adjustments).
You must inspect all Drop in Anchors for proper setting and or damage each time the Lift is re-instal-
led. Inspect the concrete for cracks defects and/or damage. Do not reinstall the Lift if any of the drop
in anchors are defective or the concrete is cracked or defective.
The Lift must be re-leveled, shimmed and bled each time the lift is reinstalled. Failure to do so may
result in injury or death.
 Loading...