Page 3 of 3
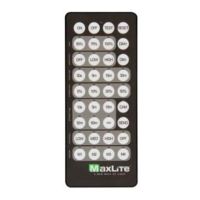
Basic Control Remote - Quick Guide
Phone: 1-800-555-5629 Fax: 973-244-7333 Web: www.maxlite.com E-mail: info@maxlite.com Rev: 04/06/21
© 2021 Specications subject to change without notice.
HOLD TIME 2 Seconds
STANDBY DIM 50%
STANDBY TIME 2 Seconds
Default settings can be changed during commissioning
For Standby Dim, “0%” means on/o control. There is no standby dimming level.
For Standby time “∞” means bi-level dimming control. Luminaire will never turn o.
Memory Mode (Commissioning)
To begin commissioning, follow the steps below:
1. Select either M1, M2, M3, or M4.
2. Indicator lights on the remote will illuminate to indicate the
current saved settings.
3. Settings can be changed by pressing appropriate buttons
in the highlighted gray area of the remote. (HIGH, SENSITIVITY,
HOLD TIME, STANDBY DIM, STANDBY TIME, and PHOTOCELL).
Review selected settings and make changes as necessary.
4. Point remote to desired luminaire to commission and press “SEND”.
5. If conguration is successful, luminaire will ash suggesting settings
are saved.
Note that any changes made to the sensor settings are automatically
saved to the memory banks M1, M2, M3 or M4 and will override previous
settings.
If commissioning multiple luminaires, select the congured memory
mode M1/M2/M3/M4 then follow steps 4 and 5.
Test Mode
Press “TEST” to enter test mode. Luminaire will ash two times.
Test mode will last ve (5) minutes then return to previous setting.
To Turn Lights ON
Press “ON” to turn luminaire on.
To Turn Lights OFF
Press “OFF” to turn luminaire off.
Manual Dimming Mode
Press “ON”, luminaire will blink, then press DIM+ or DIM- to adjust
dimming level.
Continuous Adjustment Mode or CAM
(Daylight Harvesting)
Continuously adjusts dim levels in response to changes in ambient light.
1. Point IR remote to desired luminaire
2. Enter Manual Dimming Mode - Press “ON”, luminaire will blink,
then press DIM+ or DIM- to adjust the desired light level.
3. Press “CAM”, indicator lights on the remote will indicate current
saved settings. Note: only HIGH, SENSITIVITY, and HOLD TIME
can be selected for CAM settings. (Sensitivity should be set to
either LOW or HIGH) CAM feature recommended with CN-RTPSW
sensor only.
4. Review selected settings and make changes as necessary.
Press “SEND”.
5. If conguration is successful, luminaire will blink to conrm
setting saved.
If congurating multiple luminaires, repeat steps
1-5 above to congure CAM settings. Light levels
has to be congured for each luminaire individually.
Reset Mode
Press “RESET” to enter reset mode. Luminaire will blink to indicate
reset is complete. Sensor will default to original settings shown in the
above table.
Remote Settings
FEATURE DEFINITION SETTINGS
HIGH MODE Set High Trim or Maximum light output setting
SET MAXIMUM THRESHOLD VALUE 50/75/100%.
(SENSOR DEFAULT = 100%)
SENSITIVITY Set motion detection sensitivity
OFF (NO OCCUPANCY) / LOW (50%) / HIGH (100%)
(SENSOR DEFAULT=HIGH)
HOLD TIME
Time luminaire stays at the High Trim threshold when no
motion detected before going into Standby Dim level.
30S/5M/15M/30M
(SENSOR DEFAULT=5MIN)
STANDBY DIM
With no motion detected and hold time elapsed,
light output is reduced to this level
0/10/30/50% (SENSOR DEFAULT=50%)
STANDBY TIME
With no motion detected, length of time luminaire stays
at the Standby Dim level before turning OFF.
10S / 5MIN / 15MIN / 30MIN / 60MIN / ∞
(SENSOR DEFAULT=30MIN)
PHOTOCELL
Turns luminaire ON/OFF based on photosensor settings.
(Outdoor application)
LOW(1FC) / MEDIUM(20FC) / HIGH(50FC)
(SENSOR DEFAULT = PC OFF)
Check out the
remote commissioning
video here.
 Loading...