6
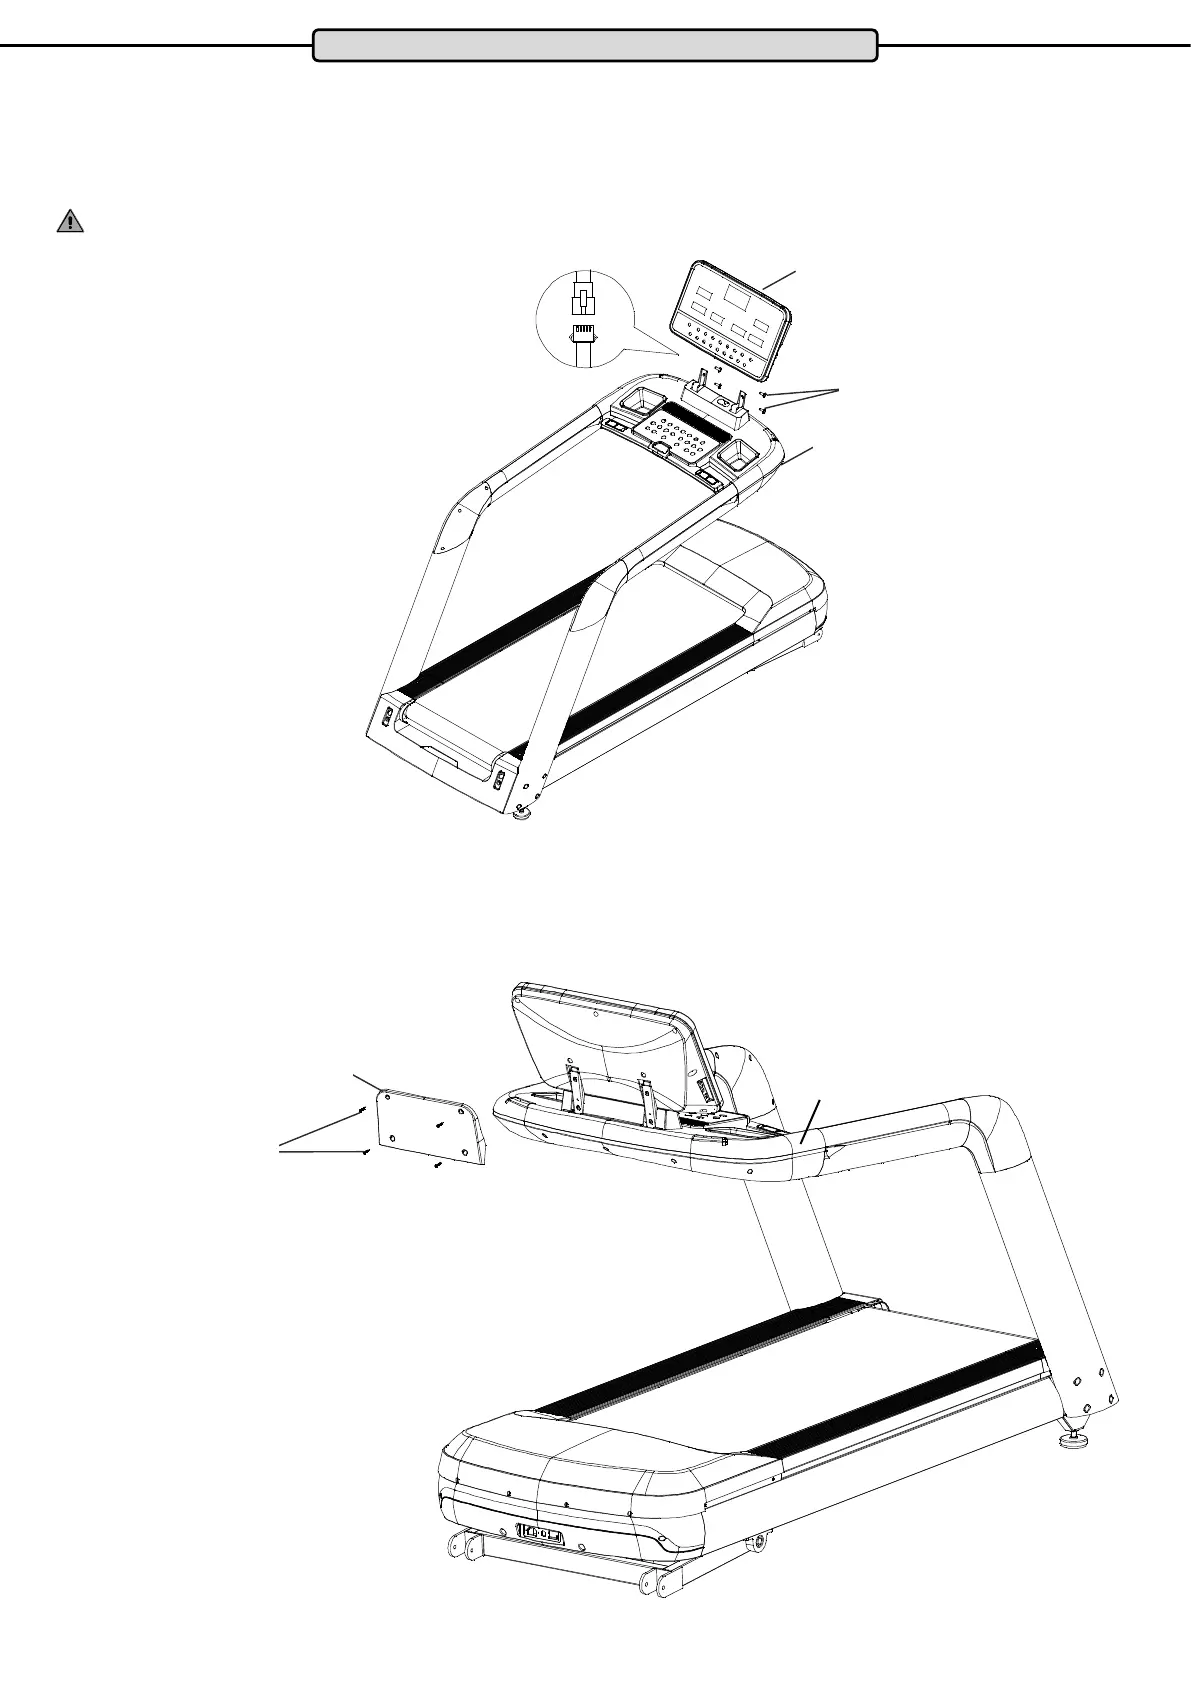
Step 3: Mounting the cockpit
Connect the plugs of the cable that protrudes from the cockpit with the appropriate plugs of the cable sticking out of the
cockpit frame. It is not possible to confuse them because the connectors are unique.
Insert the cockpit from above into the corresponding brackets of the cockpit frame and slide it down to align the four holes
of the cockpit with the four holes of the cockpit frame. Attach the cockpit to the cockpit frame with four Allen screws M8x20.
WARNING: When inserting the cockpit make sure that you do not squeeze or damage the cables.
Step 4: Assemble the rear cockpit cover
Insert the rear cockpit cover on the back of the cockpit and secure it with four self-tapping screws St4x16.
Assembly
Cockpit
Hexagon socket screw, M8x20
Cockpit Frame
Cockpit Frame
Rear Cockpit Panel
Self-Tapping Screw,
ST4x16