Pg. 6
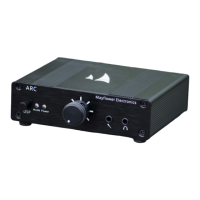
Operation
In most circumstances, the ARC will only need to be connected to an available USB port on your
system (a USB 3.0 port is recommended). Refer to the illustrations in the Connections + Controls
section to locate the items described below:
1. Ensure that the volume + power knob ⑤ is in the Off position (all the way counter-clockwise).
2. Remove the twist tie from the included USB cable and connect it between your system and the
ARC ⑪. Use a USB 3.0 port if available.
3. Connect your headphones or headset to the headset jack ⑦. This jack accepts 4 pole
headphone/mic connectors as well as standard headphones.
4. Optional: Connect your microphone to the mic input jack ⑥.
5. Power the ARC on by turning the volume + power knob ⑤ clockwise past the point where a
click is felt.
Your system should recognize the ARC and begin sending all audio processing through the ARC,
bypassing the internal sound card. If your system does not recognize the ARC, see the Troubleshooting
section.
6. Put on your headphones and adjust the volume to a comfortable level. The volume knob
rotates nearly 360 degrees, and it is normal to turn the volume past 12 O’clock to achieve
typical listening levels. If the level is not sufficient, first check your Windows audio volume and
ensure it is between 80% - 100%. If audio output is still insufficient, switch the output gain
selector ⑫ to the Hi position. For most headphones, the Lo gain setting is adequate.
Note: If no output is heard through the headphones, press the Headphone / RCA Selector ④.
Windows systems will need to have the audio output set to 24/96 mode. See the
troubleshooting section for information on changing this setting.
7. Optional: Test your microphone and adjust the software microphone volume on your system to
an optimal level.