Component & Control Testing Procedures
!
WARNING
To avoid risk of electrical shock, personal injury or death; disconnect power to range before servicing, unless
testing requires power.
16027233 June 2006
Replaces 16027002
© 2006 Maytag Services
4
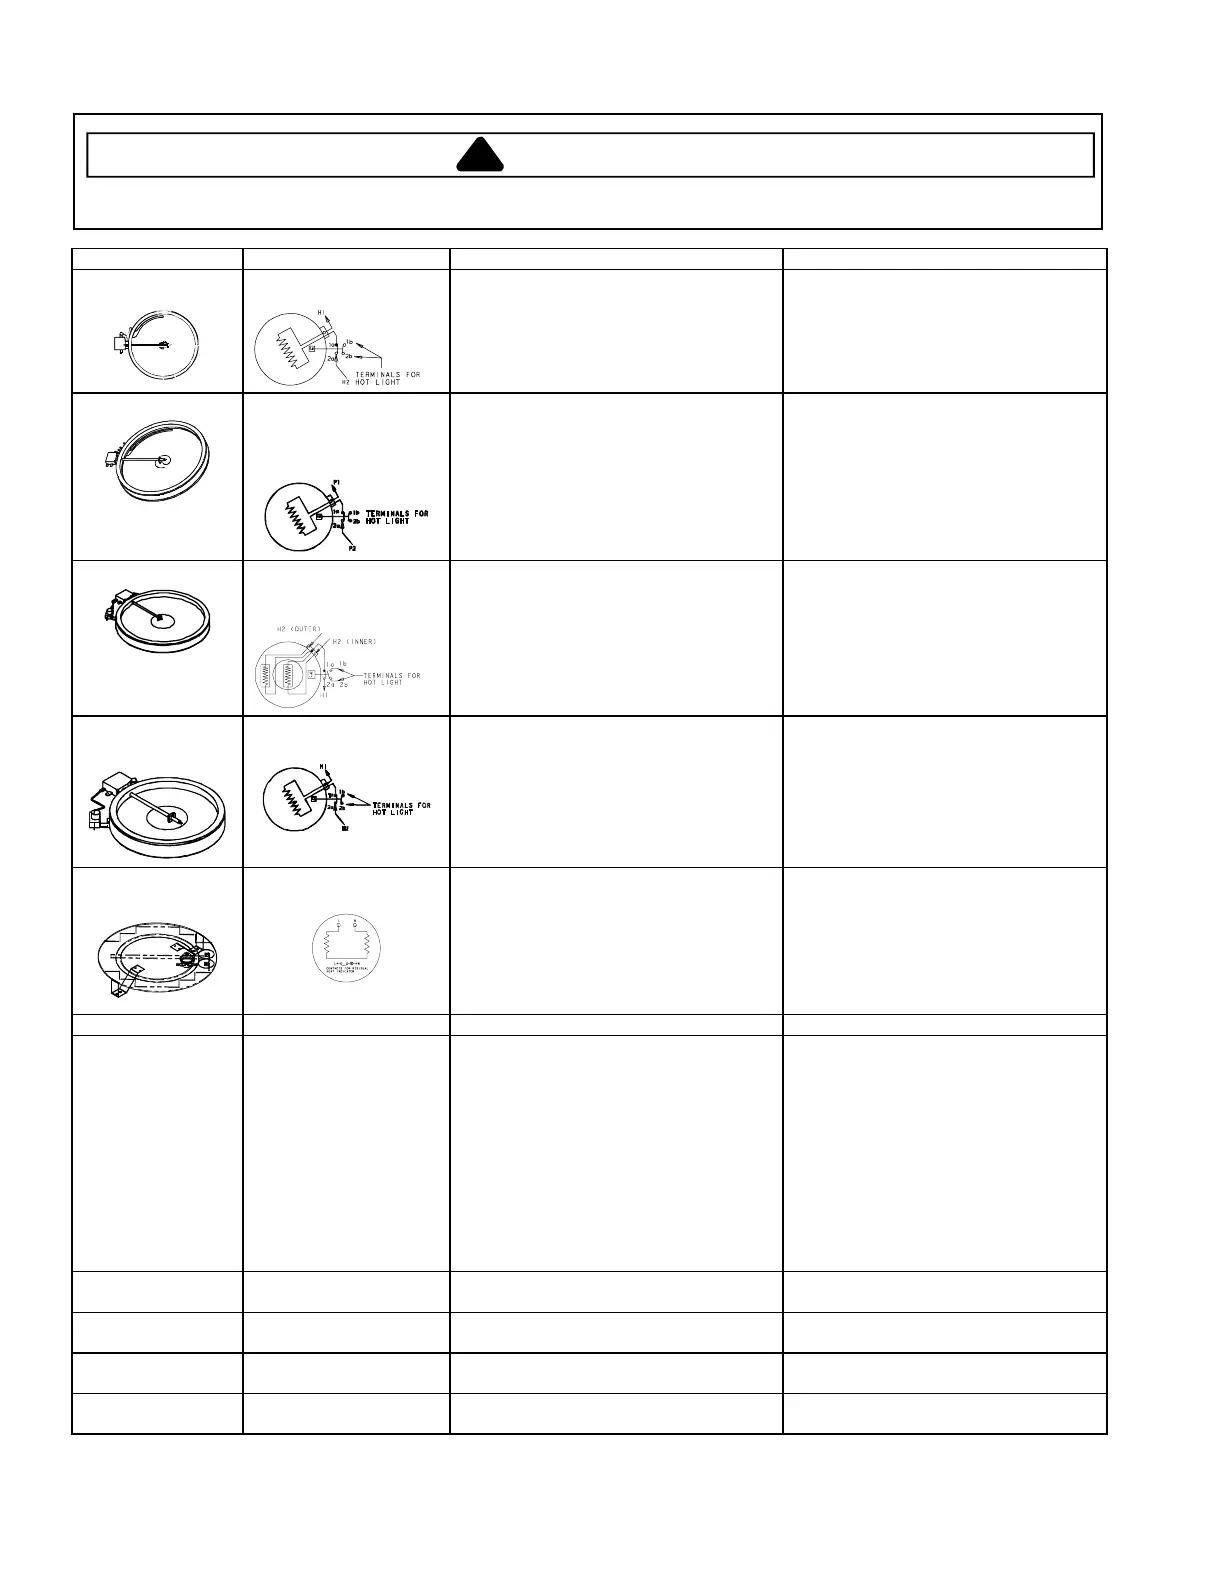
Illustration Component Test Procedure Results
(AER5815RC*)
Ribbon element
2500 W
Disconnect wiring to element and
measure cold resistance of terminals.........
Measure voltage at element.......................
Approx. 21.5 to 23.5 Ω.
240 VAC. If voltage is not present,
check wiring.
(MER5875RC*)
Ribbon element, triple,
3000 W (900 W Inner,
1100 W Middle, 2200 W
Outer)
Disconnect wiring to element and
measure cold resistance of terminals.........
Measure voltage at element.......................
2200W (Outer): Approx. 24 to 28 Ω.
1100W (Middle): Approx. 49 to 55 Ω.
900W (Inner): Approx. 60 to 68 Ω.
240 VAC. If voltage is not present,
check wiring.
(MER5875RC*)
Ribbon element, dual,
2400 W (1200 W Inner,
1200 W Outer)
Disconnect wiring to element and
measure cold resistance of terminals.........
Measure voltage at element.......................
1200W (Inner): Approx. 44 to 49 Ω.
1200W (Outer): Approx. 44 to 49 Ω.
240 VAC. If voltage is not present,
check wiring.
(MER5875RC*,
series 11)
Ribbon element,
warming, 100 W
Disconnect wiring to element and
measure cold resistance of terminals.........
Measure voltage at element.......................
Approx. 133 to 147 Ω.
240 VAC. If voltage is not present,
check wiring.
(MER5875RC*,
series 12)
Ribbon element,
warming, 100 W
Disconnect wiring to element and
measure cold resistance of terminals.........
Measure voltage at element.......................
Approx. 141 to 155 Ω.
240 VAC. If voltage is not present,
check wiring.
Control Feature Test Procedure Results
H1 Oven temperature
adjustment
Press BAKE pad.
Enter 550 on the digit pad.
Immediately press and hold BAKE pad
for 3 to 5 seconds.
Oven can be adjusted from -35 to +35
degrees in 5-degree increments by
pressing AUTOSET pads. To avoid over
adjusting the oven, move temperature 5
degrees each time. Wait 4 seconds for
the data entry timer to expire to accept
the change. Temperature adjustment will
be retained even through a power failure.
Increasing or decreasing oven
temperature does not affect self-
cleaning temperature.
H1 Temperature display Press and hold CANCEL and BAKE
pads for 3 to 5 seconds.
Toggles temperature display between
°F and °C.
H1 Clock display Press and hold CANCEL and CLOCK
pads for 3 to 5 seconds.
Toggles clock display on and off.
H1 24-hour clock Press and hold CANCEL and
FAVORITE pads for 3 to 5 seconds.
Toggles clock display between 12-hour
and 24-hour format.
H1 Factory default Press and hold CANCEL and KEEP
WARM pads for 3 to 5 seconds.
Resets clock to factory settings.
 Loading...