EasyManua.ls Logo

Maytag MEDX500XW0 User Manual

Maytag MEDX500XW0
20 pages
To Next Page IconTo Next Page
Page #1 background imageLoading...
Page #1 background image
ELECTRIC DRYER
27" WIDE
INSTALLATI N INSTR
MODELS - U.S.A. ONLY
CTIONS
Para obtener acceso al manual de uso y cuidado en espa_ol, o para obtener informaci6n adicional acerca de su producto, visite:
www.whirlpool.com
Tenga listo su nOmero de modelo completo. Puede encontrar el nOmero de modelo y de serie dentro de la cavidad superior de la puerta.
Table of Contents
DRYER SAFETY ......................................................................... 2
iNSTALLATiON REQUIREMENTS ............................................. 3
Tools and Parts ...................................................................... 3
Location Requirements ......................................................... 3
Electrical Requirements ........................................................ 4
Install Leveling Legs .............................................................. 6
Electrical Connection ............................................................ 7
VENTING ................................................................................... 13
Venting Requirements ......................................................... 13
Plan Vent System ................................................................. 14
Venting Kits .......................................................................... 14
Install Vent System .............................................................. 15
Connect Vent ........................................................................ 15
Level Dryer ........................................................................... 16
Complete Installation Checklist ......................................... 16
Reverse Door Swing (Optional) .......................................... 17
Troubleshooting ................................................................... 18
W10096988A
W10306460A=SP
Question and Answer IconNeed help?

Do you have a question about the Maytag MEDX500XW0 and is the answer not in the manual?

Maytag MEDX500XW0 Specifications

General IconGeneral
BrandMaytag
ModelMEDX500XW0
CategoryDryer
LanguageEnglish

Summary

DRYER SAFETY

Safety Alert Symbol

Explains the safety alert symbol and its meaning.

DANGER and WARNING Meanings

Defines the terms DANGER and WARNING used in safety messages.

Risk of Fire Warning

Details fire hazards related to dryer installation and venting.

INSTALLATION REQUIREMENTS

Tools and Parts

Lists necessary tools and parts for dryer installation.

Location Requirements

Specifies requirements for dryer placement, including clearance and hazards.

Dryer Dimensions

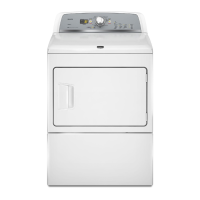
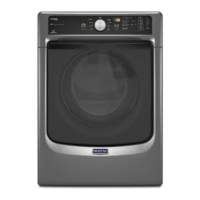
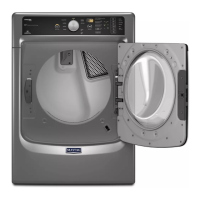
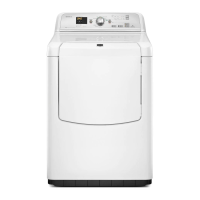
Provides specific dimensions for the dryer models.

Minimum Spacing Requirements

Details minimum clearances for recessed or closet installations.

Mobile Home Installation Requirements

Outlines special installation rules applicable to mobile homes.

Electrical Requirements

Explains electrical connection requirements, codes, and safety.

Electrical Connection

Power Supply Cord Connection

Instructions for connecting the dryer using a power supply cord.

Direct Wire Connection

Instructions for connecting the dryer directly via wiring.

Grounding Instructions

Details proper grounding methods for safety.

Install Leveling Legs

Prepare for Leveling Legs

Step-by-step guide to prepare the dryer for leg adjustment.

Screw in Leveling Legs

Instructions on how to screw in and adjust the leveling legs.

Electrical Connection Options

Choose Electrical Connection Type

Guide to selecting between power supply cord and direct wire connections.

Terminal Block Cover Removal

Steps for accessing the terminal block for wiring.

Power Supply Cord Connection Details

Strain Relief Attachment

How to attach the strain relief for the power cord.

4-Wire Power Supply Connection

Detailed steps for a 4-wire power cord connection.

Prepare Neutral Wire Connection

Steps to prepare wires for connection to the terminal block.

Connect Neutral Wires

Connecting the neutral ground and neutral wires.

Power Supply Cord Connection (3-Wire)

3-Wire Power Supply Connection

Detailed steps for a 3-wire power cord connection.

Connect Ground Wire

Connecting the ground wire to the terminal block.

Connect Remaining Wires

Connecting the remaining wires to the terminal block.

Direct Wire Connection

Strain Relief Attachment

Installing the strain relief for the direct wire cable.

4-Wire Direct Wire Connection

Detailed steps for a 4-wire direct wire connection.

Prepare 4-Wire Cable

Preparing the 4-wire cable for connection.

Connect Wires to Terminal Block

Connecting wires to the terminal block.

Direct Wire Connection (3-Wire)

3-Wire Direct Wire Connection

Detailed steps for a 3-wire direct wire connection.

Connect Neutral Ground and Neutral Wires

Connecting neutral ground and neutral wires.

Prepare 3-Wire Cable

Preparing the 3-wire cable for connection.

Connect Ground Wire

Connecting the ground wire.

Optional 3-Wire Connection

Prepare Neutral Wires

Preparing neutral wires for the optional connection.

Connect Neutral Wire

Connecting the neutral wire.

Connect Neutral Ground and Neutral Wires

Connecting neutral ground and neutral wires.

Connect Remaining Wires

Connecting the remaining wires.

VENTING REQUIREMENTS

Venting Requirements Overview

Specifies requirements for dryer venting systems and materials.

Exhaust Hoods

Details requirements for exhaust hood installation.

Elbows and Clamps

Guidelines for using elbows and clamps in vent systems.

Plan Vent System

Recommended and Alternate Exhaust Installations

Illustrates typical and alternative vent routing configurations.

Optional Exhaust Installations

Describes kits for side, left, or bottom exhaust options.

Venting Kits

Lists available kits for various venting needs.

Install Vent System

Install Exhaust Hood

Steps for installing the exterior exhaust hood.

Connect Vent to Exhaust Hood

How to connect the vent pipe to the exhaust hood.

Connect Vent

Connect Vent to Exhaust Outlet

Connecting the vent pipe to the dryer's exhaust outlet.

Level Dryer

Leveling Procedure

Instructions for ensuring the dryer is level.

Move Dryer to Final Location

Guide to moving the dryer to its installed position.

Adjust Leveling Legs

Final adjustments to leveling legs for stability.

Complete Installation Checklist

Reverse Door Swing (Optional)

Prepare Dryer and Remove Door

Protecting dryer and initially removing the door.

Remove Hinges and Door Panel Screws

Detaching hinges from the door and removing outer panel screws.

Rotate and Reassemble Outer Door

Rotating the outer door and reattaching it.

Reverse Door Swing (Optional) - Continued

Reattach Door Hinges

Reattaching the door hinges to the dryer door.

Transfer Plugs and Mount Door

Moving port plugs and mounting the door to the cabinet.

Check Door Strike Alignment

Adjusting the door catch for proper alignment.

Troubleshooting

Related product manuals