ENGLISH ENGLISH
9 9
To adjust dosing, proceed in the following manner:
• Press in sequence the menu button [☰] and the button of
the dose you want to adjust ([1], [2] or [M/3]). The display
shows the screen to change the time for the selected
dose.
• Use the navigation buttons [∧] or [∨] to increase or
decrease the dose time. Approximately, a change of 0.1
seconds is equivalent to a change of dose of 0.2 grams
(0.07 ounces).
• Press menu button [☰] to confirm the new time. Instead,
press the cancel button [B] to exit the procedure without
saving the changes.
• Use a digital precision scale to check the weight of the
dose and, if necessary, repeat above mentioned opera-
tion.
When you are inside the adjusting program it is not possible
to operate the appliance.
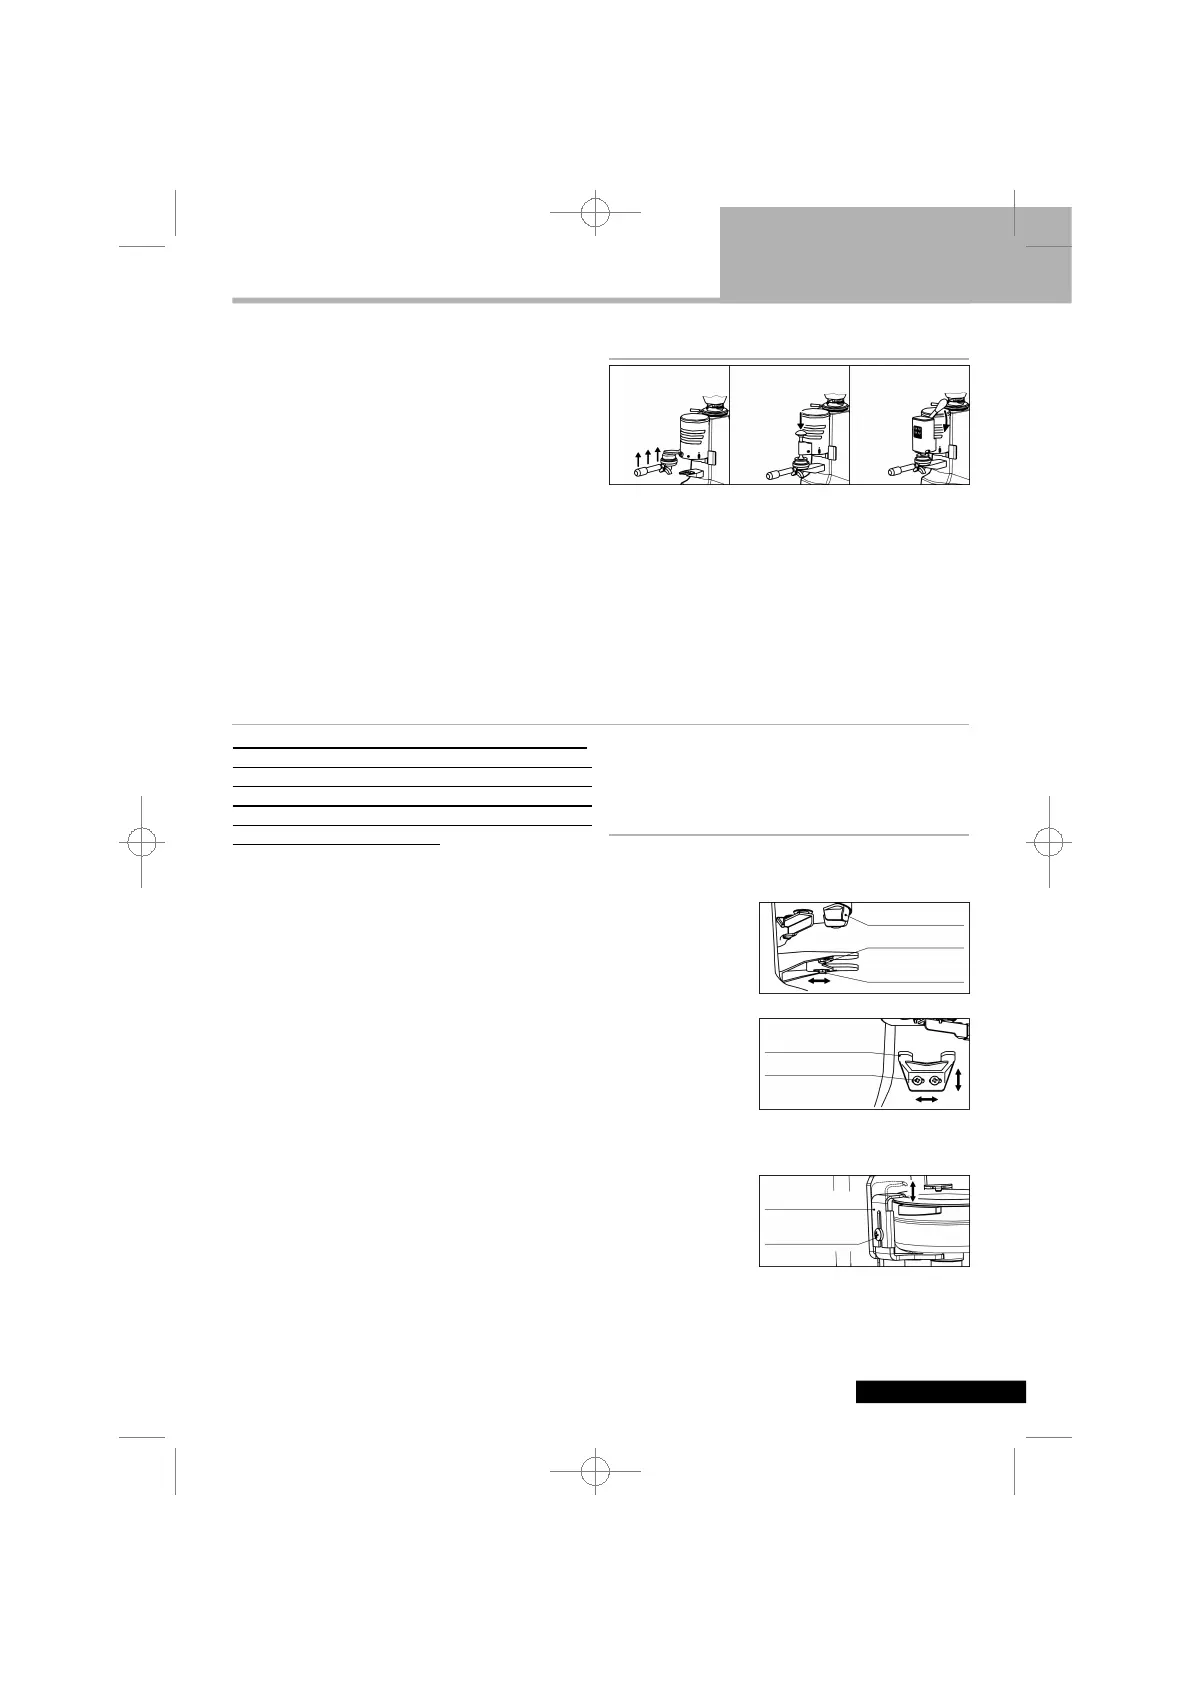
7.5. Pressing (Grinder-Dosers)
STATIC PRESSING DEVICE: place the filter holder
against the underside of the pressing device and push
upwards.
SPRING PRESSING DEVICE: place the compacting disk
against the upper face of the filter holder inserted in the fork-
shaped support and press down on the spring pressing
device knob.
EASY TAMPER: place the filter holder on the fork aligned
with the pressing disc and pull down the lever up to the sup-
port of the pressing disc on the edge of the filter holder.
EASY TAMPERSTATIC PRESSING DEVICE SPRING PRESSING DEVICE
8. APPLIANCE MAINTENANCE
Instructions stated in this section shall be solely car-
ried by persons having knowledge and practical
experience of the appliance, in particular for what is
concerning safety and hygiene, after disconnecting
the appliance from the mains supply by removing
the plug from the power outlet.
In order to assure the lasting efficiency of the
appliance, skilled technical personnel must be called
in to perform periodical maintenance, including
detailed checks of the state of those components
subject to wear.
• It is recommended to use original spare parts only.
• It is essential to check monthly the state of the sup-
ply cable and plug.
In the event the supply cable or plug are damaged,
call in skilled technical personnel to replace them,
this to prevent any risk.
In CE-certified appliances, a special tool is requi-
red to open the base plate to get at the cable.
• For an optimal functioning of the appliance a room
temperature range from 15°C to 35°C is sugge-
sted.
• Grind solely coffee beans. Any other use is under-
stood to be improper, and consequently hazar-
dous. The manufacturer cannot be held responsi-
ble for any damage as a result of improper or
incorrect use. Do not use the appliance for grinding
other types of food, or anything else.
• We recommend to check periodically the state of
the grinding blades. Keeping the grinding blades in
an excellent state assures high-quality grinding,
resulting in greater productivity and limited ove-
rheating.
For the correct use, whenever the grinding blades
have been replaced, grind some doses of coffee.
Do not use those first doses.
8.1. Filter holder fork setting
Grinder-Dosers
It is possible to adjust in horizontal, vertical and
depth directions the portafilter support position.
• For the depth
adjustment loosen
the bottom screws,
move the stop
plate to desired
position and fix the bottom screws again.
• For the
horizontal/vertical
adjustment loosen
the front screws,
move the filter hol-
der fork to desired position and fix the front screws
again.
Electronic Grinder-Dosers
To allow the correct
engagement of the
filter holder, the fork
must be set using
the side tongues.
Loosen the setscrews of the side tongues and place
the filter holder on the fork. Rest the side tongues on
the top surface of the filter holder and secure them
again.
STOP PLATE
BOTTOM SCREW
DOSER FUNNEL
FILTER HOLDER FORK
FRONT SCREW
LEFT TONGUE
LEFT TONGUE
SETSCREW


 To Next Page