- 7 -
Axis1Axis1
Axis1Axis1Axis1Axis1Axis1
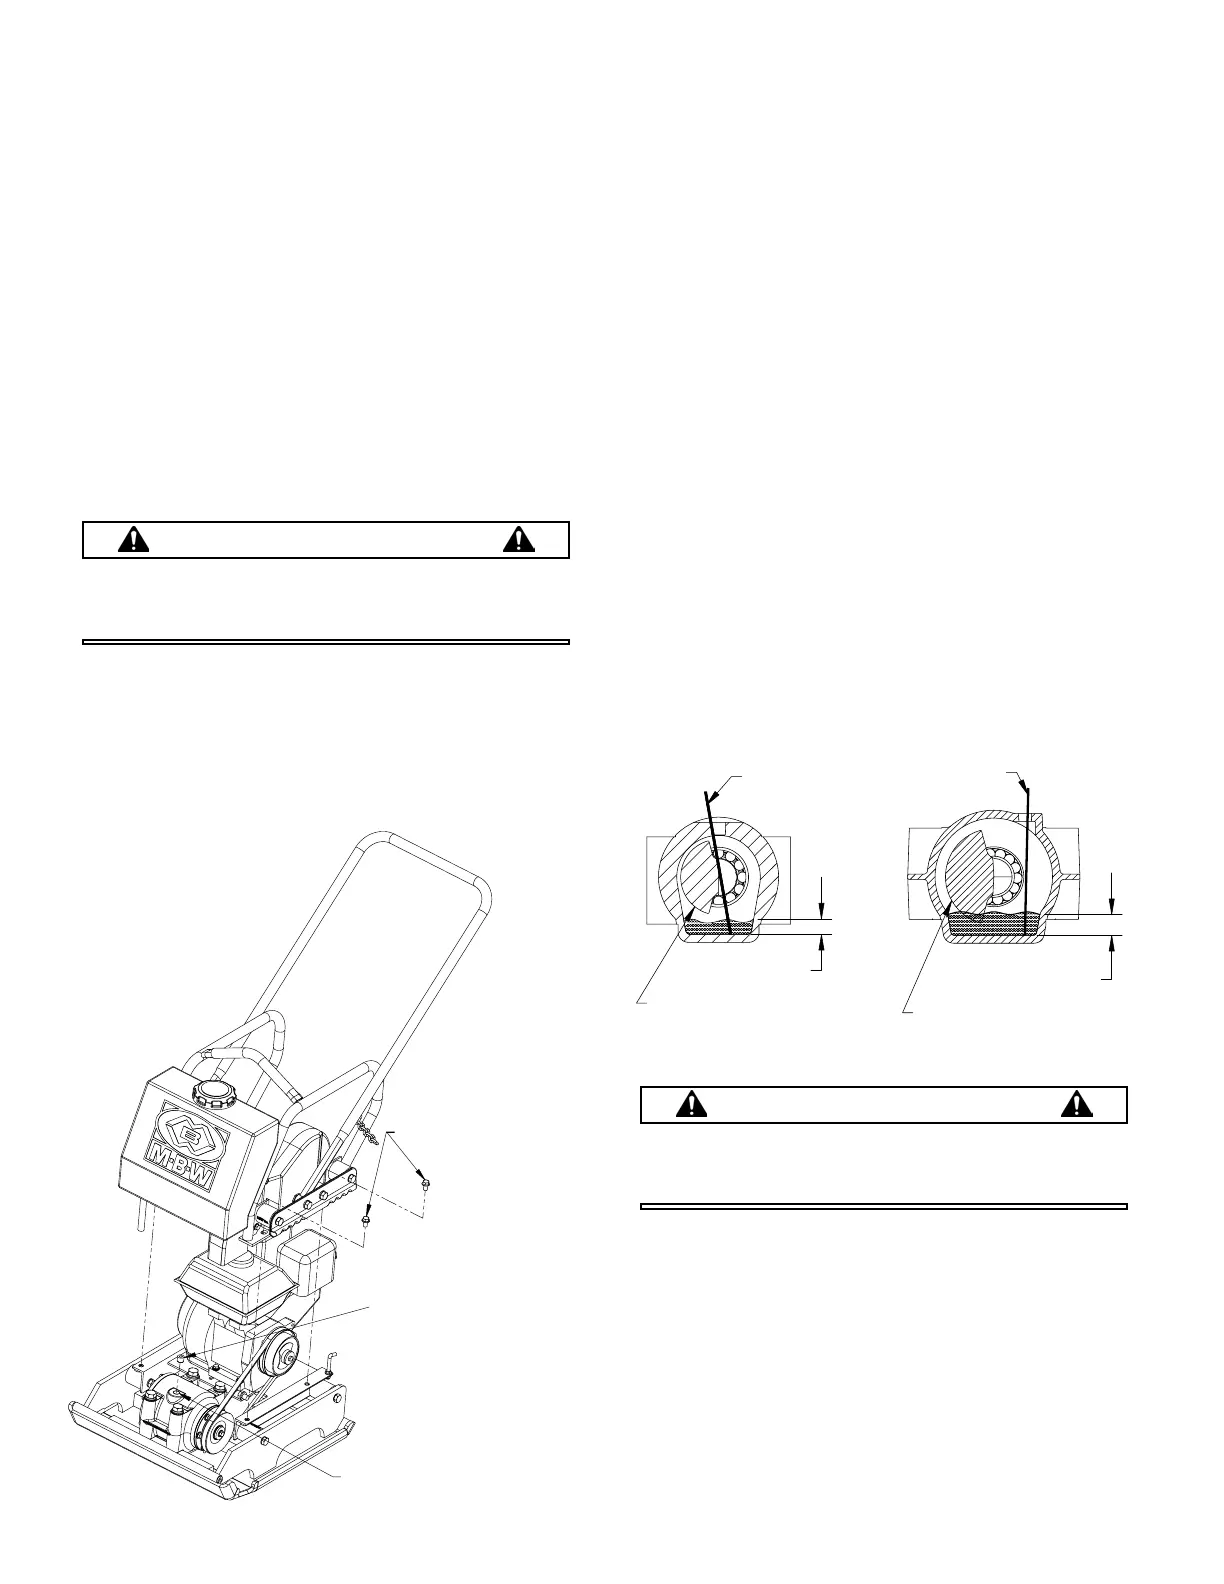
1"
7/8"
OIL LEVEL
.75 OIL LEVEL
2000 PLATE
DIP STICK
PLATE
EXCITER SHAFT
3550
FIGURE 2
EXCITER SHAFT
DIP STICK
2. Apply moderate thumb pressure to belt about half
way between pulleys. When properly adjusted the
belt should deflect approximately 3/8” (9mm). If the
belt is adjusted correctly reinstall belt guard and
hardware.
3. To adjust belt tension loosen (do not remove) the (4)
engine bolts.
4. Push engine towards the back of the plate. While
holding pressure on the engine retighten the (4)
engine bolts.
5. Recheck belt tension as described in step 2 and
readjust if necessary until the proper tension is
reached.
6. Reinstall roll cage assembly.
Checking Exciter Oil
WARNING
Exciter and oil is hot after machine has been
running. Allow machine to cool before servicing
unit.
1. Let exciter cool before checking oil.
2. Place plate on a level surface.
3. Remove roll cage assembly by removing (4) flange
screws securing roll cage to engine deck. If machine
is equipped with water tank disconnect hose from
spray bar on front of plate. Now entire roll cage
assembly, including roll cage, handle, water tank and
belt guard, can be removed (see Figure 1).
4. Clean all dirt and debris from exciter to prevent
contamination of exciter oil.
5. Remove pipe plug from top of exciter housing.
6. Rotate exciter shaft so a metal dip stick can be
inserted into exciter (see Figure 2).
7. Place a clean metal rod through the oil fill hole as
shown in figure 2.
8. Exciter should have approximately 3/4” (2000 plate)
7/8 to 1” (3550 plate) oil.
9. If oil need to be added, refer to Fluid Levels page of
this section for type of oil to be used. DO NOT
OVERFILL, over filling can cause excessive heat in
exciter.
10. Apply pipe sealant to pipe plug and reinstall into top
of exciter housing.
11. Reinstall roll cage assembly and re-attach hose to
spray bar.
Changing Exciter Oil
Exciter and oil is hot after machine has been
running. Allow machine to cool before servicing
unit.
1. Let exciter cool before changing oil.
2. Remove roll cage assembly by removing (4) flange
screws securing roll cage to engine deck. If machine
is equipped with water tank disconnect hose from
spray bar on front of plate. Now entire roll cage
assembly, including roll cage, handle, water tank and
belt guard, can be removed (see Figure 1).
3. Remove 1/2” hex head cap screws and lock washers
from side of bottom plate. Remove belt and engine
deck assembly. Refer to figure 3
OIL FILL/DRAIN HOLE
FIGURE 1
FLANGE SCREWS
PIPE PLUG