20
The MPC1500 Power Controller is very versatile in
its connection and operation in an Audio, Video or
Audio/Video System. There are two examples of con-
necting and using the MPC1500 on pages 17 and 18
of this Owner’s Manual. By becoming familiar with
the “How to Operate” section of this Owner’s Manual
many additional connection and operation possibilities
will become apparent.
Power Control
To have the MPC1500 automatically turn On or Off
when a Preamplifier or A/V Control Center turns on
or off, rotate the POWER CONTROL Switch to the
REMOTE position. For manual
operation, rotate the POWER CON-
TROL Switch to the ON or OFF
position as desired. Refer to figure
10.
Notes: 1. There must be a power
control connection
between the MPC1500
Global Power Control Input and the Pream-
plifier or A/V Control Center, in order for the
remote power turn-on to function.
2. When the POWER CONTROL Switch is
placed in the ON the position, the Global
Power Control Input activation is overridden.
3. AC Outlets 3 thru 6 switch On in sequence
with a slight delay in time between each outlet
activation.
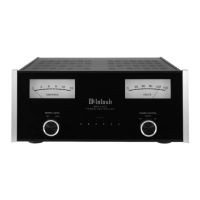
Meter Illumination
Rotate the METER LIGHTS Switch to select the me-
ter operation mode you desire. Refer to figure 12.
OFF - Meter lights are switched Off.
Note: The meters will continue to indicate
the Input AC
Line Voltage
and the con-
sumed Current.
AUTO - Meter lights are switched
On. When Global Power
Control Input of the
MPC1500 is connected
to a McIntosh Preamplifier or A/V Control
Center with Remote Meter Illumination
Control, the Meter Illumination will be
remotely controlled (On/Off).
Volt Meter
The VOLTS Meter indicates the AC Voltage avail-
able at the AC Outlets on the MPC1500 Rear Panel.
Refer to figure 13. The MPC1500 utilizes a very
large isolation power transformer, so essentially the
VOLTS Meter reading is a reflection of the incoming
AC Line Voltage. If the VOLTS Meter reading starts
to drop more than several volts (from the nominal
voltage reading at lower current consumption) when
the MPC1500 AMPERES Meter indicates 3 Amps of
current or greater, it may be an indication of a condi-
tion known as “AC Line Sag”. AC Line Sag is usually
a result of limitations in the AC Wiring in the walls
due to small wire size and/or long lengths of wire. For
additional assistance in this matter contact your McIn-
tosh Dealer and/or Electrical Contractor.
Current Meter
The AMPERES Meter indicates the total amount of
current being consumed by the components connected
to the MPC1500 AC Outlets. Refer to figure 14. It is
normal for the AMPERES Meter indication to fluctu-
ate especially when a Power Amplifier or Integrated
Amplifier is connected to the MPC1500 AC Outlets
and music is being played loudly.
Rear Panel Options
AC Outlets number 3 thru 6 can be individually con-
figured to become active via three different methods
using the Rear Panel Switches. The first way is using
the default configuration (the switch in the GLB posi-
tion) where the outlet is controlled to switch On or
Off via the MPC1500 Global Power Control Input or
the Front Panel Power Control Switch. Refer to figure
15 on the next page. The second option is to have any
one of the AC Outlets (number 3 thru 6) controlled
independently On/Off via the MPC1500 Local Power
How to Operate
Figure 10

 Loading...