1-18
Sealing Material
• It is possible to seal one of the four air discharge outlet. (sealing two or more air discharge outlet could cause a
malfunction)
• Remove the front panel and insert the sealing material into the air discharge outlet on the indoor unit to seal the air
outlet.
• The sealing material is the same length as the longer air discharge outlet. If it is desired to seal the shorter air discharge
outlet, cut the sealing material to shorten it.
• Push the sealing material in about 10 mm beyond the bottom surface of the indoor unit so that it does not touch the air
louver. Be sure not to push the sealing material in any farther than about 10mm.
Short Duct Specifi cation
• The indoor unit is provided with air discharge and air intake “knock-out” hole for duct connection. However the connection
of the short duct for air discharge is possible on only one side.
• The use of short duct for air discharge will improve airfl ow distribution if there is an obstruction (such as a lighting fi xture)
or in a long, narrow room or an L-shaped room. It also use for air conditioning of two rooms simultaneously.
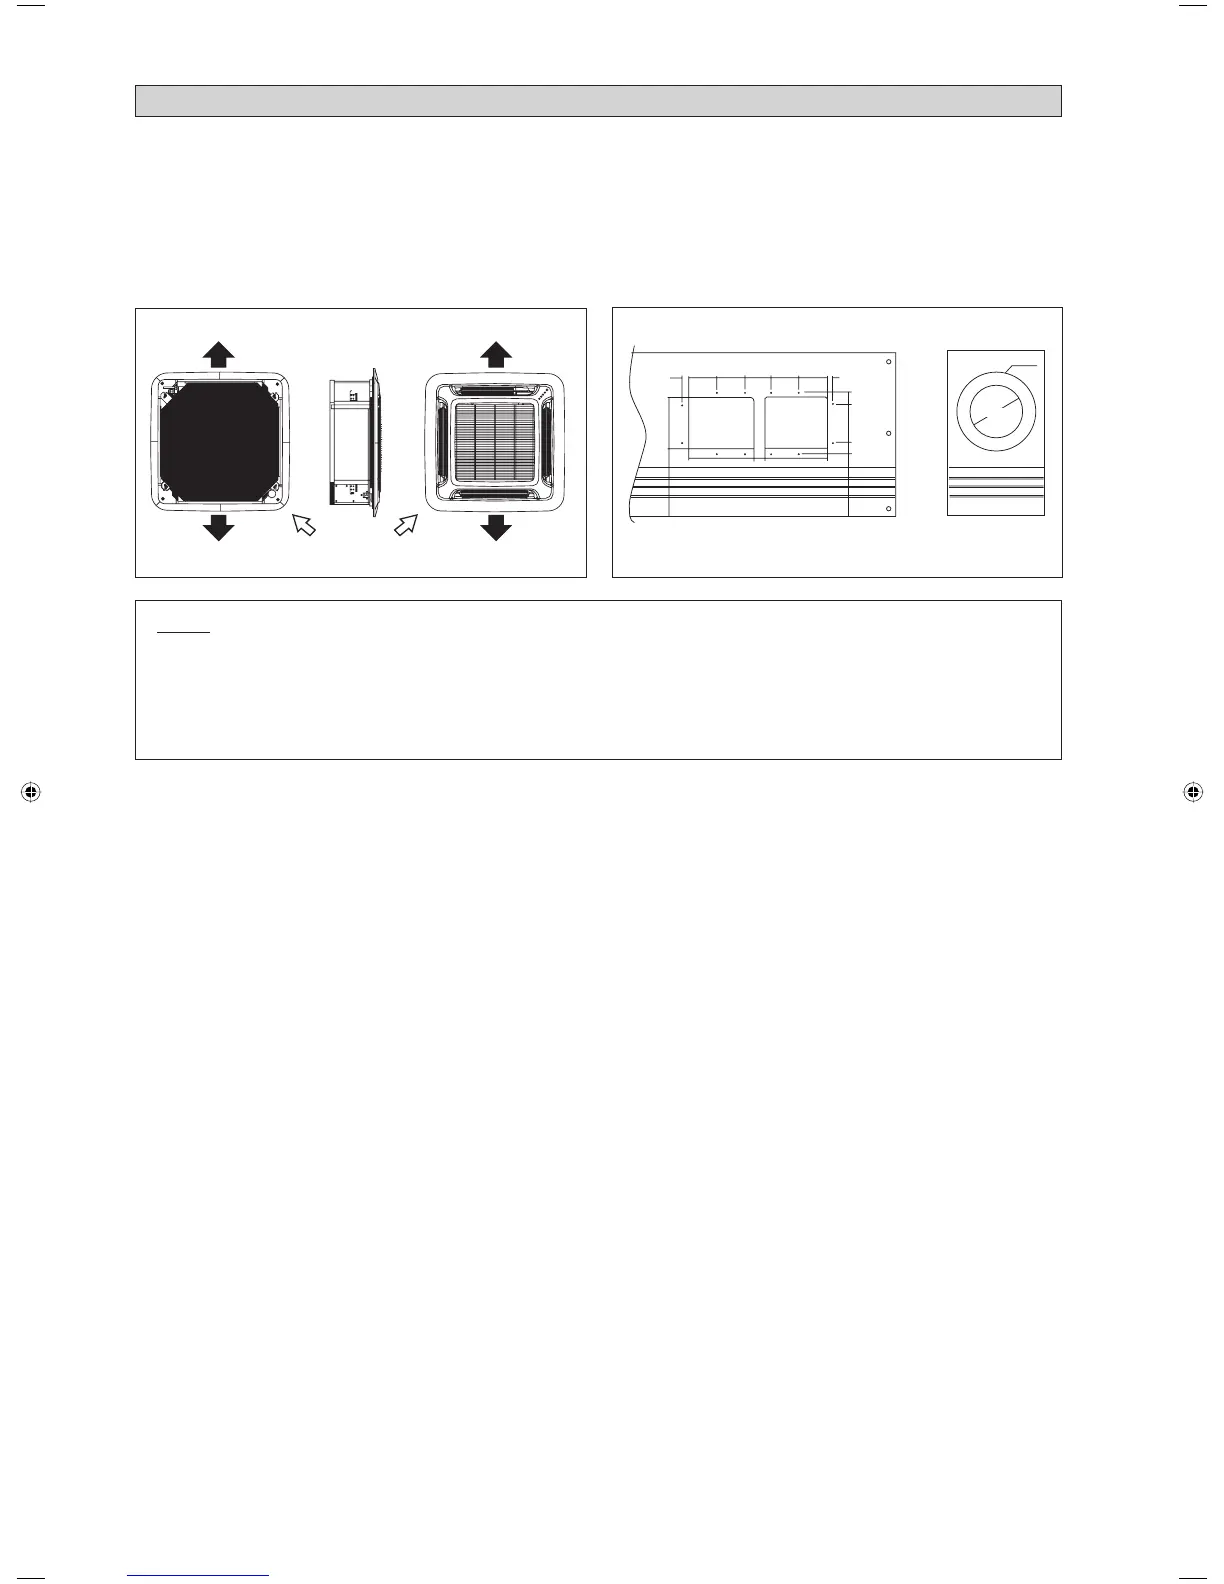
Possible Opening Dimension For Duct Connection
Air Discharge Knock Out Hole
Air Intake Knock
Out Hole
Possible Direction For Air Discharge And Air Intake
Air Intake
Air DischargeAir Discharge
Air Discharge Air Discharge
10
50 50 50 50 50 10
207020
90
Ø100
PCD Ø140
115 20 115
ACCESSORY PARTS
NOTE
• Avoid using the short duct on which the air discharge grille can be completely closed, to prevent evaporator
freezing.
• In order to prevent condensation forming, be sure that there is suffi cient thermal insulation and no leakage of cool
air when installing the short duct.
• Keep the introduction of fresh air intake within 20% of total air fl ow. Also provide chamber and use booster fan.
1 EN 5CKYER-1009(1).indd 181 EN 5CKYER-1009(1).indd 18 4/21/11 9:11:22 AM4/21/11 9:11:22 AM
 Loading...