OM 897 / Page 7 of 12
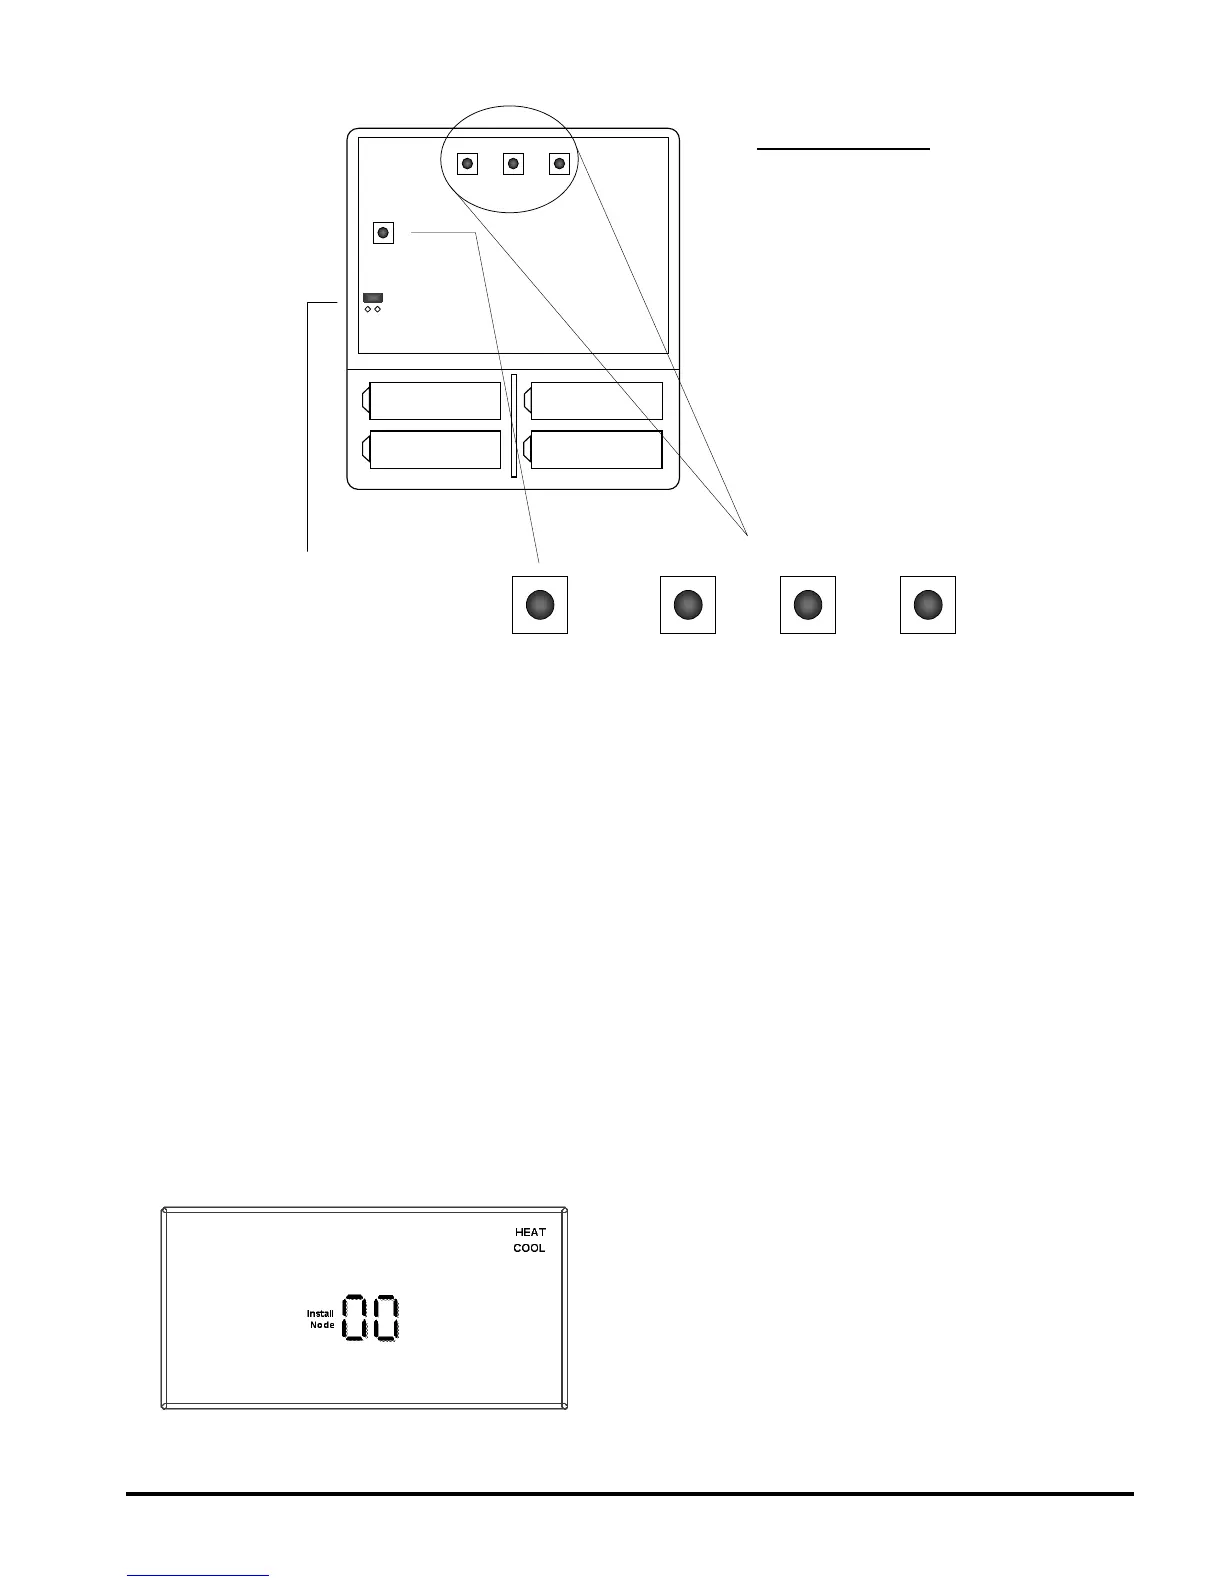
Figure 8. Internal Buttons
Installing Nodes
Step 1
Press the SW4-INSTALL. button inside the
thermostat. The display will change to the Install
Session screen shown in Figure 8, with the “install”
icon blanking.
The display always blinks the item that is active
and can be changed.
Step 2
The UP button on the front of the thermostat is used
to toggle between the following two choices:
Install - Install a Node
Remove - Uninstall ALL Nodes
(The Remove option will be discussed later.)
Figure 9. Install Setup Display
Press the HEAT/COOL to select install.
Step 3
The node number digits will now ash. Use the UP
button to set the node number you wish to install 0-7. If
this is the rst node or only node to be installed to this
thermostat, leave the node number at zero.
Press the HEAT/COOL button to select the node
number.
Step 4
The control node can be installed to a thermostat as a
HEAT only, COOL only or HEAT & COOL node. After
selecting the node number, the HEAT and/or COOL icon
will ash in the upper right hand quarter of the display is
shown in Figure 8. Press the UP button to scroll through
the following three choices:
Heat - Install node as a heating only control
Cool - Install node as a cooling only control
Heat/Cool - Install node as a heating and cooling
control
Press the HEAT/COOL button when the appropriate
icon is displayed.
SW12-RESET SW4-INSTALL SW9-LINK
PB1-NETWORK
Set A Set A
Set B Set B
SW12-RESET
SW4-INSTALL
SW9-LINK
Internal T9000 buttons
PB1-NETWORK
Used to uninstall the thermostat
from node(s) it has been linked to.
SW12-RESET
Master Reset – Returns
thermostat to all factory defaults.
SW4-INSTALL
Starts an installation session.
SW9-LINK
Used to Link the thermostat to
control nodes.
PB1-NETWORK
JP3 - Program
JP4 – Non Program
Program Jumper
JP3 = Programmable
JP4 = Non-Programmable