EasyManua.ls Logo

MDB Family 4791 User Manual

MDB Family 4791
12 pages
To Next Page IconTo Next Page
Page #1 background imageLoading...
Page #1 background image
page 1
revised 20MAY2013
Crib (4791) - Assembly and Operation Manual
Lit de bébé (4791) - Manuel d’assemblage et d’utilisation
Congratulations on purchasing an MDB Family product. This crib will provide many years of service if
you adhere to the following guidelines for assembly, maintenance and operation. This crib is for residen-
tial use only. Any institutional use is strictly prohibited.
Please be sure to follow the instructions for proper assembly. Use a Phillips head screwdriver for assembling
the crib in addition to the Allen wrench included in the hardware box. Do not use power screwdrivers. All
of our cribs are made from natural woods. Please understand that natural woods have color variations
which are the result of nature and not defects in workmanship.
DO NOT SUBSTITUTE PARTS. ALL MODELS HAVE THE SAME QUANTITY OF PARTS AND HARDWARE.
YOUR MODEL MAY LOOK DIFFERENT FROM THE ONE ILLUSTRATED DUE TO STYLISTIC
VARIATIONS.
Nous vous félicitons de votre achat d’un produit MDB Family. Ce lit de bébé vous procurera des années
de service si vous suivez les directives ci-dessous pour l’assemblage, l’entretien et l’utilisation. Ce lit est
destiné uniquement à une utilisation résidentielle. Toute utilisation dans une institution est strictement
interdite.
Prenez soin de suivre les instructions pour réaliser correctement l’assemblage. Utilisez un tournevis
cruciforme pour l’assemblage, en plus de la clé hexagonale incluse dans la boîte de quincaillerie.
N’utilisez pas un tournevis électrique. Tous nos lits d’enfants sont fabriqués en bois naturel. Il faut
comprendre que le bois présente des variations de couleur attribuables à la nature et non à un défaut
de fabrication.
NE PAS UTILISER DES PIÈCES DE SUBSTITUTION. TOUS LES MODÈLES ONT LE MÊME
NOMBRE DE PIÈCES ET D’ACCESSOIRES DE MONTAGE. VOTRE MODÈLE PEUT DIFFÉRER DE
CELUI ILLUSTRÉ EN RAISON DE VARIATIONS STYLISTIQUES.
* The crib can later be
converted into a toddler bed or
a full-size bed. To convert to a
toddler bed, turn to page 10. To
convert to a full-size bed, turn to
page 11.
*Le lit de bébé peut être
converti plus tard en un lit pour
tout-petit ou en un lit à une
place. Pour convertir le lit en un
lit pour tout-petit, passez à la
page 10. Pour convertir le lit en
un lit à une place, passez à la
page 11.
Question and Answer IconNeed help?

Do you have a question about the MDB Family 4791 and is the answer not in the manual?

MDB Family 4791 Specifications

General IconGeneral
BrandMDB Family
Model4791
CategoryBaby & Toddler Furniture
LanguageEnglish

Summary

Assembly Steps

Step 1: Headboard Assembly

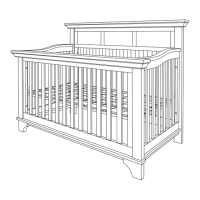
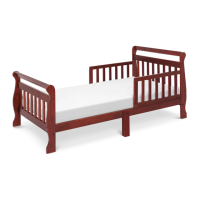
Assemble the headboard using rear left leg, rear right leg, headboard side, and cross bar.

Step 2: Side Panel Attachment

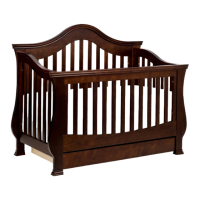
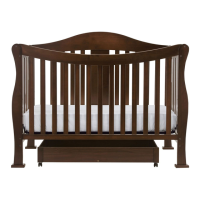
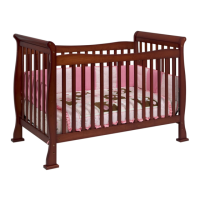
Attach left leg to left side and right leg to right side using machine bolts, barrel nuts, and lock washers.

Step 3: Connecting Sides to Headboard

Attach the assembled left and right sides to the headboard using machine bolts, barrel nuts, and lock washers.

Step 4: Spring Frame Installation

Attach the spring frame to side panels using Allen head bolts, washers, lock washers, and Allen wrench.

Step 5: Cross Bar Attachment

Attach the cross bar to the left and right sides using machine bolts, barrel nuts, and lock washers.

Step 6: Stationary Side Attachment

Attach the stationary side to the left and right sides, then tighten cross bar screws.

Child Safety and Safe Usage

Safe Environment and General Precautions

Ensure a safe environment by checking components and following instructions to prevent suffocation, strangulation, and SIDS.

Disassembly Warning

Important warning: Do not remove any wood screws during the normal disassembly of the crib.

Product Information and Support

One Year Limited Warranty

Covers replacement of missing or defective parts within one year of original purchase. Does not cover used or demo models.

Storage Recommendations

Place furniture away from vents and direct sunlight to protect wood finish and prevent damage.

Care and Cleaning Instructions

Clean with mild soap and soft rag. Avoid abrasives; refinishing voids warranty.

Daybed Conversion Assembly

Step 1: Remove Stationary Side

Unscrew and remove the 4 Allen head bolts and lock washers to detach the stationary side.

Step 2: Adjust Spring Frame

Move the spring frame to the lowest possible level.

Step 3: Attach Guard Rail

Attach the guard rail to headboards using 1 3/4" Allen head bolts and lock washers securely.

Related product manuals