EasyManua.ls Logo

MDB Family 8201 User Manual

MDB Family 8201
11 pages
To Next Page IconTo Next Page
Page #1 background imageLoading...
Page #1 background image
revised 07JUN2011
page 1
Congratulations on purchasing a MDB Family product. This crib will provide many years of service if
you adhere to the following guidelines for assembly, maintenance and operation. This crib is for resi-
dential use only. Any institutional use is strictly prohibited.
Please be sure to follow the instructions for proper assembly. Use a Phillips head screwdriver for
assembling the crib in addition to the Allen wrench included in the hardware box. Do not use power
screwdrivers. All of our cribs are made from natural woods. Please understand that natural woods have
color variations which are the result of nature and not defects in workmanship.
DO NOT SUBSTITUTE PARTS. ALL MODELS HAVE THE SAME QUANTITY OF PARTS AND HARD-
WARE. YOUR MODEL MAY LOOK DIFFERENT FROM THE ONE ILLUSTRATED DUE TO STYLIS-
TIC VARIATIONS.
Ashbury 4 in 1 Crib (8201) - Assembly and Operation Manual
* The Ashbury 4 in 1 crib can later be converted into a toddler
bed or a full-size bed. To convert to a toddler bed, turn to
page10. To convert to a full-size bed, turn to page 11.
Question and Answer IconNeed help?

Do you have a question about the MDB Family 8201 and is the answer not in the manual?

MDB Family 8201 Specifications

General IconGeneral
BrandMDB Family
Model8201
CategoryBaby & Toddler Furniture
LanguageEnglish

Summary

Ashbury 4-in-1 Crib Assembly and Operation Manual

General Welcome and Usage Guidelines

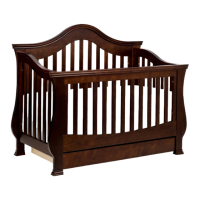
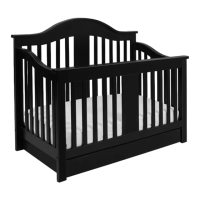
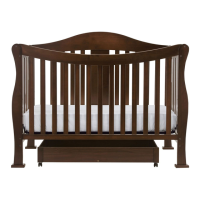
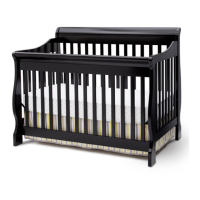
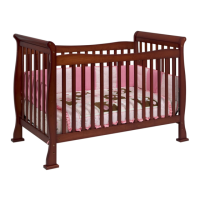
Provides congratulations, general assembly and operation advice, residential use only, and notes on natural wood characteristics.

Crib Parts Identification

Component and Hardware Listing

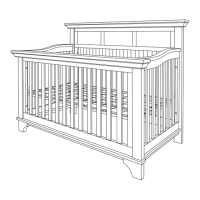
Detailed list and illustration of all crib parts and hardware required for assembly.

Crib Assembly Steps

Step 1: Attach Panel Glides

Instructions for attaching panel glides to glide support rails using specific hardware.

Step 2: Set Up Posts

Guidance on correctly positioning and setting up the crib posts.

Step 3: Attach Side Top Bar and Posts

Connects the side top bar, posts, and glide support rails to the side panels.

Step 4: Set Up Back Panel and Top Bar

Instructions for assembling the back panel and back top bar.

Step 5: Attach Spring Frame

Details on securely bolting the spring frame to the crib legs at the desired height.

Step 6: Set Up Front Panel and Top Bar

Guides the setup of the front panel and front top bar for the crib.

Step 7: Attach Drawer Glides

Instructions for attaching drawer glides to the respective drawer panels.

Step 8: Set Up Drawer Panels

Assembling the main structure of the drawer using its various panels.

Step 9: Attach Drawer Front Panel

Securing the front panel to the assembled drawer structure.

Step 10: Slide Drawer Under Crib

Final step to insert the completed drawer into the crib.

Mattress and Safety Information

Crucial details on mattress size, recording product info, and general safety reminders.

Safety Warnings and Product Care

Critical Safety Precautions

Essential warnings regarding potential hazards like strangulation, suffocation, and proper crib usage.

Warranty, Storage, and Cleaning Advice

Information on the one-year limited warranty, proper storage, and cleaning methods.

Toddler Bed Conversion

Conversion Steps and Safety Guidelines

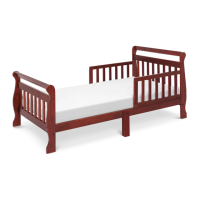
Instructions for converting the crib to a toddler bed, including mattress specifications and safety warnings.

Full Size Bed Conversion Rails Assembly

Rail Assembly and Hardware

Steps and hardware details for assembling the conversion rails to form a full-size bed.

Related product manuals