Do you have a question about the Meade 1244 and is the answer not in the manual?
Details on using the standard 3-button hand controller for coarse and microfine focus adjustments.
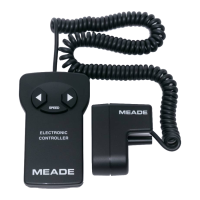
Instructions for operating the focuser using the ETX-EC/ETX-105EC Electronic Controller.
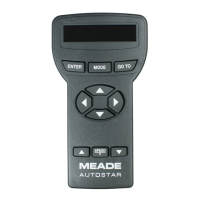
Guide to using the #497 Autostar Computer Controller for focus control and speed selection.
The Meade #1244 Electric Focuser is an accessory designed to rapidly and precisely adjust the focus of Meade ETX-90 and ETX-105 telescope models. This device enhances the focusing experience by offering both coarse and microfine speed adjustments, providing users with greater control over image clarity.
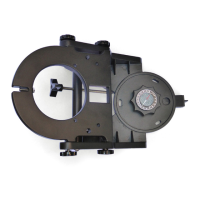
The primary function of the #1244 Electric Focuser is to replace the manual focus knob on compatible ETX telescopes with an electronically controlled focusing mechanism. This allows for smoother and more precise focus adjustments, which is particularly beneficial for high-magnification observations and astrophotography where even slight vibrations from manual adjustments can blur the image. The focuser operates by driving a gear that engages with the telescope's existing focus shaft, effectively automating the focusing process.
The #1244 Electric Focuser is specifically designed for use with Meade ETX-90 and ETX-105 telescope models. It includes a gearbox with an attached coiled cord, a 3-button hand controller, a 1.75"-long hex-head screw, a 1" diameter brass focusing gear, a mounting plate, and a set of three hex-wrenches for installation. The hand controller requires one user-supplied 9-volt battery for operation when used independently.
When integrated with ETX-EC Astro Telescopes, the focuser's functions can be controlled directly by the Electronic Controller (standard with ETX-90EC or ETX-105EC) or the optional #497 Autostar Computer Controller, bypassing the need for the focuser's own 3-button hand controller. This integration allows for a more streamlined control experience, especially for users already familiar with the Autostar system.
The manual does not explicitly detail specific maintenance features for the #1244 Electric Focuser itself beyond proper installation and battery replacement for the hand controller. However, the instruction to retain the original hex-head screw and focus knob suggests a design that allows for easy removal and re-installation of the manual focuser, implying a degree of modularity and user-serviceability for switching between electric and manual focusing if needed. For any questions or issues regarding the use of the Meade #1244 Electric Focuser, customers are advised to contact the Meade Instruments Customer Service Department during their operating hours (8:30 AM to 4:30 PM Pacific Time, Monday through Friday).
| Brand | Meade |
|---|---|
| Model | 1244 |
| Category | Accessories |
| Language | English |