Do you have a question about the Meade ETX-AT and is the answer not in the manual?
Position the telescope pointing North, ensuring the tube is level and locked for initial setup.
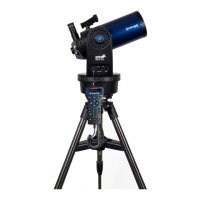
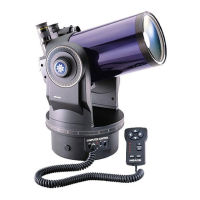
Align the telescope with celestial objects using the red-dot finder and AudioStar handbox for accurate pointing.
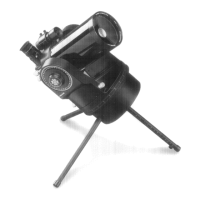
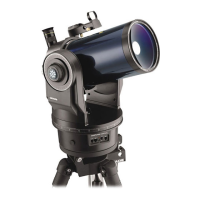
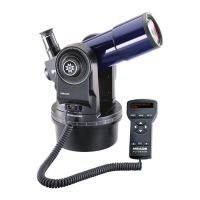
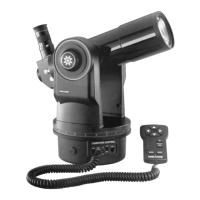
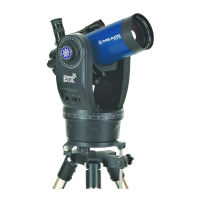
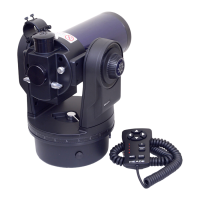
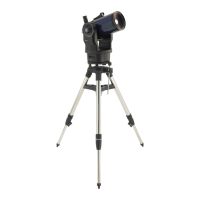
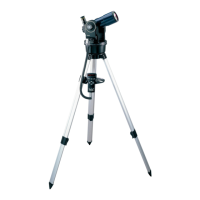
The Meade ETX-AT is a compact, computerized Go-To telescope designed for astronomical observation. It features a Maksutov-Cassegrain optical tube assembly (OTA) known for its sharp, high-contrast views and portability. The telescope is mounted on a dual-fork arm alt-azimuth mount, which can be configured for either alt-azimuth or equatorial alignment, making it versatile for both terrestrial and celestial viewing.
The ETX-AT's primary function is to provide automated tracking and location of celestial objects. It achieves this through its integrated AudioStar computer control system, which contains a database of thousands of astronomical objects. Users can select an object from the database, and the telescope will automatically slew to its position and track it as it moves across the night sky. The red-dot viewfinder assists in initial alignment and manual targeting, while the focus knob allows for precise image sharpness adjustment. The 90-degree flip-mirror control knobs enable switching between a straight-through view (for photography) and a 90-degree angled view (for comfortable visual observation with an eyepiece). The mount includes horizontal (R.A.) and vertical (Dec.) lock knobs to secure the telescope's position, as well as setting circles for manual celestial coordinate input.