EN
41
Green/yellow/red
The battery is fully charged.
Yellow/red
The battery is partially discharged.
Red
The battery needs charging.
TORQUE SETTING
The drill driver has 19 torque settings, which
are used to prevent damage to screws and
drills. Set a suitable mode, from 1 (light
screwdriving) to full power (heavy screwdriving/
drilling), by turning the torque adjuster. Always
select the torque that best suits the job. If in
doubt, start with a low torque and increase to
the required torque.
FIG. 4
NOTE:
Do not use drilling mode for screwdriving.
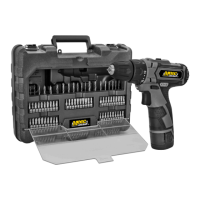
BRACING TOOL INSERTS
The drill driver has a quick chuck. Accessories
are changed quickly and easily without a chuck
key.
1. Open the jaws of the quick chuck by
turning clockwise until the opening is big
enough for the tool insert (see Technical
data).
2. Insert the tool insert in the quick chuck.
3. Screw the quick chuck clockwise to rmly
tighten.
NOTE:
Only use tool inserts that can be xed in the
chuck and which are intended for this tool.
See Technical data.
13. Charge indicator
FIG. 1
USE
CHARGING THE BATTERY
IMPORTANT:
• The battery is not fully charged on
delivery. Charge the battery before using
for the rst time.
• Only use the supplied charger to charge
the battery.
• Check that the voltage reading on the
charger corresponds with the mains
voltage before connecting the charger.
1. Press the release button on the battery
and pull it out of the driver.
FIG. 2
1. Plug the charger into a power point.
2. Insert the battery in the charger to
connect the battery and charger.
The battery should snap into place
in the charger.
FIG. 3
3. The charge indicator goes red rst. When
the battery is fully charged the charge
indicator goes green.
4. Unplug the charger from the power point
and remove the battery from the charger.
NOTE:
Remove the battery from the charger
when it is fully charged. The charger and
battery gradually get warm during the
charging, which is normal and not a sign of
malfunctioning.
Charging level
The charging level is indicated as follows: