EN
20
NOTE:
Even minor leakage can lead to malfunction.
FIG. 4
4. Plug in the plug and start the pump.
NOTE:
The preset start pressure is 1.5 bar and the
preset stop pressure is 3 bar. This is suitable
for most installations. Any adjustment should
be carried out by qualied personnel.
FIG. 5
5. Switch o the product and pull out the
plug after use. Drain the water from the
product by opening the drain on the
pump. The water in the tank can also be
drained as shown in the gure.
FIG. 6
MAINTENANCE
WARNING!
Switch o the product and pull out the plug
before maintenance and/or cleaning.
NOTE:
The system is pressurised.
After opening the rell cap or the drain, and
before releasing the connecting hoses, open
the shut-o valve on the outlet side and drain
the water from the system with a drain cock
(sold separately).
REPAIRS
Any repairs and replacement of spare parts
should be carried out by an authorised service
centre, otherwise there is a risk of personal
injury and/or material damage. Switch o the
product and pull out the plug before working
on the product.
STORAGE
Store the product in a frost-free place.
PUMPABLE LIQUIDS
• Processed water
• Well water
• Water from spring
• Rainwater
• Pool water (on the assumption that
additives are correctly dosed)
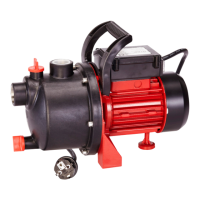
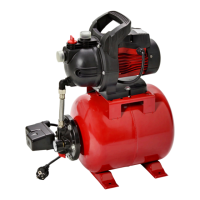
PRODUCT PARTS
1. Mechanical pressure switch
2. Pressure gauge
3. Water inlet
4. Filter casing
5. Water outlet
6. Power switch
7. Tank
FIG. 1
USE
BEFORE USE
• Check that the mains voltage corresponds
to the rated voltage on the type plate.
• It is recommended to use a pre-lter and
intake system with suction hose, inlet
grille and non-return valve to prevent slow
lling of water and damage to the pump
from stones and other solid particles.
1. Remove the product from the packaging
and place it on a level, stable surface.
Fix in place with screws (sold separately)
if necessary.
FIG. 2
2. Connect the suction hose to the water
inlet and the outlet hose to the water
outlet.
FIG. 3
3. Open the lter cover with the screwdriver
and ll with water until it runs over.
Replace the lter cover and tighten with
the screwdriver.