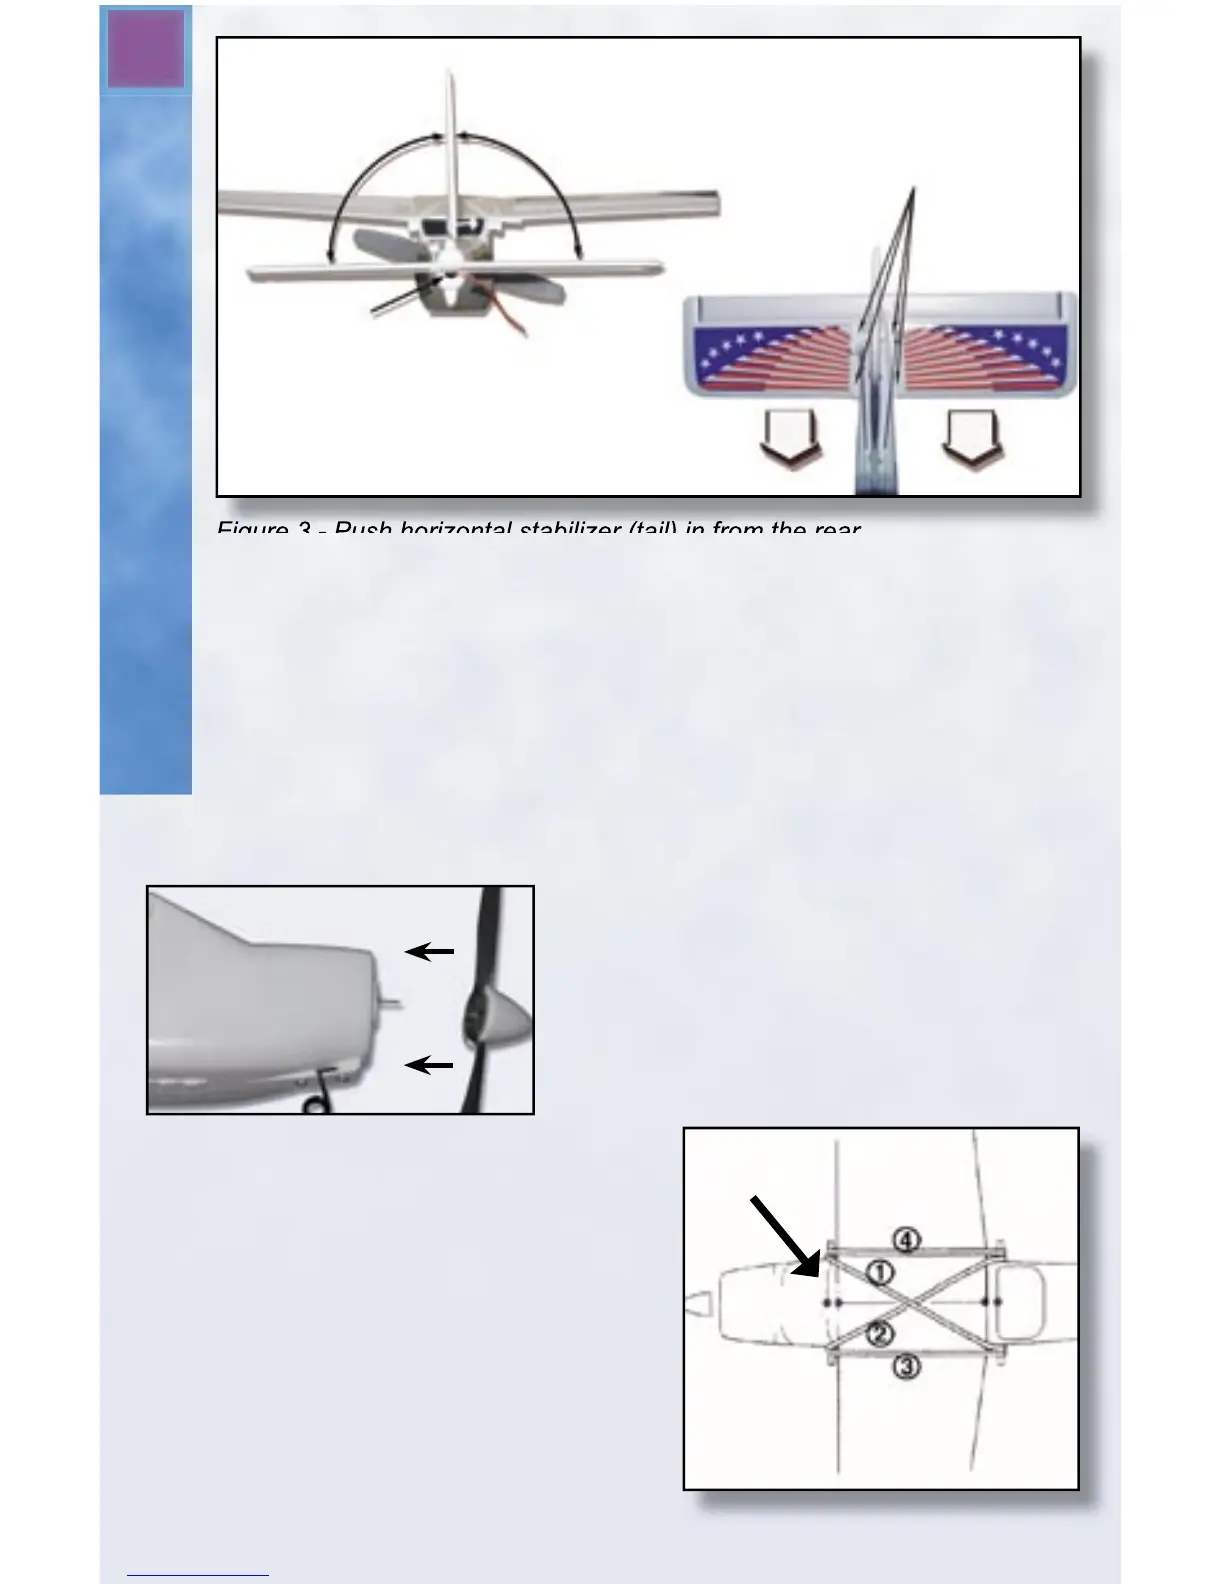
Apply
tape
here.
90°
90°
Antenna should
exit here.
Insert
screws
here.
Phillip’s head screwdriver and insert the screws into the pre-drilled
holes in the tail as shown in Figure 3. Be careful not to over-tighten
the screws.
Next, snap the plastic control links into place. The clevis (hook) at
the end of the push rod on the left side of the plane (when held nose
down) attaches to the horn on the rudder. The clevis on the right
connects to the elevator control horn. Don’t worry if the rudder and
elevator are not straight. They will be adjusted later.
Step 3: Attach the Propeller
Find the propeller with built-in nose
cone. Firmly, but carefully, press it onto
the prop shaft at the nose of the plane
as shown in Figure 4.
Step 4: Attach the Wing to the
Fuselage
A. Set the wing on the fuselage.
Carefully align the center of the
wing onto the saddle area of the
fuselage. Look at the picture on
the box if you’re not sure what is
the front and what is the back of
the wing.
Figure 4 - Gently push nose cone
onto propeller shaft.
Alignment Marks
Figure 5 - Attaching the Main Wing
 Loading...