Sanding the body
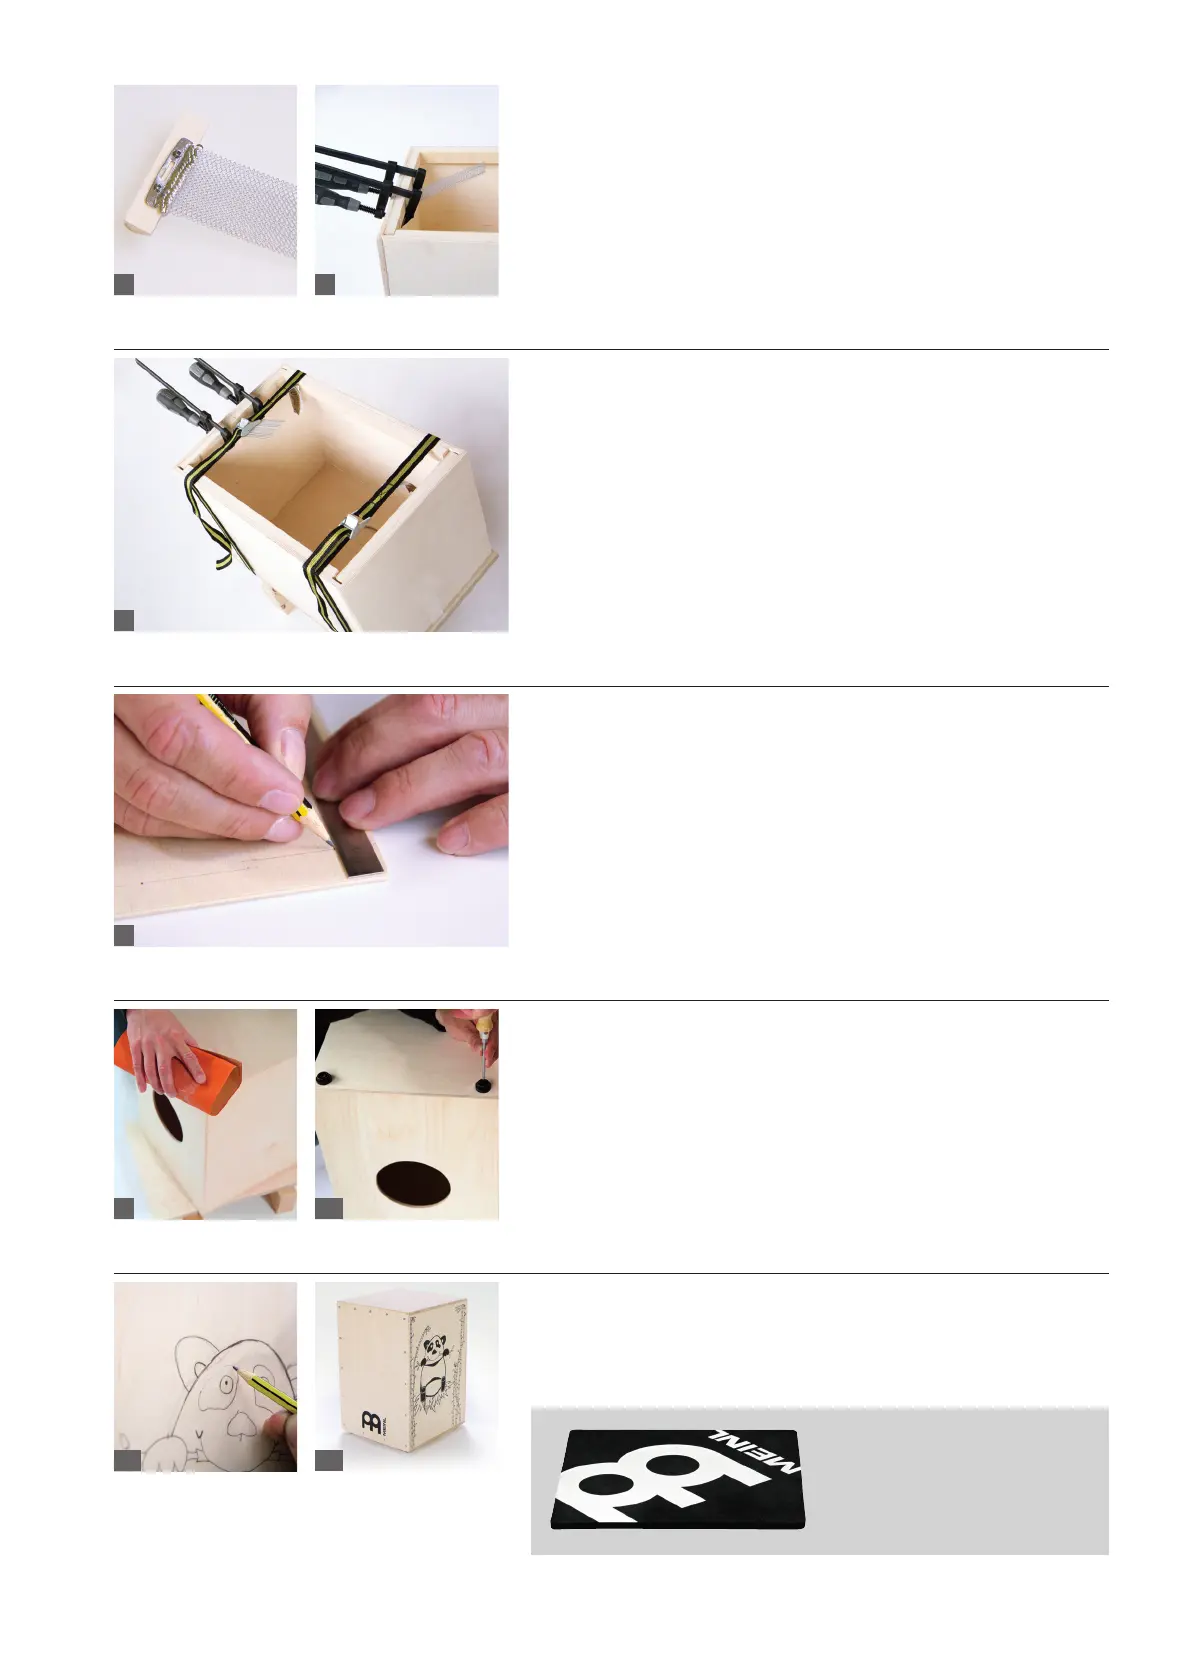
The snare is tted as shown in Fig. 5, in the middle of the hypotenuse of the
triangular batten. The snare should be mounted using the two 3 x 12 mm screws.
Mount the snare with its soldered side facing up as illustrated in Fig. 5. Next, the
surfaces for joining the front and rear panels of the cajon body should be sanded.
It is important that the joining surfaces should be sanded smooth in order to create
a perfect seat for the front and rear panels. Next, the triangular batten, to which
the snare has already been attached, is glued centrally as shown in Fig. 6. A small
screw clamp or glue clamp will be needed here to secure the batten. For this step,
the glue must be allowed to dry for approx. 60 minutes.
Gluing the rear panel
To ensure that the rear panel will be securely bonded, we recommend the use of a
multiplex board or similar; this should be approximately 10 - 20 mm larger than the
rear panel. The two wooden battens (approx. 25 x 25 x 300 mm) make it easier to
apply the necessary pressure with the screw clamps or belt clamps. Glue is now
applied all over the rear side of the cajon body. Important: the rear side is the side
that has no battens already attached. The rear panel is laid down on the multiplex
board, which in turn is laid on the two battens, see Fig. 7, which are used as an
assembly aid. The rear panel is secured using adhesive tape with a slight overhang
beyond the cajon body on all four sides. Next, the screw clamps or belt clamps are
used to apply pressure to the rear panel as shown in Fig. 7. The positioning of the
rear panel should now be checked again, and then the glue should be allowed to
dry for approx. 120 minutes.
Screwing the front panel on
A diagram showing the positions of the 15 holes for securing the front panel can be
found overleaf. We recommend that the holes are measured out accurately on the
front panel, see Fig. 8. The 15 holes are drilled using the 3 mm drill bit. Important:
the assembly battens should be used when each hole is drilled to avoid damage
to the work surface. Using either the manual countersink or a 12 mm metal drill bit,
the holes should now be countersunk to allow the screw heads to end up ush with
the surface. The front panel is screwed to the body using 15 screws (3 x 20 mm).
Important: again make sure that the overhang is even (as for the rear panel) and use
adhesive tape to initially secure the panel. The best way to screw the front panel on
is to use the four corners and pre-drill the holes with the 3 mm wood drill bit to a
depth of approx. 6 to 8 mm.
Sanding, then tting the rubber feet
The next step is to sand down the overhangs on the front and rear panels. For this
purpose, we recommend using coarse sandpaper rst followed by ne sandpaper.
The ne sandpaper can then be used to sand the entire body of the cajon. In order
to make the instrument more comfortable to play and to sit on, we recommend
sanding all the edges until they are nicely rounded. The rubber feet are secured
with the 4 x 15 screws. To ensure that the cajon will stand securely on its feet, we
recommend attaching the rubber feet approx. 25 mm inside the front and side
panels. The feet are attached after the cajon has been given its nish.
Cajon nish
When it comes to applying a nish to your cajon, the sky‘s the limit. It can be oiled,
lacquered, waxed, or why not even paint it with an entirely original design?
Warranty claims will only be considered if the assembly process has not been started. Furthermore, Roland Meinl Musikinstrumente GmbH & Co. KG will not accept liability for any damage
incurred or possibly incurred in the course of or as a result of the assembly process. Subject to corrections and changes. Version dated July 2012.
Now that you have nished constructing
your cajon, you can add to the comfort
when sitting on it with our MEINL cajon
pad (CAJ-PAD).
5
9
7
8
6
10
1211
Bauanleitung Cajon A4.indd 5 28.08.12 11:02
 Loading...