9
Please note:
•Waterhardnesscannotbeprogrammedwhilebrewing.
•Thelastwaterhardnesslevelchosenremainseven
after removing the power cable.
4. Coffee preparation
For aromatic coffee flavour and the best fit of your
coffee filter in the filter holder we recommend using
Melitta
®
coffee filters size 1x4
®
.
•Ensurethatthepowercableispluggedin.
•Openthelidonthewatertank.
•Fillthewatertank.Theremovabletankcanbelled
directly at the tap. Alternatively use the insulated jug
to pour the water into the tank in the appliance . The
required amount of water can be seen on the water
level indicator on the tank.
•Closethewatertanklidandplacetheinsulatedjug
with closed lid in the appliance.
•Setthenumberofcups to the amount of water
in the water tank . The number of cups is shown
in the display .
Note: Ensure that the selected number of cups
corresponds to the amount of water in the water
container . Please note that when making coee
all the water in the water tank is used. If the
number of cups and the amount of water do not
correspond to each other then this can lead to you
not getting the coee flavour you would like.
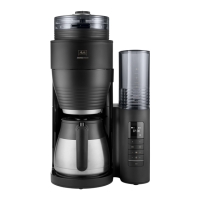
4.1 Using coffee beans
•Whenthebeancontaineriscompletelyfull,youcan
brew enough coee for 10 cups 2 or 3 times. Roast-
ed coee beans lose their flavour. Only fill coee
beans in the container which will be used within a
few days.
•Openthebeancontainerlidandllwithcoee
beans . Then close the lid.
Note: To ensure the grinder functions perfectly
do not use caramelised coee beans. Do not put
ground coee in the bean container.
•Opentheswivellter to the left.
•FoldaMelitta
®
1x4
®
coee filter at the embossed
seams and place it in the filter holder . Use your
hand to press the filter in to ensure the best fit.
•Swivelthelterbackintotheappliance.Anaudible
click indicates that the filter is in place.
•Turnthegrinddial, to select the required grind
level (from fine to coarse). The grind dial allows you
to select from 3 dierent settings. Settings between
the symbols are also possible. The ‘fine’ setting is
for standard coee. This setting may give the coee
a slightly bitter character. If a coarser setting is
selected the coee will be less bitter.
•Pressthebuttontoselectcoeestrength. The
selected coee strength is shown in the display .
One coee bean is for mild, two beans for
medium and three beans for strong.
•TurntheapplianceonusingthestartbuttonON/
OFF . Coee preparation begins and the green
LED flashes.
Note: The appliance has an overload safety function
of the grinder, which protects the grinder against
damage by foreign objects in the coee beans. If you
hear a loud chattering, unknown noise during the
grinding process, switch the appliacne o and
clean the grinder as described in point 7.
•Thedripstop prevents coee dripping when you
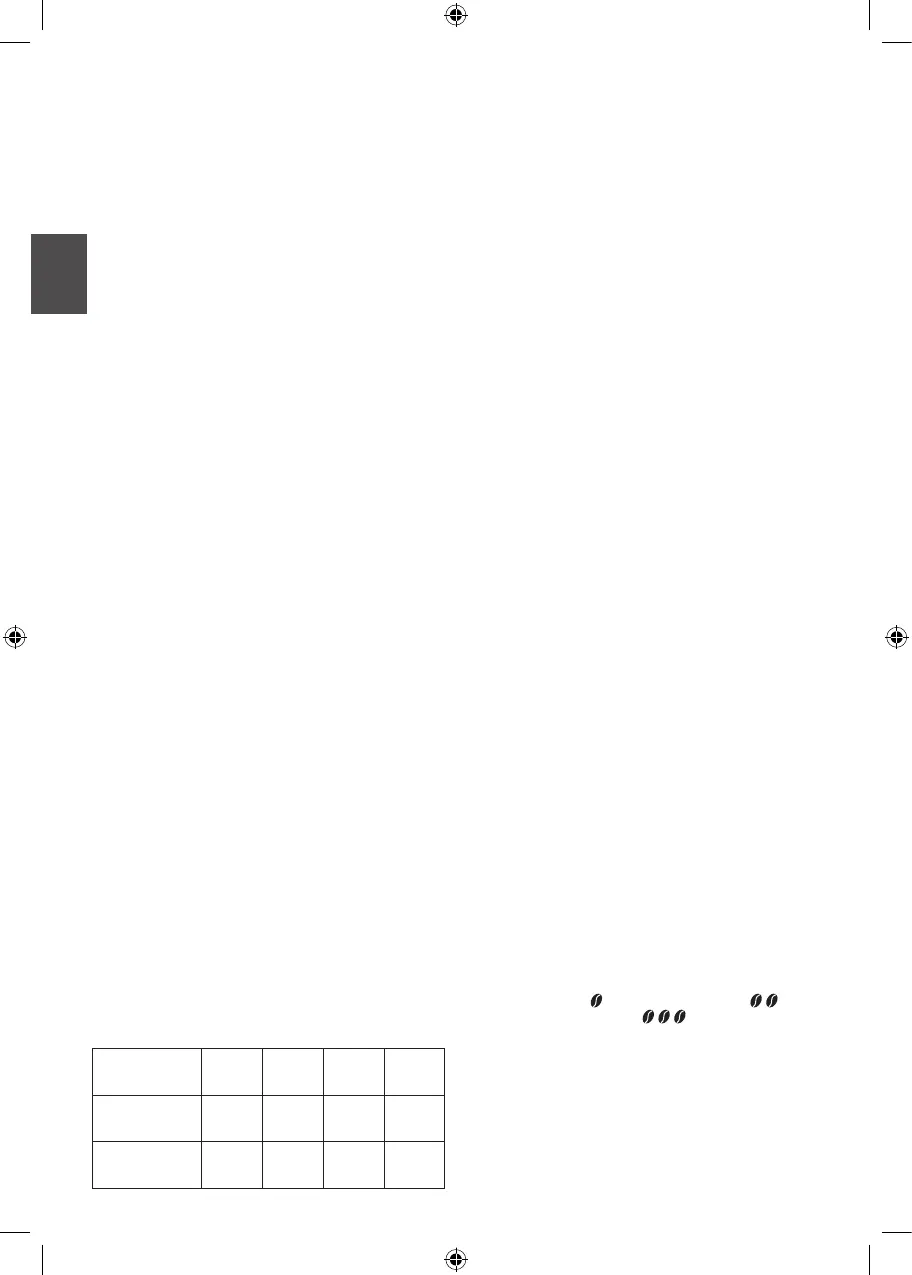
Hardness
setting
I II III IV
°dH
<7°
dH
7-14°
dH
14-21°
dH
>21°
dH
Display
1
2 3 4
for stirring or cleaning and
do not fill with ice cubes or
carbonated liquids.
•Donotsubjecttheglassaskto
high temperature fluctuations.
2. Before rst use
• Ensure that the mains voltage in your home corre-
sponds to that indicated on the identification label
on the base of the appliance.
•Connecttheappliancetothemainspower.Cable
which is not required, can be stored in the cable
spool .
•Setthecurrenttimeusingthebuttons‘h’and‘m’.
It is possible to speed this up by holding in the
respective button. The display light can be turned
on or o by holding down the h and m buttons
for longer than 2 seconds.
•Allappliancesaretestedforfaultfreeoperation
when they are produced. Some residual water may
be left behind after this test. Rinse the appliance
twice with the maximum amount of water without
a coee filter or ground coee in order to clean it.
To do this, fill the water tank up to the 10 cup
level marker, then press the setting for using ground
coee and turn the appliance on .
•The appliance has a variety of features for the best
coee enjoyment and ease of use. These features
are explained below.
3. Set water hardness
Depending on water hardness lime scale may build up
in the appliance. This increases the appliance’s energy
consumption as lime scale on the heating element
can prevent the water heating eectively. To avoid
damage the appliance must be descaled regularly. The
descaling display helps you in this. If the CALC-button
is permanently lit this shows that the appliance needs
to be descaled.
The appliance is pre-set for a high level of water
hardness (level 4). You can find out the level of water
hardness in your area by asking your local water
provider or by using water hardness measuring strips
available in the shops. For softer water the descaling
display can be adjusted to descale less often.
•HolddowntheCALC-button and by briefly
pressing the m-button set the desired level of
water hardness. The hardness setting will then
show in the display
•Onceyouhavesetthedesiredlevelofwater
hardness, let go of the CALC-button.
Your settings are now saved.
•Thesettingsanddisplayareshowninthetable.
GB
 Loading...