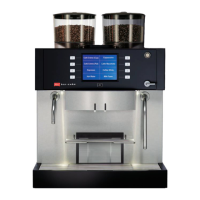
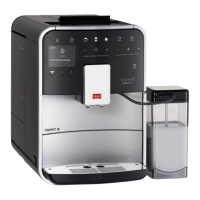
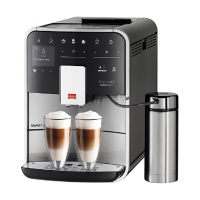
Installation and Set Up:
Please read the instructions fully and refer to the Operating Instructions booklet supplied
with the machine.
1. Install the machine on a stable, level and dry surface. Ensur
e there is a 10cm gap between
the machine and the wall or other appliances.
2. Plug the power supply lead into an earthed 10A socket outlet. Turn the machine on using
the power switch at the rear of the machine
3. Fill the bean container with coffee beans. Do not use ground, freeze dried, caramelized or
coated beans.
4.
Remove the water reservoir from the machine by lifting the lid and pulling it up and out of
the machine. Fill the water reservoir to the max level with fresh water. Replace the reservoir.
5. Press the on/off button at the front of the machine
6. The machine will execute an automatic rinsing and heating cycle, water will flow from the
coffee nozzles.
7. When the water stops flowing, the on/off button will be illuminated. The machine is now
ready for use.
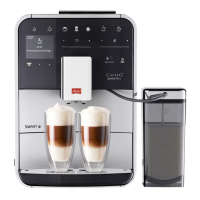
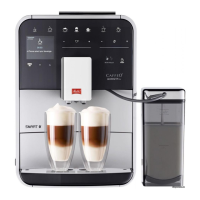
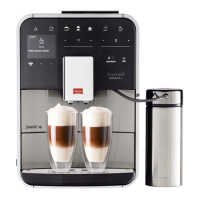
Adjusting the Brewing Strength
1. Press the button for brewing strength, to select from four degrees of strength.
The selection is indicated by the bean symbols in the display.
2. One bean is mild.
3. Two beans is normal.
4. Three beans is strong.
5. Four beans is very strong.
Adjusting the Coffee Quantity:
The size of coffee vend can be adjusted using the quantity regulator. Turning the regulator to
the left reduces the quantity of the vend by turning the regulator to the right it increases the
quantity of the vend.
Preparing Coffee with Beans: Ensure the bean container has beans in it.
Turn the lever to select the desired beans.
Single cup.
1. Place a cup under the coffee outlet.
2. Press the button for single cup dispensing.
3. The grinding process and coffee dispensing will start.
4. To stop the process prematurely press the single cup dispensing button again.
Double Cup
1. Place two cups under the coffee outlet.
2. Press the button for double cup dispensing.
3. The grinding process and coffee dispensing will start.
4. To stop the process prematurely press the double cup dispensing button again.
Preparing Coffee with Ground Coffee:
1. Open the lid of the ground coffee chute. The symbol for the ground coffee chute will flash.
2. Fill the chute with one scoop of ground coffee.
3. Close the lid of the chute. The symbol for the ground coffee chute and single cup dispensing
will illuminate.
4. Place a cup under the coffee outlet.
5. Press the button for single cup dispensing
6. The brewing process and coffee dispensing will start.
7. To stop the process prematurely press the single cup dispensing button again.
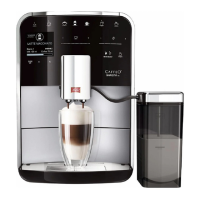
Frothing Milk:
1. Place a vessel with milk in it under the milk whisk. Push the whisk unit down until the whisk
is immersed in the milk.
2. Press the button for steam dispensing. The button will flash.
3. When the button is fully illuminated turn the valve switch clockwise to open
4. Once the desired volume of milk is reached turn the valve switch anticlockwise.
5. Clean the whisk by inserting it into a vessel of clean water and repeating the above process.
Cleaning:
General cleaning should be carried out daily. Refer to the Operating Manual.
1. Wipe the outside of the machine with a soft, damp cloth.
2. Empty and clean the drip tray regularly.
3. Clean the coffee grounds container regularly.
4. Clean the milk whisk/steam pipe as follows:
5. Place a cloth under the frother unit to catch any residual liquid.
6. Turn the steam pipe with whisk anticlockwise and remove.
7. Pull the whisk down to remove from the steam pipe.
8. Rinse the steam pipe and whisk under clean running water.
9. Slide the whisk onto the steam pipe until it locks in place.
10. Turn the steam pipe and whisk clockwise until it locks in place.
11. Do not use micro-fibre cloths, scouring cloths, sponges or cleaning agents.
Cleaning the Brewing Unit: The brewing unit should be cleaned weekly.
1. Switch the power switch to position "0" to completely switch off the appliance.
2. Reach into the recess on the right side of the appliance and pull the cover to the right.
3. Press the red button on the handle of the brewing unit and turn the handle in the direction of the arrow
to the stop (approximately 75°).
4. Use the handle to pull the brewing unit out of the appliance. Leave the brewing unit as it is (do not move
or twist the components of the brewing unit).
5.
Thoroughly rinse the brewing unit as a whole from all sides under running water. Do not use any cleaning
products. Ensure that the filter surface is free of coffee residue.
6. Let the brewing unit drip dry.
7.
Remove coffee residues from the surfaces in the interior of the appliance where the brewing unit is inserted
.
8.
Re-insert the brewing unit back into the appliance and turn the handle clockwise to lock the unit in place.
9. Replace the cover
10. Switch the power switch to the "I" position. The appliance is in stand-by mode again.
MELITTA
®
BISTRO OPERATING INSTRUCTIONS
4
5
3
6
5