Full Programming Options
Full Menu Structure
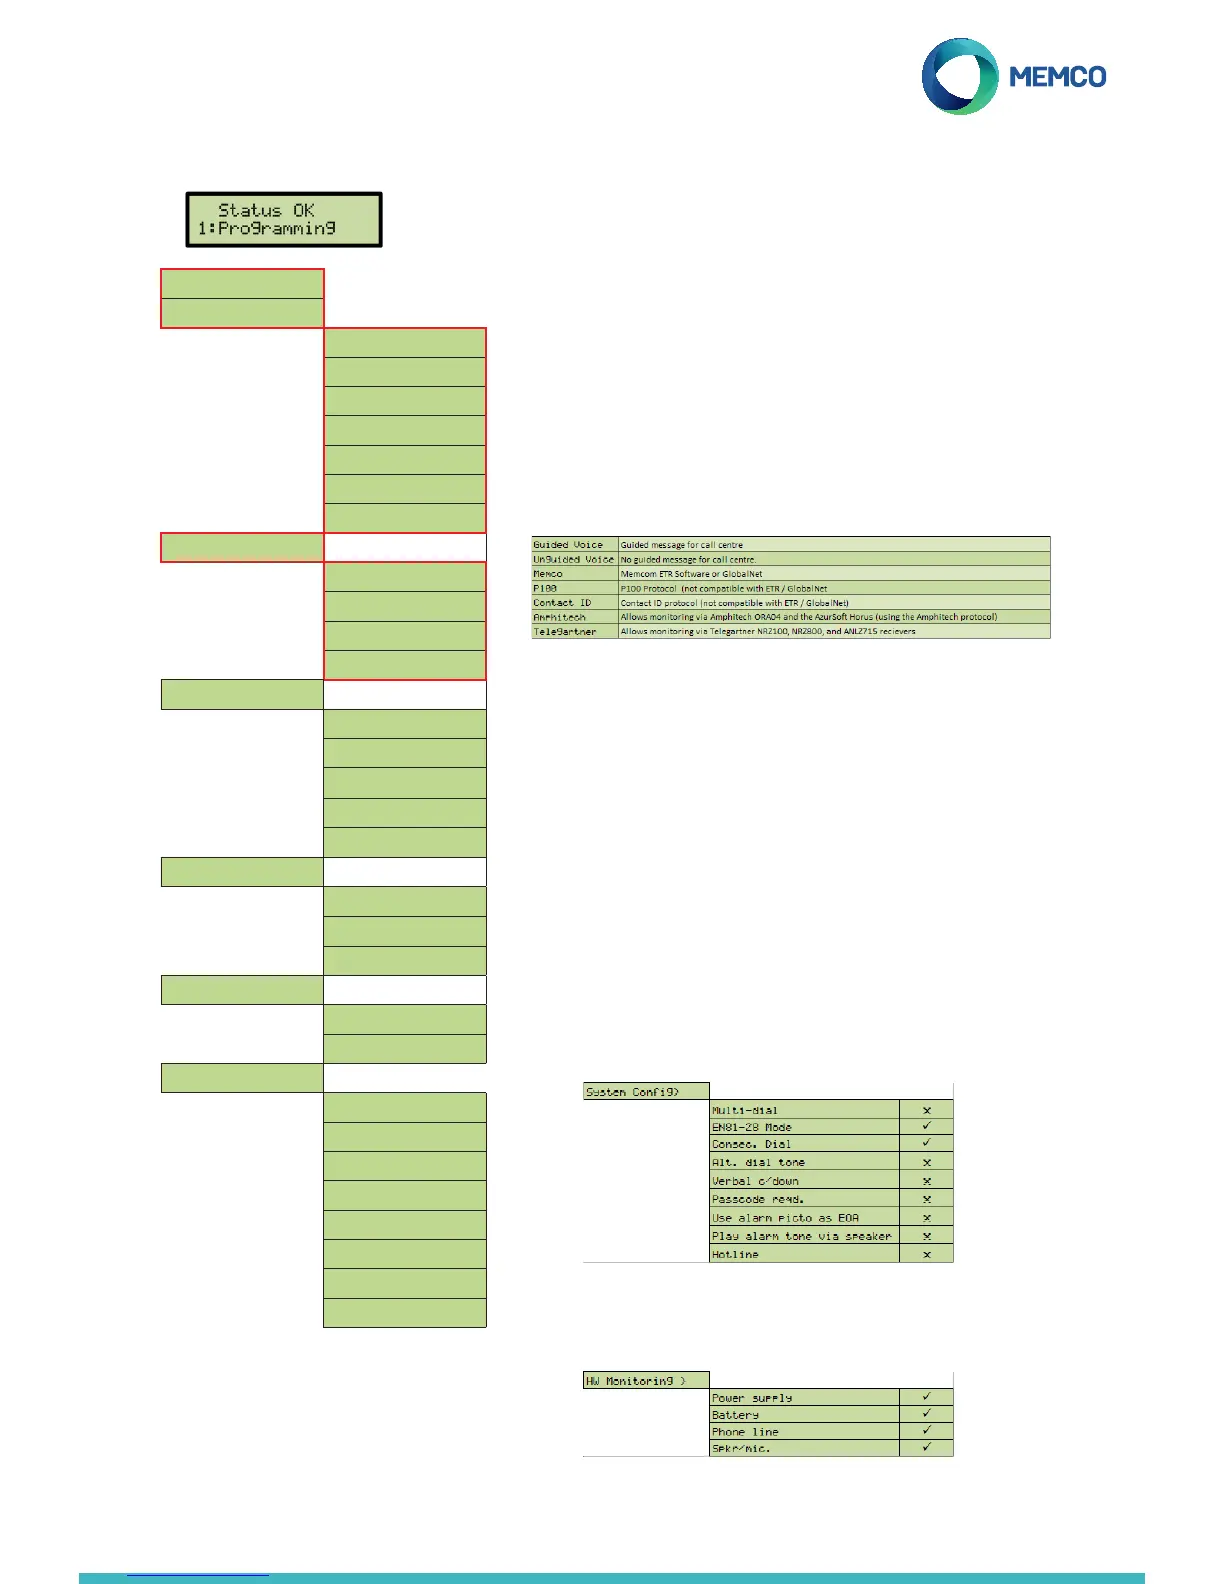
If re-programming a unit, you will see the idle screen pictured here. Press 1 to enter
the programming menu for full programming options. It will only prompt you to
enter a password if one has been made active through selecting EN81-28 Mode.
Menu Sections explained...
Quick Start
The quick start menu consists of 7 menu options required for quick
setup. Please refer to the previous page in this guide for more
information.
Tel. Numbers
Up to four alarm telephone numbers can be programmed in the C100
unit. Using the keypad, enter the rst alarm telephone number. Select
the protocol required from this list.
Scroll to the preferred protocol and press to conrm. When using
ETR software or GlobalNet monitoring, select the protocol ‘Memco’. If
connecting to a hotline then no telephone number is required, and this
will need to be programmed by ticking ‘Hotline’ in Settings> Sys Cong>
Hotline.
PBX / PABX – If connected to a PBX, insert the number required to
get an outside line, followed by a pause (*), followed by the telephone
number, i.e., 9*01344854000.
If further alarm numbers are required, repeat this process for Alarm No.
2, Alarm No. 3 etc.
Settings
Volume – press the up and down arrows to adjust the volume, and
press to conrm.
System Cong – sets how the system will operate. Select / deselect
which modes of operation are required in the system using the key.
See below for a full explanation of each option:
HW Monitoring – Hardware monitoring sets which system elements are
checked when the unit completes its self check and places a test call.
Quickstart >
Tel. Numbers >
Alarm No. 1
Alarm No. 2
Alarm No. 3
Alarm No. 4
Tech.no.
Background No.
Call attempts
Settings >
ID Code
Volume
System Cong>
HW Monitoring >
Delays >
COP delay
LVAS delay
Tech delay
Hangup delay
Answer delay
Messages >
Location
Reassurance
Guidance
Time / Date >
Time
Date
Advanced >
Passcode
Network ID
Next EN81 call
Frequency PBX
Language >
Relay Mode >
Relay Override >
GMT Offset

 Loading...