6
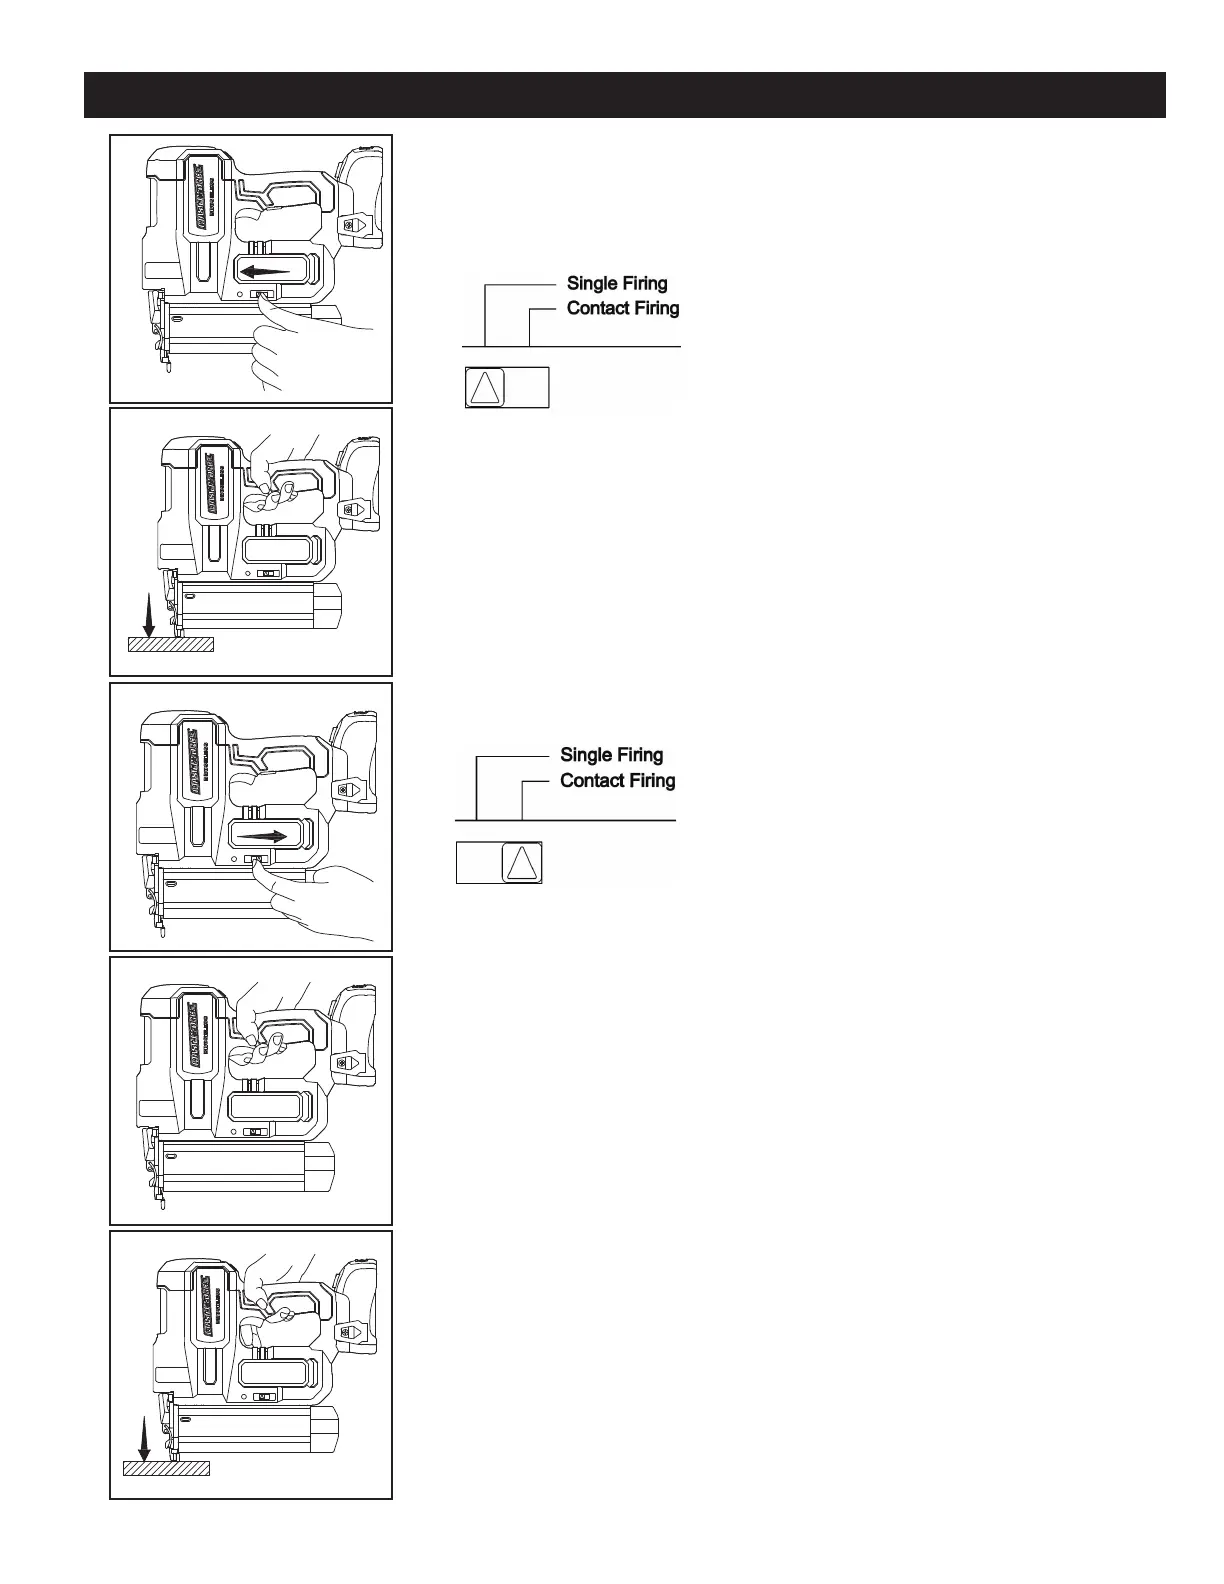
1) Single Firing Mode:(See FIG. 3, FIG. 4)
Push the drive shift (single/contact firing knob) to left side, it is on Single Firing
mode. Single Firing is good for precision placement.
Step 1: Push the drive shift to left side.
Step 2: Depress the safety contact pin against the work piece.
Step 3: Squeeze the trigger to fire the staple or nail.
Step 4: Release the trigger and safety contact pin after firing.
Firing next staple or nail, repeat step 2 ~ step 4
The safety contact pin must be depressed before the trigger is squeezed.
ADJUSTMENTS
OPERATING PROCEDURES
Fig.3
Fig.4
Fig.5
Fig.6
Fig.7
2) Contact Firing Mode:(See FIG. 5, FIG. 6, FIG. 7)
Push the drive shift (single/contact firing knob) to right side, it is on Contact
Firing mode.
Contact Firing is good for conveniently and quickly firing.
Step 1: Push the drive shift to right side.
Step 2: Squeeze the trigger, keep squeezing and don’t release.
Step 3: Depress the safety contact pin against the work piece
to fire the nail or staple.
Step 4: Keep squeezing the trigger all the time but release safety
contact pin after firing.
Step 5: Press it against the next area you want to fire a nail or
staple into. When the contact pin is pressed against the work piece
the tool will fire.
Firing next staple or nail , repeat step 4~step 5
The trigger must be squeezed the entire time the saftey contact pin is
being depressed.
Two modes of firing: Single Firing and Contact Firing.