INSTALLATIONINSTRUCTIONS
2
REV3.0
Makesureelectricityisturnedoffatthemainpowerboxbeforecommencingwork.Turnoff
thepowerbyremovingfuseorturningoffcircuitbreaker.
Incorrectwireconnectionwoulddamagetheremotecontrolreceiver
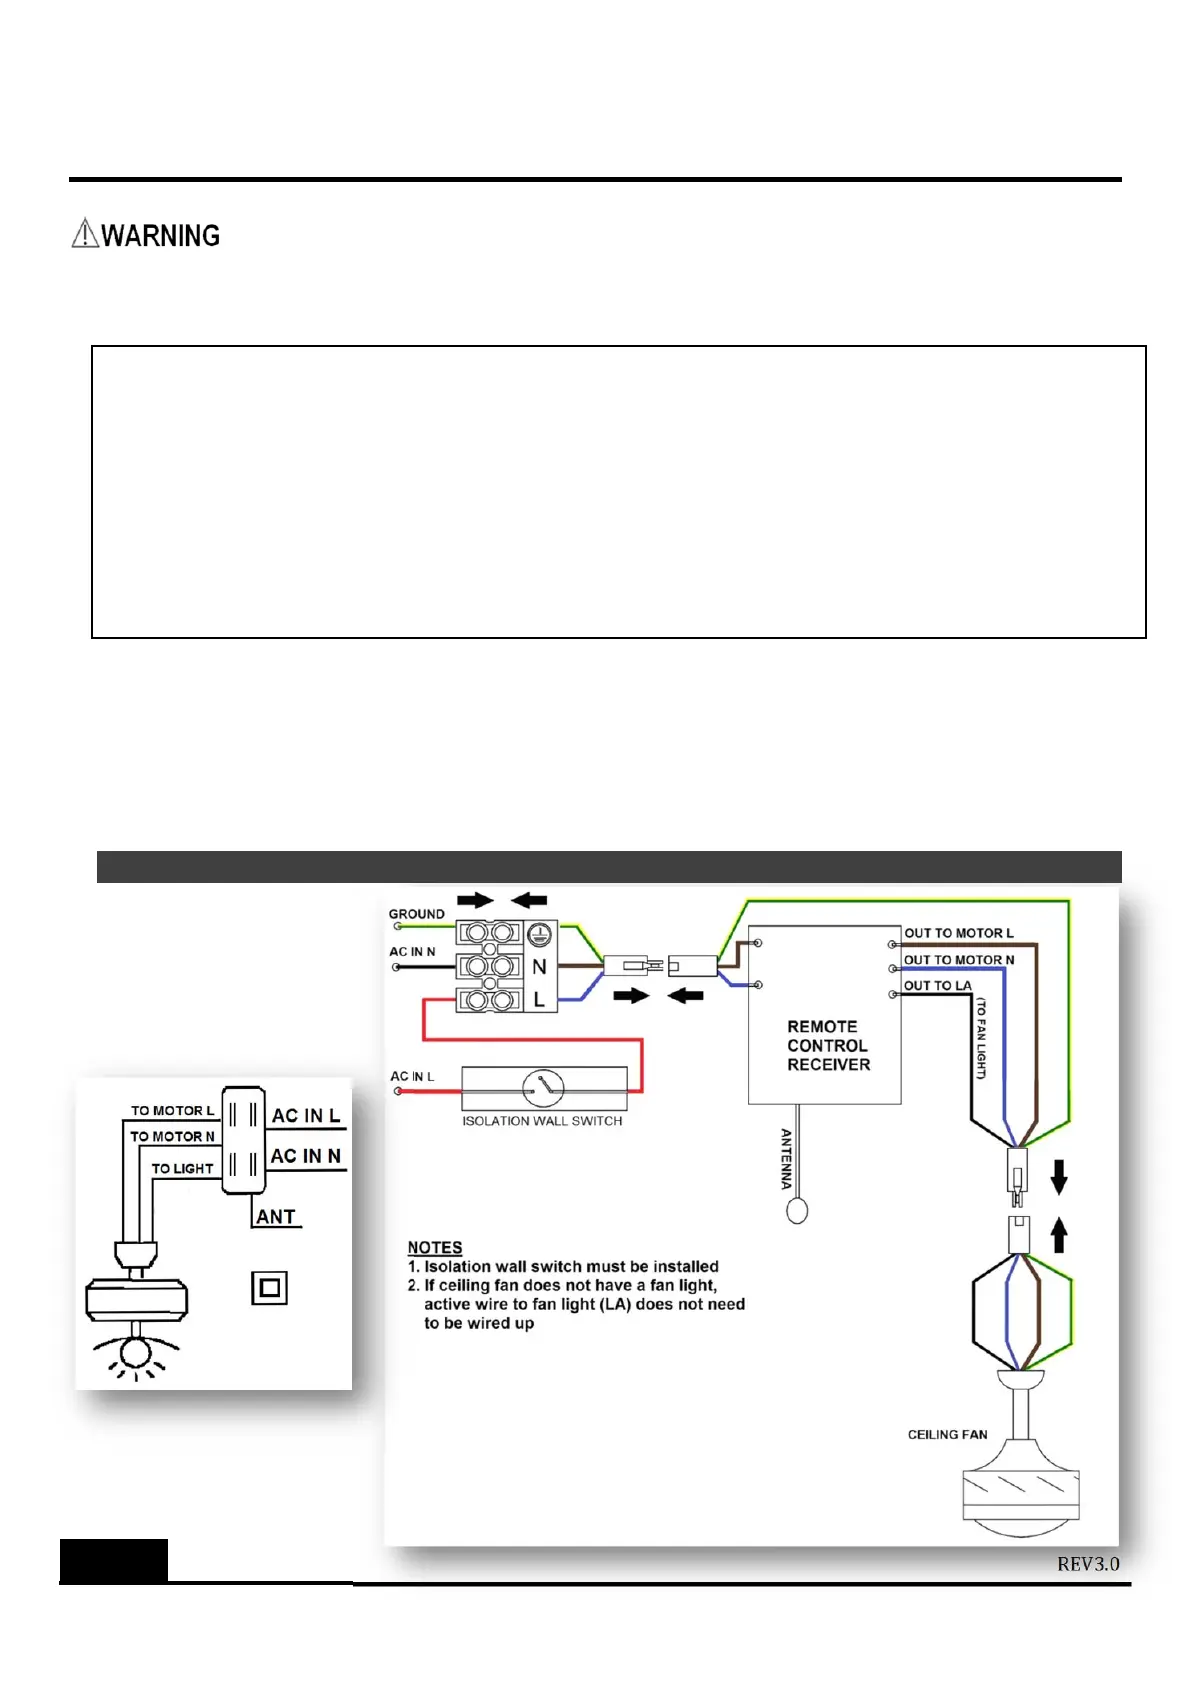
1. Powersupplytoremotecontrolreceivermustbeconnectedthroughanisolationswitch,i.e.
existingwallswitch.Ensureidenticalcodeswitchsettingonbothreceiverandhandset.
2. Insertreceiverthroughhangingbracket.Connectwiresinaccordancetowiringdiagram.Cover
upthereceiverandhangingbracketwithfancanopy.Becarefulnottodamagewiring.
3. Forceilingfanwithmanualorpullchainswitches,setthefantoHIGHspeedandthelightkit,if
any,toONpositionusingpullchainafterinstallationbeforeoperatingremotecontrol.
REMOTECONTROLWIRINGDIAGRAM
NOTE:Instructionswheninstallingremotecontrollerinceilingfans(i)ofotherbrands,(ii)wi thalow
profile/huggerdesignor (iii)thatmayhaveasmallerha ngingbracket.
‐ Please check to confir m electrical compatibility of the remote controller set with the ceiling fan before
installation.
‐ If receiver of the
remote controller cannot be inserted into the hanging bracket due to dimensio nal
limita tionsor ifthereis nohanging bracket inthe case of alowprofile (huggerdesign)ceiling fan, the
receivercanbeenclosedinanElect rical InsulationBox(pleasefollowAustralianwiringregulations)and
placed in the
ceiling. In this case, please make sure to draw the antenna / aerial wire away from the
insulationboxthroug hasmallhole.
Dependingonmodelyourreceiver
maybepre‐assembledwithwire
connectorsforquickinstallation.
Otherwiseusesuitableterminalblock
notsu
lied
orwireconnection.
IMPORTANT:
Keepantenna
safelyinside
canopy.Make
sureitswiringis
notcutor
damaged.

 Loading...