INSTALLATIONINSTRUCTIONS
4
Rev3.0
Makesureelectricityisturnedoffatthe
mainpowerboxbeforecommencing
work. Turn off the power by removing
fuseorturningoffcircuitbreakerbefore
installingremotecontroller.
HOW TO INSTALL REMOTE
CONTROLLER
1. Thisremotecontrollersethas16possiblecode
combinationsforwirelesscontrol
communication.Codesettingonremotecontrol
transmitterandreceivermustmatc heach
otherforoperation.Otherwisetheremote
controllerwillnotwork.Thecodesettingcan
beadjustedthrough4switchesfoundonboth
thetransmitterandthereceiver.
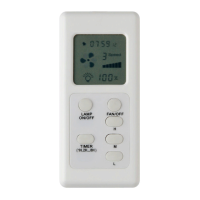
Settingthecodeontransmitter
I. Removebatterycover.
II. SlidecodeswitchestoyourchoiceofON
orOFFposition.Useasmallscrew
driverorballpointpentoslideeach
switchfirmlyupordown.
III. Installbattery(included)
IV. Installbatterycoverontransmitter
Settingthecodeonreceiver
I. Slidecodeswitchesonthereceiverso
thattheyareonthesamepositionsas
thosesetonthetransmitter.
Ifyouwishtocontroltwoormoreceilingfans
independentlywithdifferentsetofremote
controllers,setdifferentcodesforeachremote
controllerset.
Possible DIP SwitchSetting (ON setting
represented by1; OFFsetting represented by
0)
0000 0100 1000 1100
0001 0101 1001 1101
0010 0110 1010 1110
0011 0111 1011 1111
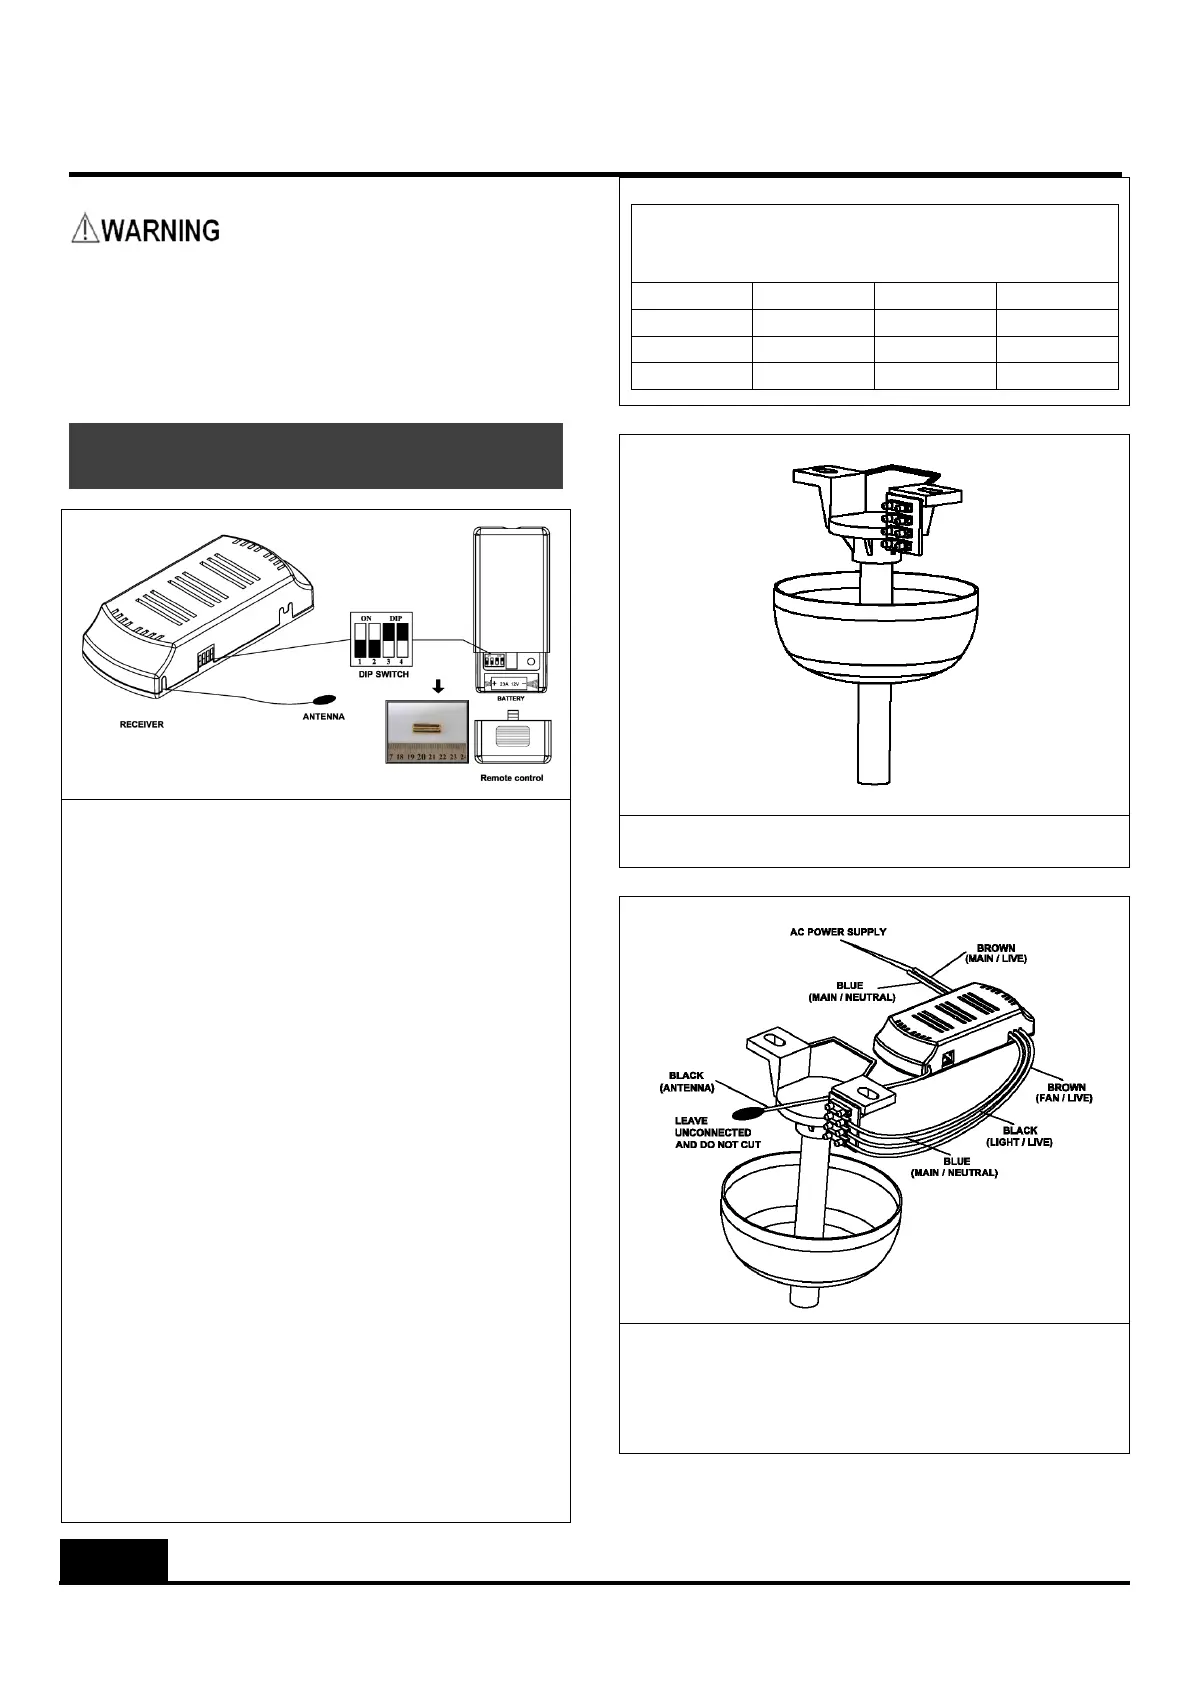
2. Make sure power supply is cut off before
removingfancanopy.
3. Thinkaboutbestorientationofremotereceiver
insidefancanopy.Connectreceiver’sinputand
output wires in accordance to wiring diagram
provided. Note: Isolation switch must be
installed.
 Loading...