(9) Remove the rear evaporator panel from the
vehicle.
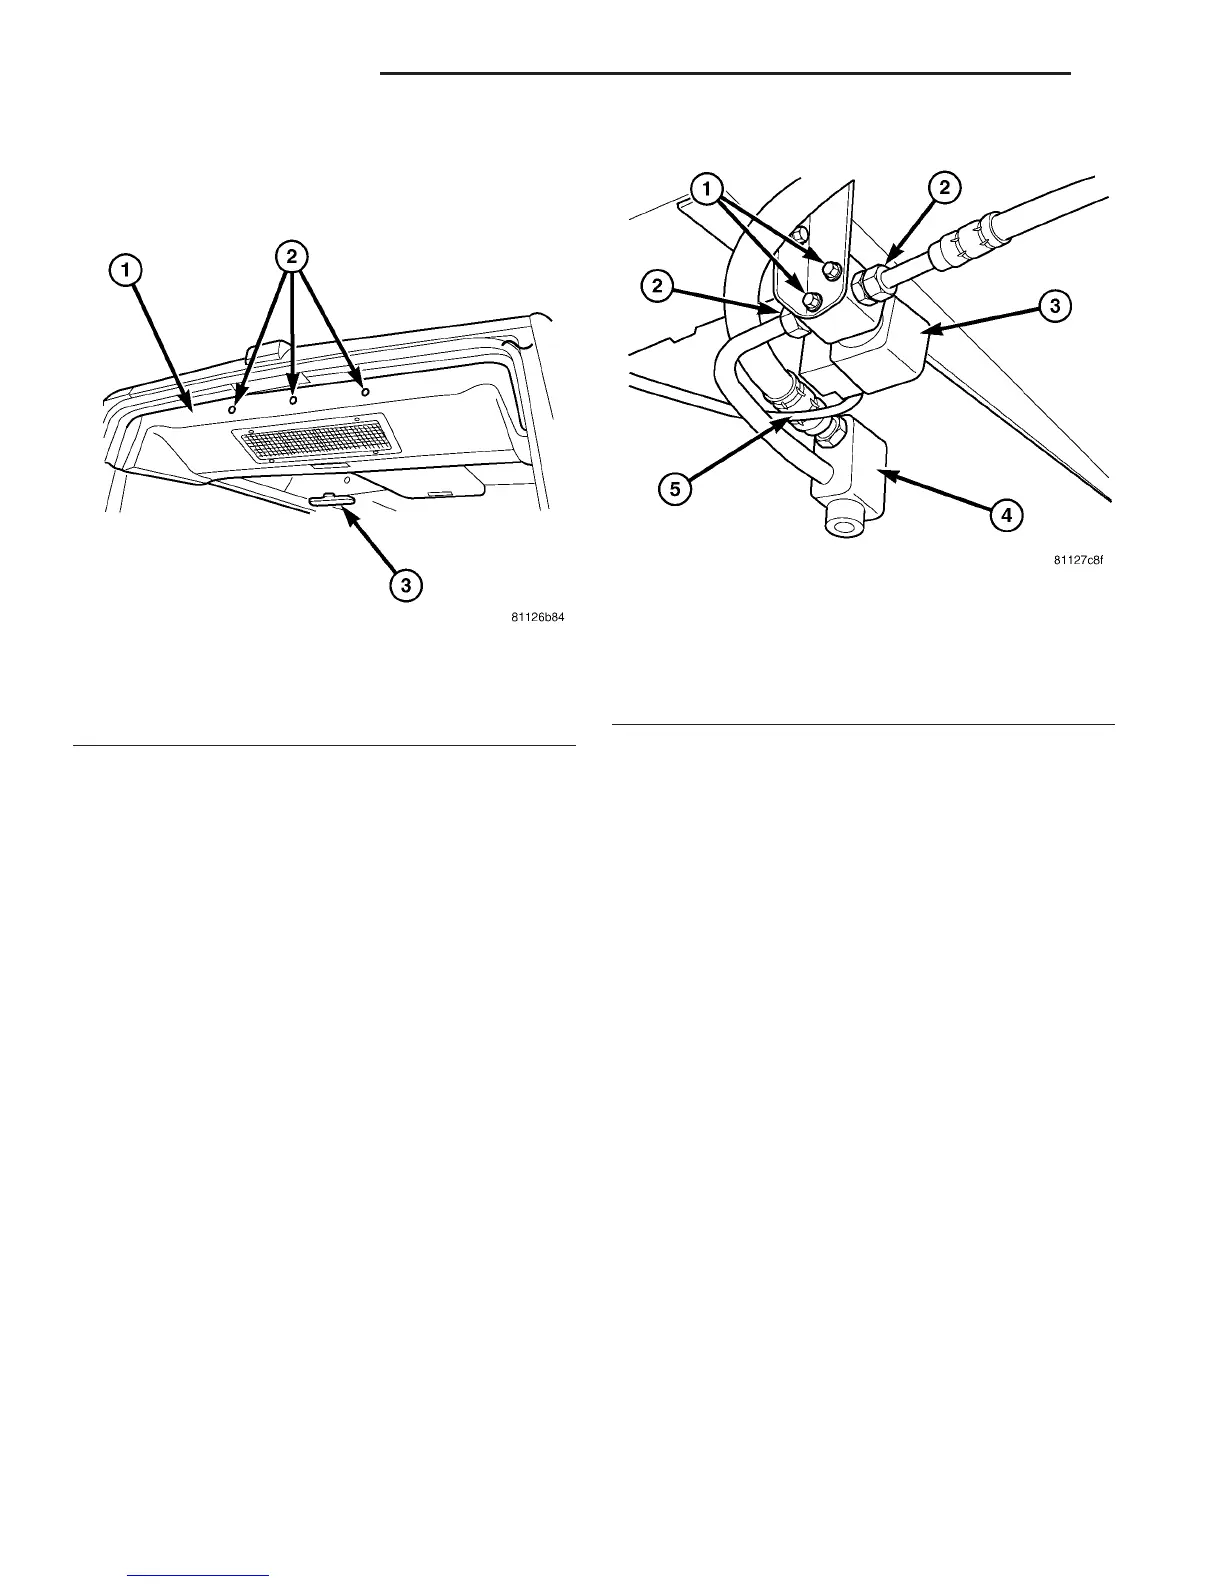
(10) Remove the nuts that secure the liquid refrig-
erant lines to the solenoid valve (Fig. 9).
(11) Disconnect the refrigerant line from the out-
board side of the solenoid valve.
(12) Disconnect the solenoid valve wire harness
connector.
(13) Remove the two solenoid valve retaining
screws and remove the solenoid valve from the vehi-
cle.
(14) Remove the seals from both liquid line fittings
and discard.
(15) Install plugs in, or tape over the opened liquid
line fittings and both solenoid valve ports.
INSTALLATION
(1) Remove the tape or plugs from the opened liq-
uid line fittings and solenoid valve ports.
(2) Lubricate two new rubber o-ring seals with
clean refrigerant oil and install them on the liquid
line fittings.
(3) Align the solenoid valve to the liquid line going
to the rear evaporator and to the mounting bracket.
Remove the two solenoid valve retaining screws and
remove the solenoid valve from the vehicle.
(4) Install the two solenoid valve retaining screws.
Tighten the screws to 10 N·m (89 in. lbs.).
(5) Connect the solenoid valve wire harness con-
nector.
(6) Connect the refrigerant line to the outboard
side of the solenoid valve.
(7) Install the nuts that secure the liquid refriger-
ant lines to the solenoid valve. Tighten the nuts to 16
N·m (142 in. lbs.).
(8) Install the rear evaporator panel and the three
push-in fasteners.
(9) If equipped, connect the interior motion sensor
wire harness connector and install the motion sensor
into the rear evaporator panel.
(10) Install the five evaporator panel screws at the
front of the panel. Tighten the screws to 2 N·m (17
in. lbs.).
(11) Install the rear duct panel and the six push-
pin fasteners.
(12) Connect the dome light wire harness connec-
tor and install the dome light into the rear roof duct
panel.
(13) Reconnect the battery negative cable.
(14) Recover the refrigerant from the refrigerant
system
(15) Evacuate the refrigerant system (Refer to 24 -
HEATING & AIR CONDITIONING/PLUMBING -
STANDARD PROCEDURE).
(16) Charge the refrigerant system (Refer to 24 -
HEATING & AIR CONDITIONING/PLUMBING -
STANDARD PROCEDURE).
Fig. 8 Rear Evaporator Panel
1 - REAR EVAPORATOR PANEL
2 - PUSH-PIN FASTENER (3)
3 - INTERIOR MOTION SENSOR
Fig. 9 Rear A/C Solenoid Valve
1 - SCREW (2)
2 - REFRIGERANT LINE NUT (2)
3 - SOLENOID VALVE
4 - REAR A/C EXPANSION VALVE
5 - WIRE HARNESS
24 - 28 CONTROLS - REAR VA
SOLENOID VALVE (Continued)

 Loading...


