10
INTRODUCTION
IMPORTANT
PRECAUTIONS
ASSEMBLY
BEFORE
YOU BEGIN
TREADMILL
OPERATION
LIMITED
WARRANTY
TROUBLESHOOTING
& MAINTENANCE
CONDITIONING
GUIDELINES
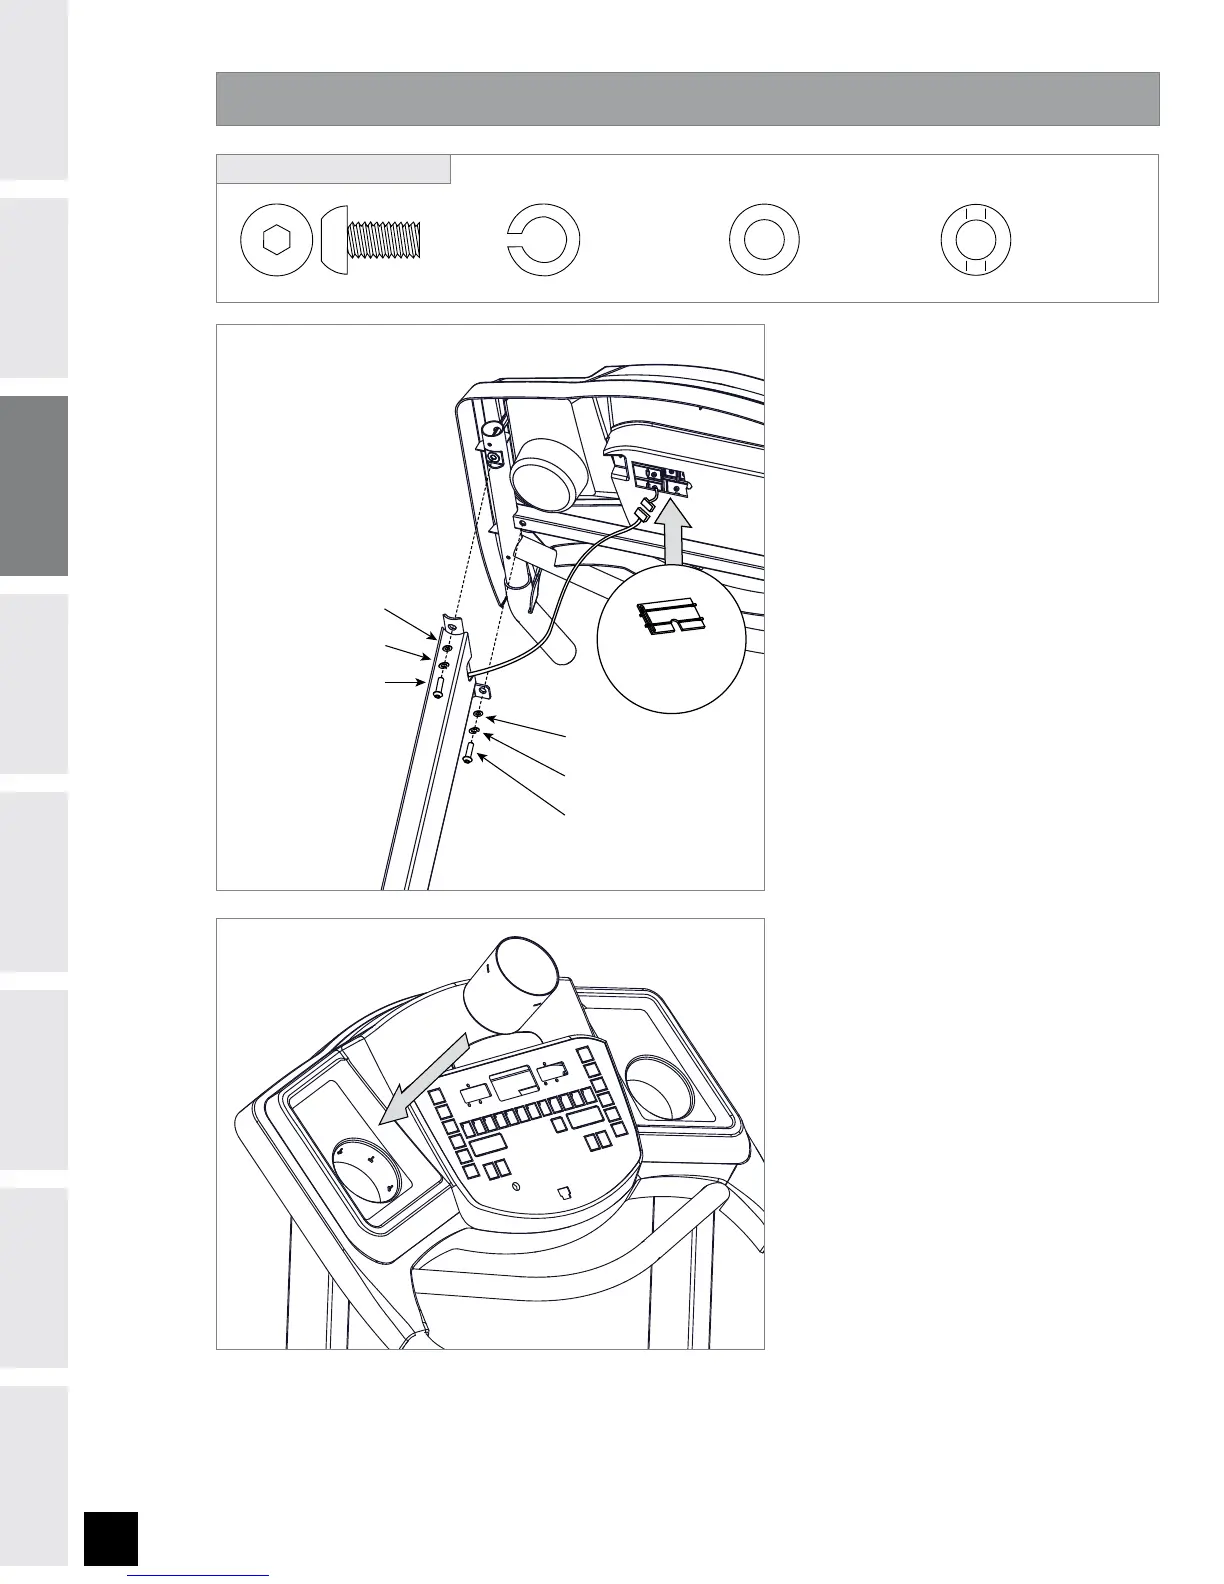
ASSEMBLY STEP 3
Open HARDWARE BAG 3.
Attach the CONSOLE to the
UPRIGHT MAST from the back
using 2 BOLTS (G), 2 LOCK
WASHERS (B),
2 ARC WASHERS (E).
NOTE: Make sure CONSOLE
CABLE is not blocking any of
the bolt holes.
Attach from the side using 2
BOLTS (G), 2 LOCK WASHERS (B)
and 2 FLAT WASHERS (C).
After all bolts are inserted
for ASSEMBLY STEP 2 and
ASSEMBLY STEP 3, all bolts can
be completely tightened.
Connect the CONSOLE CABLE
and carefully tuck wires in MAST
to avoid damage. NOTE: DO NOT
PINCH CONSOLE CABLE. Be sure
the console cable prongs are
aligned and the ends are tightly
seated into each other.
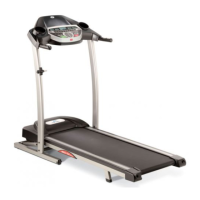
Attach CONSOLE CABLE COVER.
Attach CUP HOLDER.
A
B
C
D
E
F
G
FLAT WASHER (C)
LOCK WASHER (B)
BOLT (G)
ARC WASHER (E)
LOCK WASHER (B)
BOLT (G)
CONSOLE CABLE
COVER
BOLT (G)
20 mm
Qty: 4
LOCK WASHER (B)
20 mm
Qty: 4
ARC WASHER (E)
18 mm
Qty: 2
FLAT WASHER (C)
20 mm
Qty: 2
HARDWARE BAG 3 CONTENTS :