COPYRIGHT © 1995 MERIT INDUSTRIES, INC.
PM1717-0C SCORPION™ 9000 MANUAL 1
SITE PREPARATION
In determining the location for your SCORPION™
9000 dart game, consideration must be given to the
location of a suitable electrical outlet. Since the
game is a computerized device, it should have a
separate circuit, if at all possible. If a circuit is not
available, care should be taken to provide a clean
and constant voltage. As a basic guideline, never
connect the unit to a circuit that also supplies power
to freezers, coolers or other high power-consuming
and electrical-noise-making equipment.
The game should be prominently located to attract
attention, but not where games will be interrupted by
people walking through the playing area. The play
area must extend approximately 8’ from the front of
the machine to accommodate the throw line.
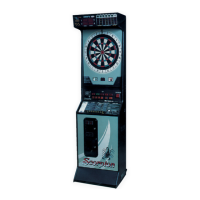
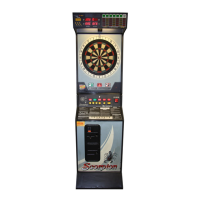
SET-UP AND INSTALLATION
Floor Model Installation
1. Locate and remove the plastic bag stapled
to the top of the base section. This bag
contains the game keys.
2. Locate the Velcro hook on the base of the
cabinet. The Velcro hook is holding the
target section in its fold-down position. Pull
the target section up until the Velcro latch on
the target section door separates from the
Velcro hook on the base section. Continue
pulling the target section up until it locks into
its upright position. Refer to Figure 7.
3. Use a #564 key to unlock the target door.
On the upper, right corner of the target door
you will see a safety hook holding the door
in its closed position. Push the hook upward
to release the target door. Inside, stapled to
the floor of the target section, you will find a
plastic bag with three threaded knobs. Place
the knobs and washers in the holes
provided as shown in Figure 9.
4. Close the target section door.
5. Using the key provided, open the coin box
door.
6. Remove the line cord from the coin box and
attach it to the receptacle on the back of the
cabinet. See Figure 7.
7. Locate and remove the bag of hardware
inside the coin box. This hardware is used to
secure the game to the wall. Refer to the
instructions contained within the bag to
properly install the hook needed for your
application.
8. Move the game into position. Adjust the
levelers until the game does not rock and is
stable. Attach the safety chain from the
game to the wall hook installed in step 7.
9. Set the floor mark for the throw line. In the
U.S.A., the throw line should be placed 8
feet from the face of the target. In some
European countries, the throw line distance
is placed 2.44 meters or 2.37 meters from
the face of the target. Consult your local
rules for throw line distances. The throw line
decal can be found in the coin box.
10. Plug the power cord into the wall outlet.
Power up the game.
Disassembly of Target from Base
If you decide to move the game to a different
location and you do not have access to a large van
or vehicle, you may need to disassemble the target
from the base. In those circumstances, follow the
steps below.
1. Unplug and remove the power cord from the
back of the game. Store the power cord for
future use.
2. With the game in the upright position, open
the control panel door. Disconnect the target
lamp power cord from the power supply.
Unhook the light power cord from the clips
holding it in place to the back of the cabinet.
Also disconnect the main wiring harness or
harnesses that may connect between the
target and base sections. Close and lock the
control panel door.
3. Unlock and open the target section door.
Carefully pull the target lamp power cord
and other wiring harnesses up into the
target compartment. Next, remove the large
black assembly knobs and washers. Store
the knobs outside of the target section for
future use. Carefully close and lock the
target section door. Remove all keys from
the target door lock.
 Loading...