Page 9For technical questions, please call 1-888-866-5797.Item 58547
SAFETYOPERATIONMAINTENANCE SETUP
Cleaning, Maintenance, and Lubrication
1. BEFORE EACH USE, inspect the general
condition of the Filter/Regulator. Check for:
• loose hardware,
• misalignment or binding of moving parts,
• cracked or broken parts,
• damaged electrical wiring, and
• any other condition that may
affect its safe operation.
2. AFTER USE, wipe external surfaces of
the Filter/Regulator with a clean cloth.
3.
WARNING! TO PREVENT SERIOUS INJURY:
If the supply cord of this Filter/Regulator
is damaged, it must be replaced only
by a qualified service technician.
Maintenance Schedule
Following are general guidelines for maintenance checks of the Filter/Regulator.
Note: The environment in which the Filter/Regulator is used, and the frequency of use will affect how
often you will need to check the Filter/Regulator components and perform maintenance procedures.
Daily:
a. Make sure all nuts and bolts are tight.
b. Drain moisture from air tank.
c. Check for abnormal noise or vibration.
d. Check for air leaks.
• To check for air leaks, apply soapy water
to joints while the Filter/Regulator is
pressurized. Look for air bubbles.
e. Wipe off any oil or dirt from the Filter/Regulator.
• To clean the Filter/Regulator surface,
wipe with a damp cloth, using a
mild detergent or mild solvent.
Weekly:
Inspect Air Filter.
Quarterly (every 3 months):
Tool Disassembly, Cleaning, and Inspection:
Have the internal mechanism cleaned, inspected,
and lubricated by a qualified technician.
Air Filter Maintenance
Check the Air Filter weekly to see if it needs replacement. Replace the filter
more often if Filter/Regulator is used in dirty environments.
Periodically remove the Filter, rinse it out with water and put it back in.
1.
To access the Air Filter:
a. Loosen the bottom Filter/Regulator Valve
until pressure is at zero.
b. Remove all four screws from the Bottle Lid.
c. Pull off the Tank, exposing the Filter Assembly.
d. Disassemble the Filter Assembly
using figure to the right as reference.
Keep track of assembly order.
2. Remove the Filter.
3. Check that the Washer and Shield are in
place, and replace with a new Filter.
4. Reassemble Filter Assembly according
to assembly order shown.
5. Place Retainer back on Rod Assembly and
Filter. Thread on bottom Nut and tighten.
Note: Retainer must be tight against the Filter.
If it is loose, the Filter will not function.
6. Use the four screws to reconnect the
Bottle Lid. Tighten screws.
Note: Rubber Seals on Nuts and Tank must
be in good condition before reassembly.
7. Reconnect Filter/Regulator Valve.
Tighten to repressurize.
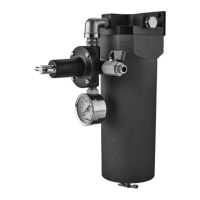
Filter/Regulator
Valve
Nut
Filter
Washer
Gasket
Bottle Lid
Screws
Retainer
Shield
Rod Assembly
 Loading...