EasyManua.ls Logo

Merlin QuietDrive Pro - User Manual

Merlin QuietDrive Pro
20 pages
Print Icon
To Next Page IconTo Next Page
Loading...
This manual contains IMPORTANT SAFETY information
DO NOT PROCEED WITH THE INSTALLATION UNTIL READING THE
INSTRUCTIONS THOROUGHLY
Garage Roller Door Opener
Installation and Operating Instructions
Owners Copy: Please keep these instructions for future reference
gomerlin.com.au
gomerlin.co.nz
MR655EVO

Questions and Answers

Summary

Warranty Registration

Safety Instructions

Ensure Door Balance and Stability

Keep the garage door balanced. Do not let the opener compensate for a binding or sticking door.

Personal Safety During Installation

Do not wear rings, watches or loose clothing while installing. Wear gloves and suitable protective clothing.

Regular Inspection of Door Components

Frequently examine the door installation for signs of wear, damage, or imbalance. Do not use if repair is needed.

Adherence to Installation Codes

Installation and wiring must be in compliance with your local building and electrical codes.

Importance of Safety Reverse System Test

The safety reverse system test is very important. The door MUST reverse on contact with a 40 mm obstacle.

Restrictions on Use by Children and Incapacitated Persons

This appliance should not be used by children or persons with reduced capabilities unless supervised.

Prohibited Installation on Wicket Doors

The opener must not be used on a wicket door (door within a door).

Wall Control Installation Guidelines

Install wall control at least 1.5m high, away from moving parts and out of reach of children.

Safe Operation Practices

Activate opener only when the door is in full view, free of obstructions and properly adjusted.

Child Safety Precautions

Do not allow children to play near the door or with door controls.

Carton Inventory

Tools Required

Door Requirements

Maximum Door Height

Maximum door height of 4.5 m.

Maximum Curtain Area

Maximum curtain area of 16.5 m².

Maximum Door Mass

Maximum door mass of 100 kg.

Maximum Door Axle Diameter

Door axle diameter must not exceed 35 mm.

Control Panel Overview

Terminal Block Functions

Terminal block used for external accessories like push buttons and obstruction detection beams.

Down Button Operation

DN Button: used to drive the door DOWN.

Up Button Operation

UP Button: used to drive the door UP.

Program Button (P) for Limits

P Button: used to "PROGRAM” the DOOR LIMITS.

Save;Delete Button (S) for Remotes

S Button: used to "SAVE” and “DELETE” the “REMOTE CONTROLS".

Control Panel LED Indicators

LEDs indicate program status and diagnostic codes.

Control Button Functionality

Control Button: Activates door when remotes are unavailable.

Courtesy Light Operation

Courtesy Light: Turns on during operation and turns off after 3 minutes.

Testing the Door Balance

Attaching the Stop Collar

Attaching the Weight Bar

Pinning the Door

Release Handle and Cord Safety

Operating the Manual Release

Attaching Extension Poles

Left;Right Hand Installation

Installation Procedure

Installation Preparation Steps

Prepare opener for manual release, tie door, secure brackets, support door, mark shaft position, remove axle U-Bolt.

Opener Mounting and Clamping

Slide opener over axle, engage drive legs, refit mounting bracket, clamp opener assembly to axle.

Power Connection and Initial Activation

Position power cable safely, plug opener into power point, turn ON. Opener light will illuminate.

Setting Travel Limits and Force

Configure Handed Operation

Set door operation to right or left hand by pressing 'P' and 'S' buttons.

Set Door Open and Close Limits

Set the desired OPEN and CLOSED positions using the 'UP', 'DN', and 'P' buttons.

Automatic Force Setting

Automatically set the door's opening and closing force by cycling the door.

Manual Force Setting

Manually set the door's opening and closing force via the 'S', 'UP', and 'DN' buttons.

Testing the Safety Reverse System

Fixing Warning Labels

Installing Wireless Wall Button

Installing the Protector System (Optional)

Enabling the Protector System

Connect obstruction detection beam wiring to the opener and turn ON for automatic enablement.

Disabling the Protector System

Reprogram the opener by cycling power after removing obstruction detection beam wires.

Timer to Close Feature (TTC)

Activating Timer to Close

Activate TTC by holding 'P' and 'DN' buttons, then setting interval with 'UP' button.

Deactivating Timer to Close

Deactivate TTC by holding 'P' and 'DN' buttons, then pressing 'P' to confirm.

Audible Beep Feature

Disabling Audible Beep

Turn off the audible beep by holding 'S' and 'DN' buttons for 3 seconds.

Ventilation Mode (Partial Opening)

Activating Ventilation Mode

Set a partial opening position by pressing 'P' and 'UP' buttons, then programming a remote button.

Deactivating Ventilation Mode

Deactivate partial opening by pressing 'P' and 'UP' buttons together for 3 seconds.

Wireless Programming and Remote Accessories

Programming Additional Transmitters

Program new remote transmitters by holding the remote button and pressing the opener's 'S' button.

Erasing All Remote Codes

Erase all learned remote codes by holding the opener's 'S' button for approximately 8 seconds.

Standby Mode Options

Activating Normal Standby Mode

Activate normal standby by turning power OFF, holding 'UP' and 'DN', then turning power ON.

Activating Low Standby Mode

Activate low standby by turning power OFF, holding 'UP' and 'DN', then turning power ON.

Opener Operation Details

Opener Activation Methods

Opener can be activated by Control Panel, Remote Transmitter, or Wireless Keypad.

Opener Activation Behavior

Describes how the door opens, closes, or stops based on its current state.

Obstruction Handling Behavior

Details how the opener reacts to obstructions during opening or closing cycles.

Manual Door Opening Procedure

How to manually open the door using the release cord, and re-engage the opener.

Opener Care and Maintenance

General Opener Care

Opener operates with minimal maintenance and does not require additional lubrication.

Monthly Maintenance Checks

Perform safety reverse test, check door balance, and ensure full opening/closing.

Product Specifications

Available Accessories

Spare Parts List

Troubleshooting Common Issues

Opener Not Responding

Troubleshoot issues where the opener does not operate from buttons or transmitters.

Transmitter Works, Wired Control Fails

Check wiring connections if the transmitter works but wired controls do not.

Button;Transmitter Operation Failure

Program opener to match transmitter code if buttons/transmitters don't work.

Short Transmitter Range Issues

Address short transmitter range by checking location, antenna, or replacing batteries.

Unintended Door Operation

Resolve doors opening/closing by themselves by clearing memory and reprogramming remotes.

Door Reverses Before Full Opening

Check for obstructions or door imbalance if the door reverses before opening completely.

Reversals with Flashing Lights

Check obstruction detection beams alignment if door reverses and lights flash 10 times.

Door Fails to Close Properly

Check for obstructions, door balance, or reset limits if the door opens but won't close.

Opener Straining to Operate Door

Diagnose opener strain by checking door balance, broken springs, or calling a technician.

Motor Hums But Wont Operate

Check manual release mode, broken springs, or door locks if motor hums briefly then stops.

Opener Failure During Power Outage

Use manual release for power failure; re-engage opener when power is restored.

Control Panel LED Indicator Codes

Refer to diagnostic code section if control panel LEDs flash in sequence.

Diagnostic Chart

Fault Code 1-1: Door Wont Close

Safety sensors may be open circuit or cut. Inspect wires and reboot opener.

Fault Code 1-2: Door Wont Close (Short Circuit)

Short circuit wire for safety sensors. Inspect and correct wire or replace.

Fault Code 1-3: Door Control Malfunction

Door control wires shorted or control faulty. Inspect and correct wires.

Fault Code 1-4: Safety Sensors Misaligned

Safety sensors misaligned. Realign sensors to ensure steady LEDs.

Fault Code 1-5: No Motor Movement

No RPM pulses detected. Check door balance, binding, or motor/RPM sensor.

Fault Code 2-1: Opener Fails to Operate (Memory)

Possible PCB memory failure. Reboot opener, reprogram limits and force settings.

Fault Code 2-2: Opener Fails to Operate (Voltage)

Possible PCB voltage failure. Reboot opener, reprogram limits and force settings.

Fault Code 2-4: Remote Control Operation Failure

Possible receiver failure. Reboot opener and recode transmitters.

Fault Code 4-1: Downward Movement Reversal

Door reverses during downward movement. Check for binding or reset limits.

Fault Code 4-2: Upward Movement Reversal

Door reverses during upward movement. Check for binding or reset limits.

Chamberlain Limited Warranty

Warranty Coverage Details

Details what parts and timeframes are covered by the Merlin warranty.

Warranty Exclusions and Voidance

Lists conditions and actions that will void the warranty.

Warranty Conditions for Validity

Specifies requirements like professional installation and registration for warranty validity.

How to Make a Warranty Claim

Instructions on contacting the service center and the process for making a claim.

Overview

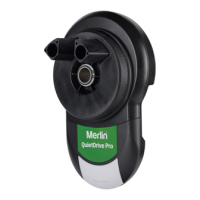
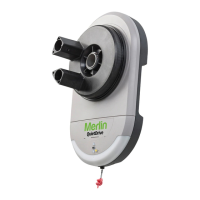
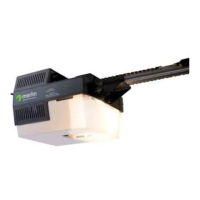
The Merlin QuietDrive Pro MR655EVO is a garage roller door opener designed for residential use, offering safe and reliable operation when installed and maintained according to the provided instructions.

Function Description:

The QuietDrive Pro MR655EVO is a garage roller door opener that automates the opening and closing of spring-balanced residential rolling garage doors. It can be activated via its control panel, remote control transmitters, or an optional wireless entry keypad. The opener is designed to stop the door if an obstruction is encountered during closing or opening, and it can reverse direction if the door has been stopped in a partially open or closed position. It also features an optional "Ventilation Mode" for partial opening, allowing for pedestrian or pet access and ventilation. The opener is factory-configured for right-hand installation but can be adjusted for left-hand installations during the limit setting process.

Important Technical Specifications:

  • Input Voltage: 220-240 VAC, 50-60 Hz, 110 W
  • Rated Load: 32 Nm
  • Max. Pull Force: 500 N @ 300 mm
  • Max. Door Weight: 100 kg
  • Max Lift under Spring Tension: 20 kg
  • Max. Door Area: 16.5 m²
  • Standby Power: <1 watt (in low standby mode)
  • Drive: DC gear motor permanent lubrication
  • Max. Drum Rotations: 4.5
  • Memory Registers: 64
  • Operating Frequency: 433.30/433.92/434.54 MHz
  • Operating Temperature: -25°C to 55°C
  • Maximum door height: 4.5 m
  • Maximum curtain area: 16.5 m²
  • Maximum door mass: 100 kg
  • Door axle diameter: Must not exceed 35 mm.
  • Safety Reverse System: The door MUST reverse on contact with a 40 mm obstacle placed on the floor.
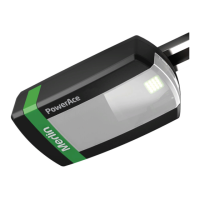
  • Obstruction Detection Beams (Optional): Required if the closing force at the edge of the door exceeds 400 N (40 kgf). These beams use an infra-red beam to detect obstructions, causing the door to stop and open.

Usage Features:

  • Control Panel: Includes UP, DOWN, P (Program), and S (Save/Delete Remote Controls) buttons, along with LEDs for program and diagnostic indicators. A "Control Button" allows activation (Open - Stop - Close) when remotes are unavailable.
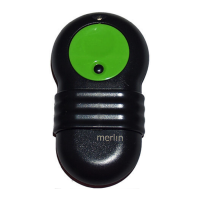
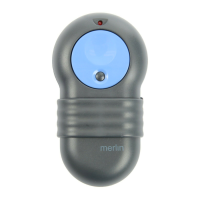
  • Remote Control Transmitters: Two E960M Premium transmitters are included. Additional transmitters (E950M, E940M, E943M, E945M) can be programmed.
  • Wireless Wall Button: An E138M wireless wall button is included and pre-programmed.
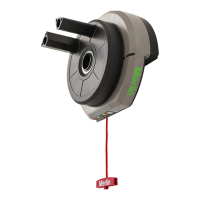
  • Manual Release: A red manual release cord allows for manual operation during power outages or emergencies. The handle should be no higher than 1.8 meters from the floor.
  • Courtesy Light: Turns on during operation and automatically turns off after 3 minutes. It also flashes at half strength during programming sequences.
  • Audible Beep (Optional): The opener is factory-set for an audible "BEEP" on button presses, which can be turned ON/OFF.
  • Ventilation Mode (Partial Opening Feature): Allows for a pre-set second stop position for ventilation, pedestrian, or pet access. This feature can be programmed to a remote control button.
  • Standby Mode: Factory-set for low standby mode (<1 watt). Normal standby mode can be activated if external accessory power is required.
  • Wireless Programming: New remote controls can be programmed to the opener using the "S" button. All remote control codes can also be erased.
  • Warning Labels: Warning labels for entrapment risk and general warnings must be installed in prominent places, adjacent to wall controls and manual release mechanisms, and out of reach of children.
  • Extension Poles (Optional): Can be attached to the drive legs for additional support, requiring a reinforcing brace.

Maintenance Features:

  • Minimal Maintenance: The opener requires minimal maintenance and no additional lubrication.
  • Monthly Checks:
    • Repeat the safety reverse test (section 15) and make any necessary adjustments.
    • Manually operate the door to check for unbalance or binding. Call for professional garage door service if issues are found.
    • Check that the door opens and closes fully. Set limits and/or force if necessary.
  • Limit and Force Settings: These settings must be checked and properly set during installation and re-adjusted if weather conditions cause minor changes in door operation.
  • Transmitter Battery Replacement: If the transmission range decreases, the battery (CR2032 or equivalent) in the remote control should be replaced. Instructions for replacement are provided, emphasizing safety precautions for handling batteries.
  • Door Maintenance: The garage door itself must be spring-balanced, operable by hand with no more than 20 kg of lifting weight, and professionally maintained and serviced at least during the third year of the warranty period.
  • Troubleshooting Guide: A comprehensive diagnostic chart is provided to help identify and resolve common issues based on LED indicators and symptoms.

Merlin QuietDrive Pro Specifications

General IconGeneral
BrandMerlin
ModelQuietDrive Pro
CategoryGarage Door Opener
LanguageEnglish

Related product manuals