PAGE 22
4. CONTROLLERS: These are “Channels” which information travels upon in the Midi domain. The Midi Specification provides 120
such channels on which information can be sent and received. Some are permanently set for specific functions, others you can use
for whatever you decide upon. Each TriAxis parameter can be set to receive on any of these 120 control channels. However,
only one controller per parameter may be assigned per PRESET. All nine parameters can be assigned to one controller and
controlled by one pedal, this is the most common application. Each of the nine parameters could be assigned their own controller
number and dedicated pedal! CRAZY? However, the possibility of ultimate control on-the-fly is here. Granted, most players would
find this a little extreme, but a dedicated pedal for say, MASTER, LEAD DRIVE and DYNAMIC VOICE, might make for some interest-
ing “ real time” soloing possibilities. Regardless of whether you’re a keep-it-simple one-pedal guy or a techno fiend multi-pedal-
maniac...this software will support your habit. Most guitarists will find one or two pedals sufficient for ultimate expression.
NOTE: If you are going to use several expression pedals assigned to several controllers, you will need to have as many conversion
devices, i.e.several “Pocket Pedals” chained together and set to transmit on the proper controller.
5. VALUE: After deciding what parameters you wish to modulate and assigning them controller numbers, you will need to “tell them
what to do. ”VALUE” is simply the amount of change in either a positive or negative direction. A “positive” or “ + “ VALUE on the
TriAxis is “turning up” the control. A “negative” or “ - “ VALUE is “turning down” the control. This is programmed by the
keys located under the PROGRAM/CHANNEL window.
6. SUB-ROUTINE: This is a “Mode” or operational “Loop” in the software that is triggered by a Front Panel keystroke. Two such sub-
routines would be the “Controller/Assign” sub-routine and “Value” sub-routine. There are other sub-routines used for other functions
in the TriAxis such as the COPY function or the Numeric Keypad function, but for the control change programming you need only deal
with the “Controller Assign” and “Value” sub-routines.
Now that we’re speaking the same language, here is a “STEP BY STEP “ programming guide. Start with a PRESET that you like and
think of somewhere that you would want to go with it. We will outline factory PRESET “4” and demonstrate one way that Control
Change software may be used in a minute, but for now here is the sequence of keystrokes to put you in the Controller Assign Loop.
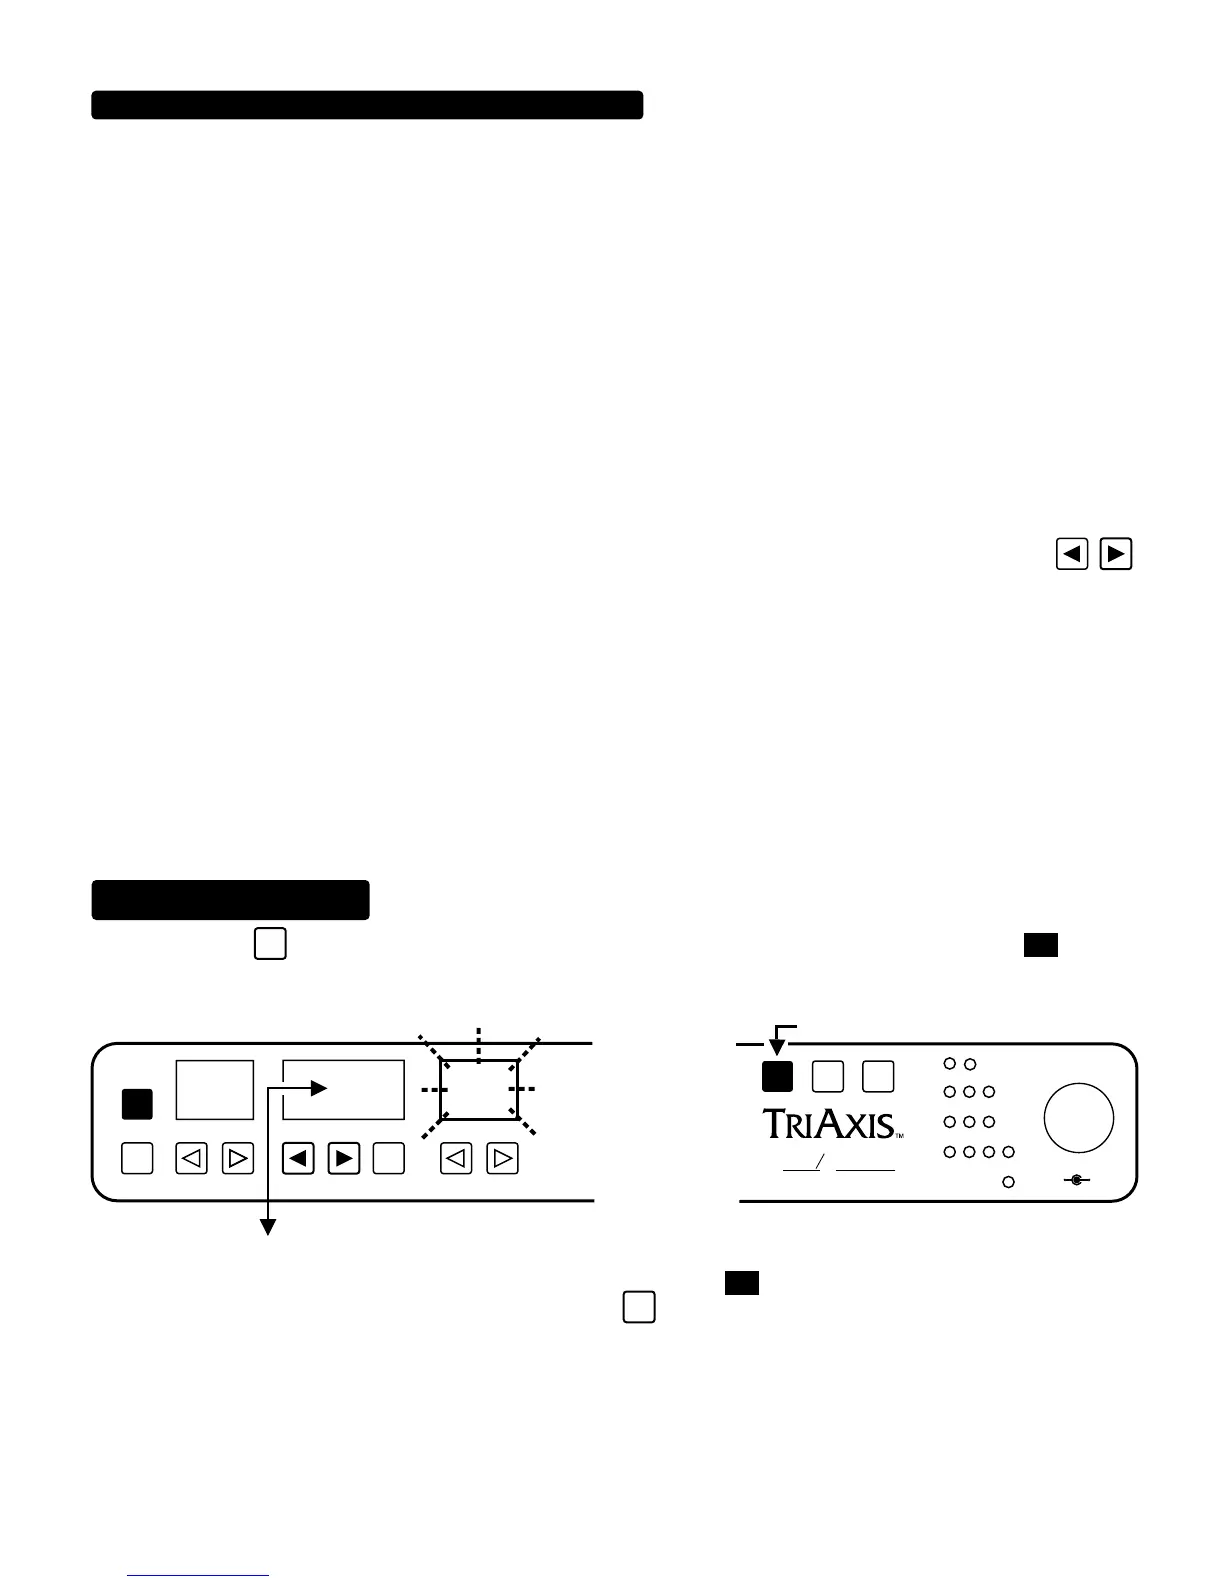
STEP 1. Press the
SHIFT
key three times. Upon the third keystroke, the “PROGRAM/CHANNEL” window will show
and the
GAIN parameter will start flashing. You are now in the Controller Assign subroutine. This is where you decide what parameters will
respond to your pedal(s).
NOTE: These display values are normal for units that have never been programmed to receive continuous control messages. If
someone has programmed a particular unit...this window might read other than
This holds true for all parameters and is not a
problem. Simply set the desired controller number and press the
ENTR
key one time to save your chosen controller number to that
PRESET.
CONTINOUS CONTROL SOFTWARE: (Lingo Continued)
SUB-ROUTINE
CONTROLLER ASSIGN
GAINPROGRAM/CHANNELPRESET
PGM
/CH
COPY
01
00
OUTPUT
RHY
LD1
LD2
SW
1 2 3 4
FX LOOP
SHIFT
5
6
7
8
9
10
4
3
2
1
0
A B
PRESS 3 TIMES
ENTR
FLASH
ALL TUBE PREAMPLIFIER
OOGIE
B
M
ESA
 Loading...