Do you have a question about the Mesa Amp and is the answer not in the manual?
Instructions for powering the unit on and selecting ground position.
Procedure for cycling through the first ten factory presets.
Using arrow keys to adjust presets, programs, or parameters.
Steps to save new parameter settings to an existing preset.
How to toggle and store FX Loop and Function Switch combinations.
Procedure for selecting programs using the numeric keypad.
Procedure for selecting presets using the numeric keypad.
Instructions on assigning a preset sound to a program location.
Steps to copy one preset to another preset location.
How to sequence through the eight operational modes.
Display information for current MIDI Program Number or MIDI Channel.
Details on viewing and changing the MIDI Channel number.
Procedure for changing the MIDI channel number.
Explanation of dumping and retrieving system exclusive data.
Steps for transmitting data from the TriAxis to storage.
Procedure for loading previously written sounds and information into the TriAxis.
How to defeat or recall the first 20 factory presets.
Description of phantom power output for MIDI foot controllers.
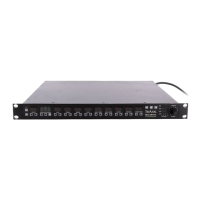
Explanation of MIDI interface jacks and their functions.
Function of switch jacks for controlling external devices.
Direct stereo interfacing jacks for recording or mixing consoles.
Description of the A/B output jacks for interfacing with amplifiers.
Mono send and stereo return effects loop configuration.
Location and function of the instrument input jack.
Explanation of the Gain control's function and sonic impact.
How the Treble control affects tone and blends with Mid/Bass.
The Mid control's effect on midrange punch and vocal qualities.
Blending lower frequencies and its interaction with the Treble control.
Primary gain control for Lead 1 circuits, affecting the pre-amp stage.
Fine-tuning overdrive in post-tone control circuits for Lead 2 modes.
Master control for level balancing, effects send, and recording output.
Control for highs and negative feedback, with dynamic adjustment.
EQ circuit that blends with the dry signal for tonal shaping.
Overall master volume and effects return level control.
Overview of the Rhythm modes (Green and Yellow).
Vintage "old Black Face" style circuit with fat bass response.
Tighter, more urgent attack with higher, more percussive top end.
Vintage mode based on Boogie Mark 1, offering fat, warm, round tone.
Mode with more gain, tighter focus, and boosted midrange for a bold sound.
High-gain, aggressive mode inspired by Vintage/Orange channel.
Post-tone control gain circuit, focused gain for articulation and punch.
Reincarnation of the Mark II-C+ Lead mode, known for its "California" sound.
Mode designed for shred, with enhanced upper harmonics and aggressive attitude.
Steps for assigning controllers to parameters for modulation.
Essential rules and guidelines for setting parameter values for modulation.
Procedure for defining the direction and amount of parameter modulation.
Identifies the function of each vacuum tube in the TriAxis.
Physical dimensions of the TriAxis unit.
Technical specifications including impedance and power requirements.
Interface for saving and recalling custom personal settings.
Interface for saving and recalling custom personal settings.
Interface for saving and recalling custom personal settings.
Interface for saving and recalling custom personal settings.
Interface for saving and recalling custom personal settings.
Interface for saving and recalling custom personal settings.
Interface for saving and recalling custom personal settings.
Interface for saving and recalling custom personal settings.
Interface for saving and recalling custom personal settings.
Interface for saving and recalling custom personal settings.
| Power Output | Varies by model (e.g., 50W, 100W) |
|---|---|
| Channels | Varies by model (typically 2-3) |
| EQ Controls | Varies by model |
| Effects Loop | Varies by model (e.g., Series, Parallel) |
| Speaker | Varies by model |
| Weight | Varies by model |
| Dimensions | Varies by model |
| Inputs | 1/4" Instrument Input |