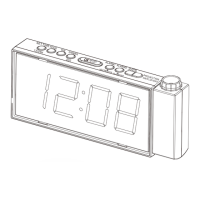
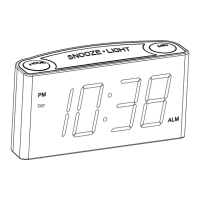
The Mesquool CR1001F is an alarm clock with time projection, designed to enhance your sleep environment. This device offers a range of features for timekeeping, alarm management, and convenience, including a USB charging port.
Function Description
The primary function of the CR1001F is to display time and provide alarm capabilities. It features a projection function that allows the time to be displayed on a wall or ceiling, offering an alternative way to check the time without needing to look directly at the clock's display. The clock supports both 12-hour and 24-hour time formats. It includes two independent alarms (Alarm 1 and Alarm 2), each with adjustable volume. A snooze function is available to temporarily silence the alarm for 9 minutes. The device also incorporates a Daylight Saving Time (DST) function for automatic time adjustments. For added convenience, it includes a USB charging port, enabling users to charge their mobile devices.
Important Technical Specifications
- Power Source: The clock operates on AC power (100-240V) via an adapter. It also requires 2pcs 1.5V "AAA" size batteries for backup.
- Battery Backup: The "AAA" batteries memorize time and alarm settings during a power outage. While on battery power alone, the time display is not active, but the alarm function will still work.
- USB Charging Port: The integrated USB port provides a maximum charge current of 1 Ampere, suitable for charging smartphones and tablets.
- Projection Distance: The optimal projection distance for clear image quality is between 1.5 to 3.0 meters (4.92 to 9.84 feet).
- Projection Light Source: The projector uses an LED light. It's important to note that the projection may not be easily visible in brightly lit environments.
- Display Brightness: The main display features a dimmer function, allowing users to adjust its brightness to their preference.
- Projection Brightness: The projection also has an adjustable dimmer to control its brightness.
Usage Features
Time Setting:
- Press the "SET TIME" button once. The "12:00" display will start flashing.
- Use the "HOUR" button to set the hour and the "MIN" button to set the minute.
- Press the "OK/SNOOZE" button to save the time, or wait 10 seconds for automatic confirmation.
- To switch between 12H and 24H time formats, hold down the "SET TIME" button.
Alarm Setting:
- Press the "ALARM" button. The alarm indicator (1) will light up, and the "6:00" display will start flickering.
- Use the "HOUR" button to set the alarm hour and the "MIN" button to set the alarm minute.
- Press the "ALARM" button or "OK/SNOOZE" button to save the alarm time, or wait 10 seconds for automatic confirmation.
- Adjust the alarm volume using the "VOL+" or "VOL-" buttons.
- Press the "OK/SNOOZE" button to save the volume setting.
- To activate the alarm when it's off, press the "ALARM ON/PAUSE" button. The alarm settings will revert to the last saved configuration.
- To cancel an alarm completely, hold down the "ALARM ON/PAUSE" button until the alarm indicator disappears from the display.
Turning Off Alarm (When Alarm Sounds):
- Snooze: Press the "OK/SNOOZE" button to temporarily turn off the alarm for 9 minutes. The alarm will ring again after 9 minutes.
- Turn Off for 24 Hours: Press the "ALARM ON/PAUSE" button to turn off the alarm for 24 hours. The alarm indicator will remain on, indicating that the alarm is still activated and will ring again after 24 hours.
Projection Mode:
- Press the "PROJECTION ON/FLIP/OFF" button once to turn on the projection.
- Press the "PROJECTION ON/FLIP/OFF" button again to flip the projected time if it appears backward.
- Press the "PROJECTION ON/FLIP/OFF" button a third time to turn off the projection.
- Rotate the "FOCUS RING" (17) to adjust the clarity of the projected image. If the projection is fuzzy, rotate this ring until the image is clear.
Display and Projection Dimmer:
- Display Dimmer: Repeatedly press the "DIMMER/DST" button to cycle through different brightness levels for the main display.
- Projection Dimmer: Press the "PROJECTION DIMMER" button to adjust the brightness of the projected time.
Daylight Saving Time (DST):
- Hold down the "DIMMER/DST" button to switch the DST function on or off.
USB Charging:
- Connect your phone or tablet to the USB port on the clock to charge it. The maximum charging current is 1 Ampere.
Maintenance Features
- Battery Replacement: Ensure that 2pcs 1.5V "AAA" batteries are installed correctly in the battery compartment (18) to maintain time and alarm settings during power interruptions. Replace batteries as needed to ensure backup functionality.
- Power Connection: Always connect the adapter line to the DC jack (20) and plug it into a 100-240V AC wall power outlet for primary operation.
- Cleaning: The manual does not specify cleaning instructions, but general electronic device care suggests using a soft, dry cloth for cleaning the exterior. Avoid using harsh chemicals or abrasive materials.
- Troubleshooting: If the projection is fuzzy, adjust the "FOCUS RING" (17). If the alarm does not go off, ensure it is activated and not canceled. If the time display is off during a power outage, remember that batteries only back up settings, not the display itself.
- Contact Support: For any issues or inquiries, users can contact Mesquool support at support@mesquool.com.